

If you are a first-time reader, welcome! I’m so happy you’ve joined me here. At Cali Girl In A Southern World, my goal is to inspire you through beautiful home decor, easy DIYs, crafts, delicious recipes, and more. To stay most up to date with me, I invite you to subscribe to my blog here.
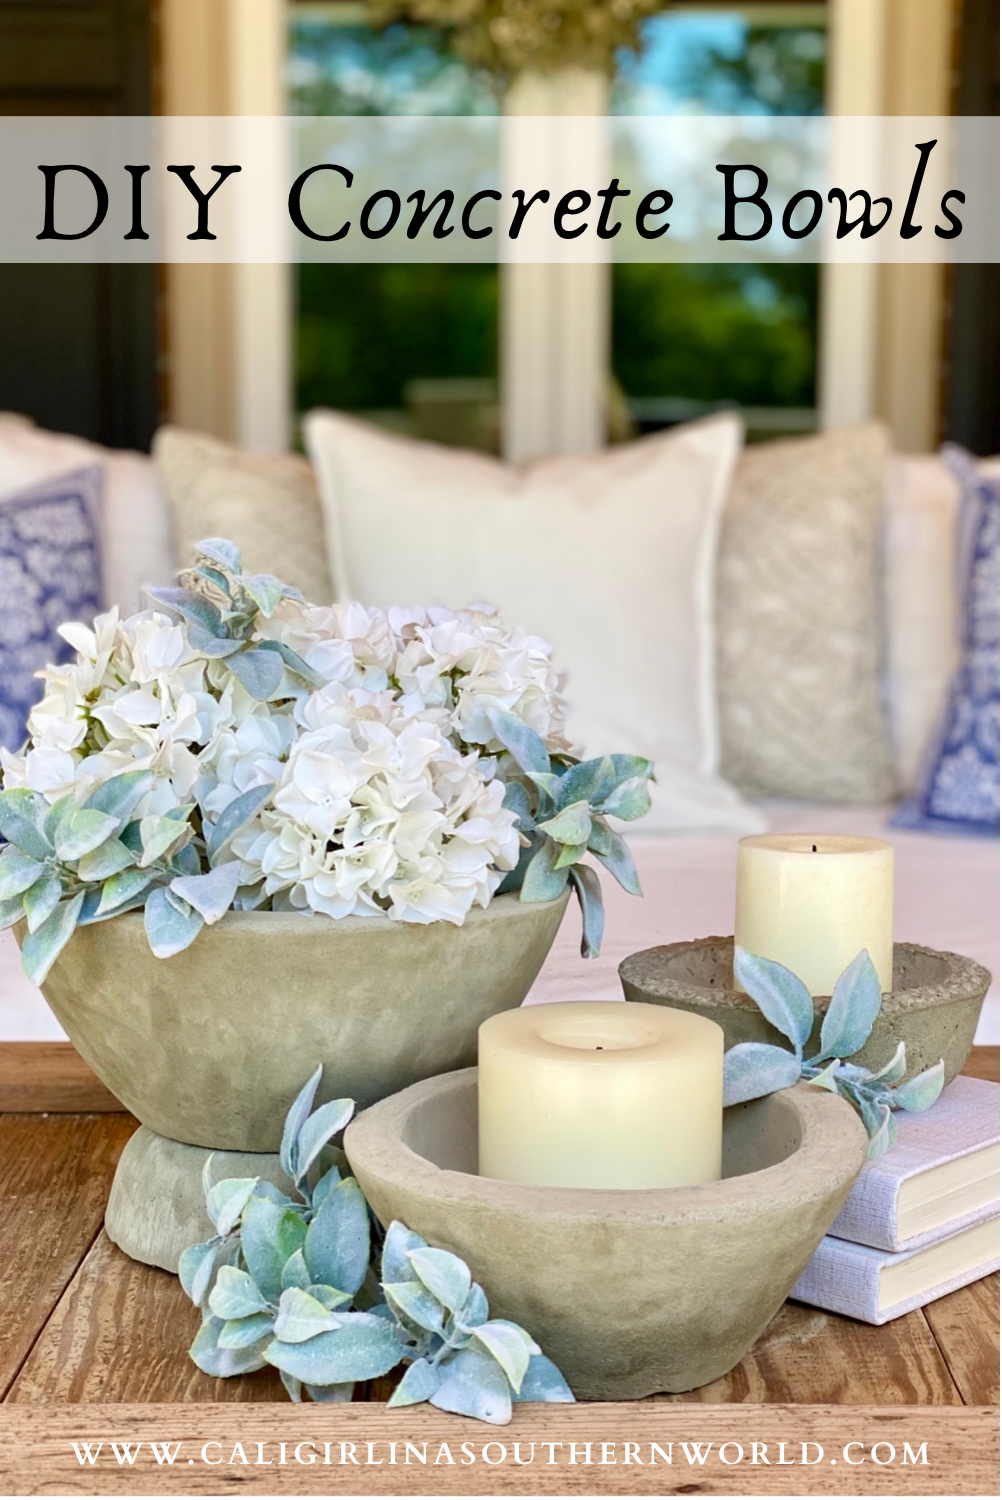
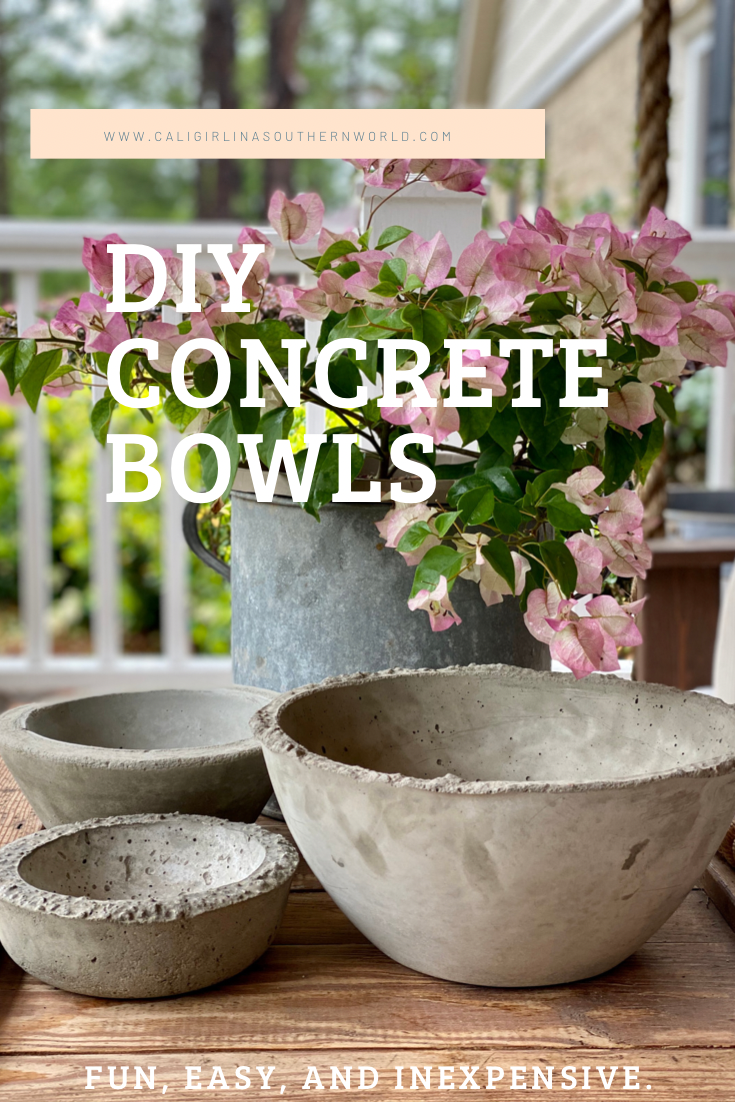
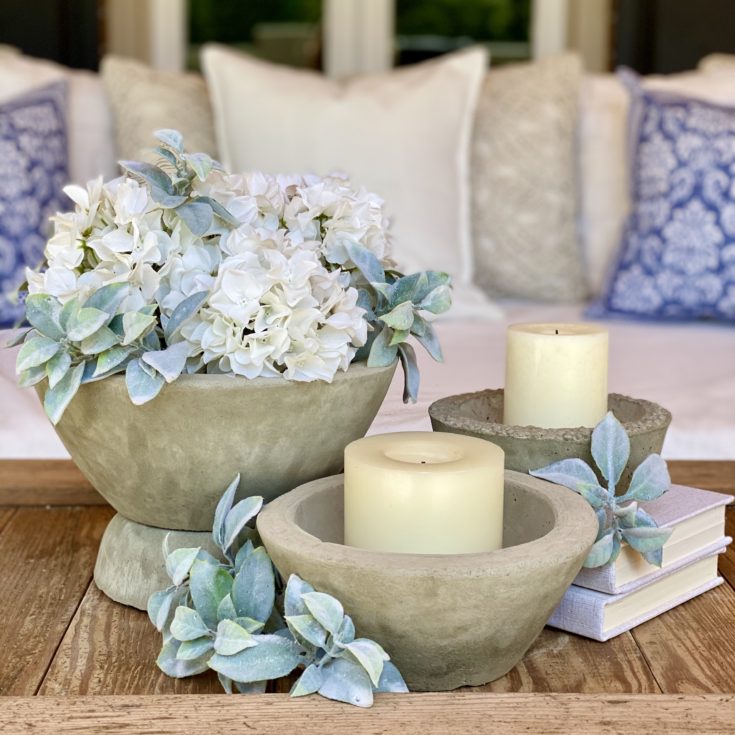
DIY Concrete Bowls
Concrete bowls are not only beautiful, but they are incredibly durable too, especially for use outdoors. They can be used as planters for green plants, vessels for flower arrangements, or candle holders. The options and uses for these bowls are endless. Whatever you do though, don’t serve food or eat out of them.
Helpful Hints
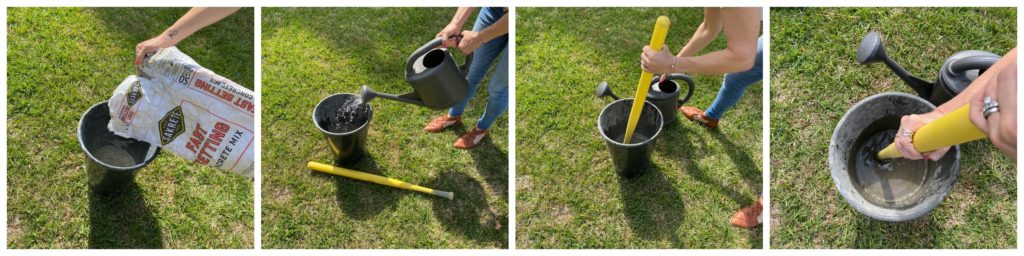
Be sure to mix the concrete in a bucket that you aren’t emotionally attached to because it’s unlikely your bucket will ever be the same again. I used a bucket that Trader Joe’s gave me to bring home bunches of flowers. Your concrete should be the consistency of pudding. It’s difficult to give an exact concrete mix/water ratio because it depends on the size of the bowl you’re making. I highly recommend using gloves for this project as wet cement has a very high alkaline (high ph), so gloves will help prevent the possibility of chemical burns.
The bowl forms I used to create my bowls were all bowls I had around the house. One of my outer bowls was an old ($1) birthday party chip bowl, the inner bowl I used with the chip bowl was an old plant container from the nursery. The plant is now in the yard, so I repurposed the container for this project. If you don’t have spare bowls as I did, don’t despair. Cheap nesting bowls are super easy to find at stores like Dollar Tree.
Don’t forget the cooking spray.
The secret sauce for DIY concrete bowls is cooking spray. Yup, I said it, cooking spray. If you take nothing else from this tutorial, remember the cooking spray!
Why you ask?! Thank you for asking… I forgot to use cooking spray on one of the bowls I made and believe me, you only make that mistake once. I spent about an hour carefully chipping away the bowl molds to save the concrete bowl. Thankfully the concrete bowl was spared, however, the bowl molds were demolished.
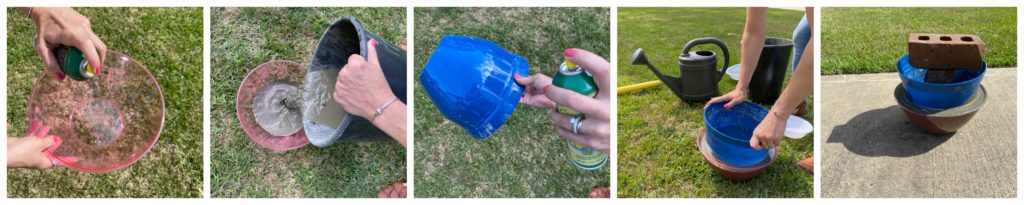
It’s imperative that you spray the molds with cooking spray. You will spray the inside of the base bowl and the outside of the bowl that will be placed in the concrete. This helps tremendously when it comes time to remove the concrete from the molds once the bowl is dry.
No two concrete bowls are alike.
With one bag of concrete, I made nine bowls. The sizes varied. The fun part was how unique each bowl turned out. Not just in shape and size, but also in regard to texture. Some of the bowls had more gravel in the concrete giving the bowl a very rough texture, while other bowls were surprisingly smooth. Even air bubbles in the concrete differed from bowl to bowl, some looked coral-like. I had so much fun playing around with the different styles and textures of my bowls.
Here are a few of my favorite concrete bowl creations. I hope you enjoy this DIY as much as I did! I would love to see the bowls and planters you create for your home. Feel free to email me photos!
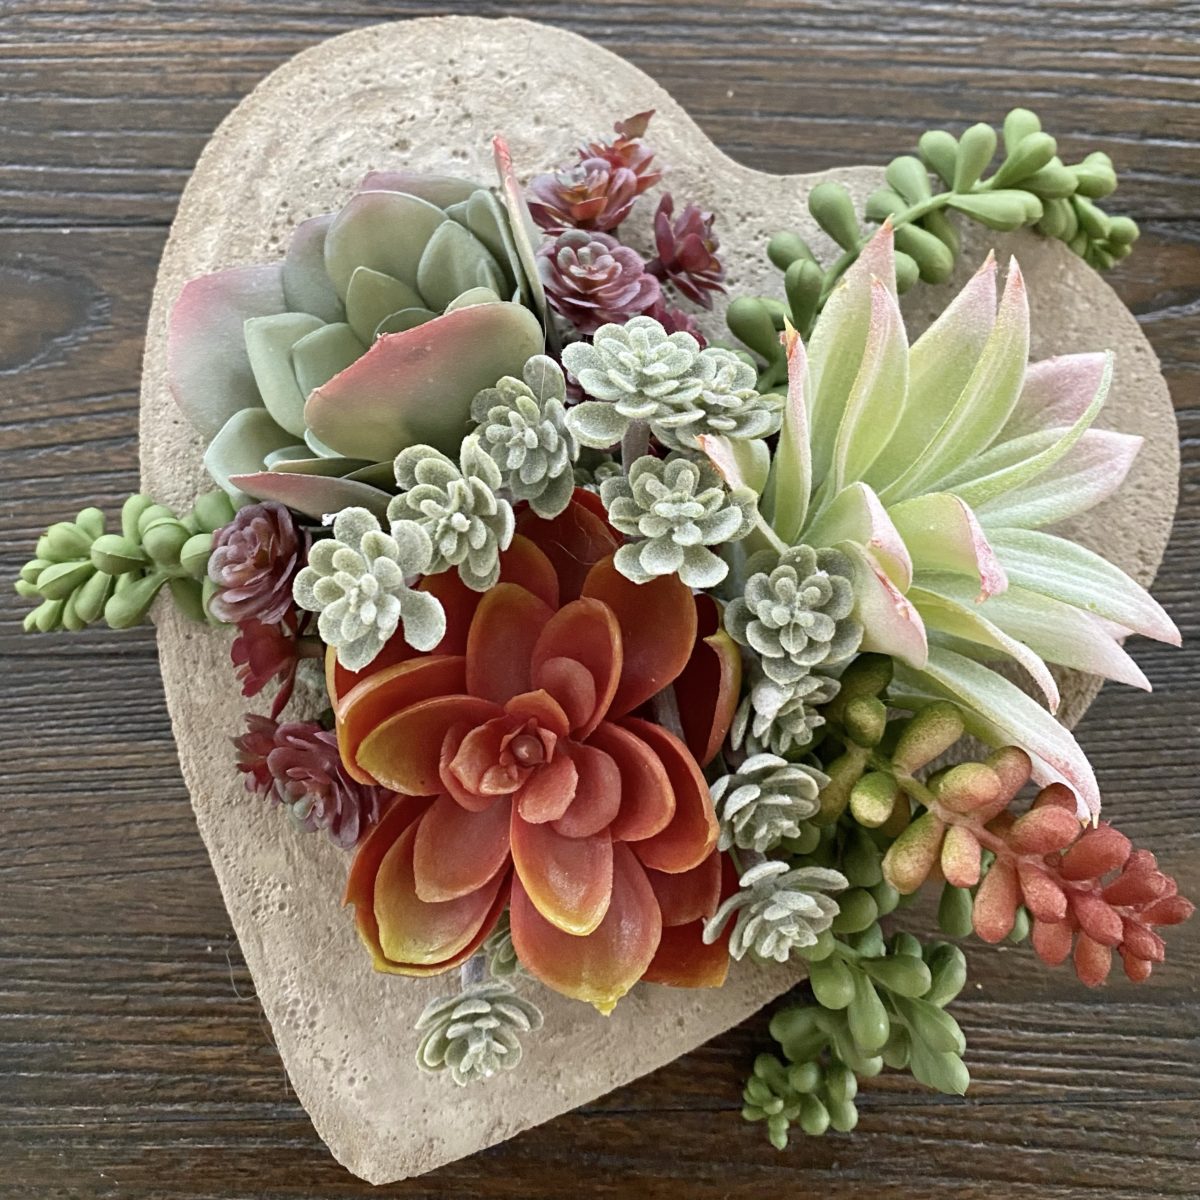
If you enjoyed this concrete project, you may want to check out the others I’ve tried too:

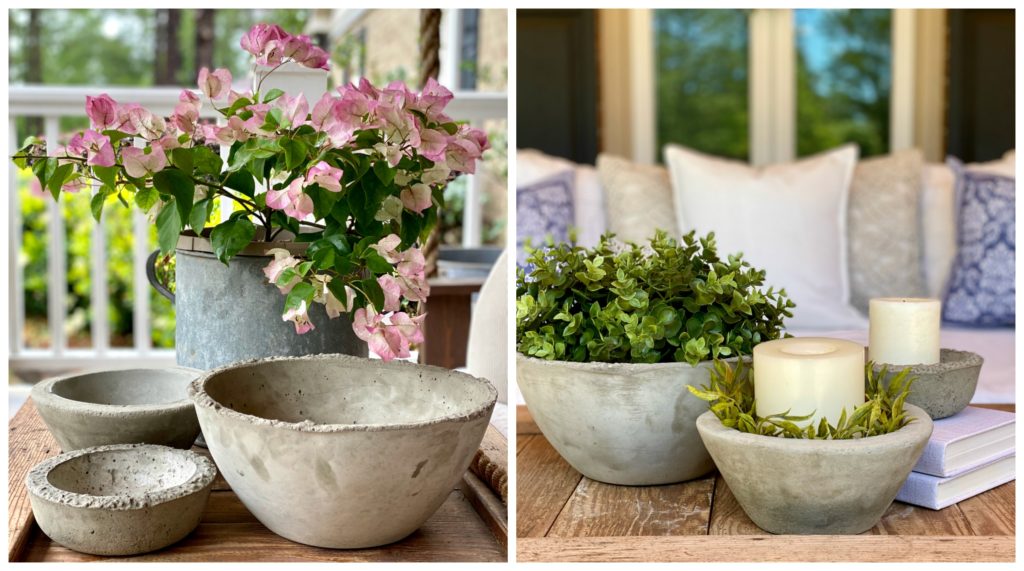
Post revised on July 7, 2021 to add the beautiful pedestal version of DIY concrete bowls. This look can be achieved easily by using a smaller bowl turned upside-down on the bottom and placing a larger bowl on top. There is no need to glue or adhere the two bowls together because of the inherent weight of the top bowl. This idea is my new favorite!
DIY Concrete Bowls
I could not be more excited to share this incredibly easy, fun, and inexpensive DIY with y'all! This is, by far, my favorite DIY of the year, if not of all time. I also feel that it is my responsibility to warn you that this DIY is also highly addictive. Once you start making concrete bowls, you may find it very hard to stop. I hope you love making them as much as I do!
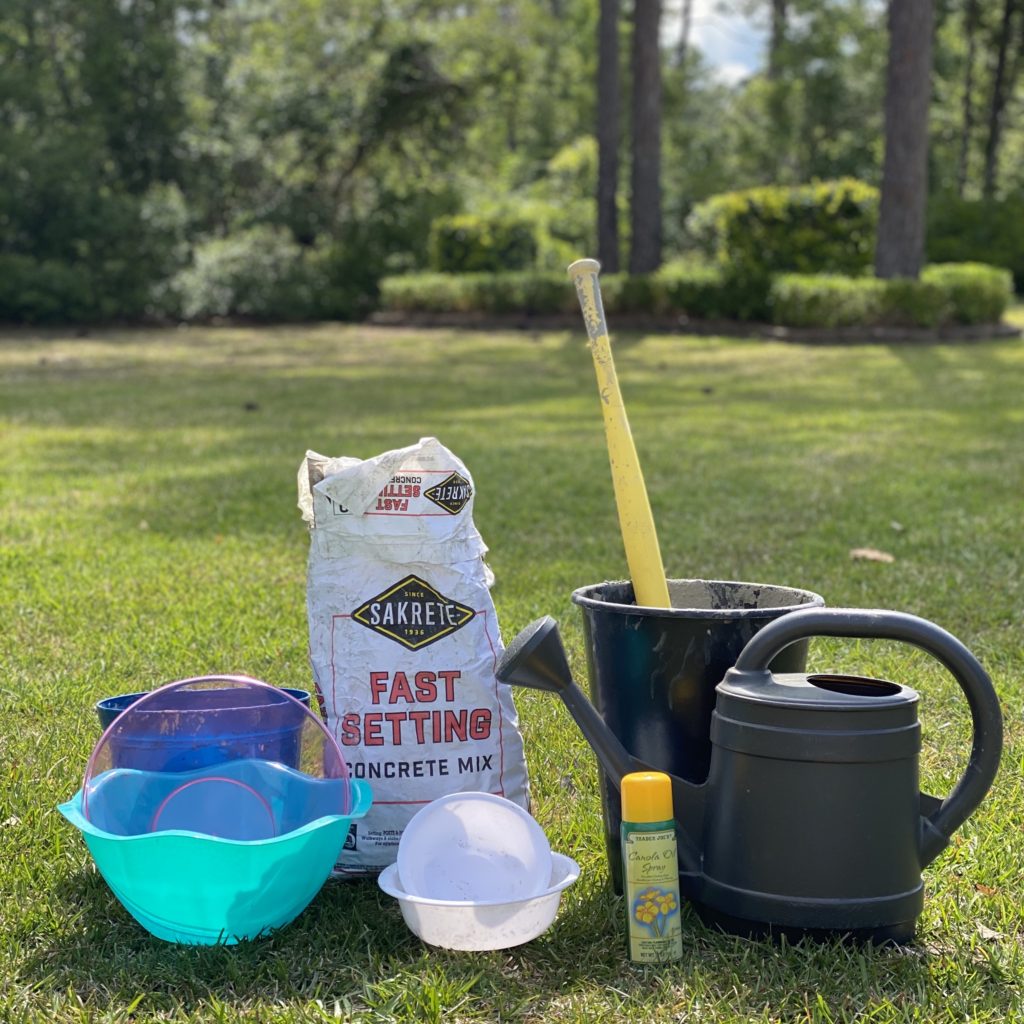
Materials
- Concrete Mix
- Bowls (Inexpensive and that can nest with one another)
- Cooking spray
- Water
- Weights (bricks, large rocks, etc)
Tools
- Bucket (to mix concrete in)
- Metal or strong plastic rod (to stir concrete)
- Rubber Mallet (to gently tap sides of bowls once the concrete has hardened, if necessary)
- Sandpaper (to smooth edges after the bowls are dry)
Instructions
- Eyeball the amount of dry concrete you think you will need to make your bowl. Since all bowls are sized differently, do the best you can to estimate how much you will need.
- Pour some dry concrete into a bucket and add enough water to make the concrete the consistency of pudding. If it looks too runny, add more concrete mix. If it seems too dry and hard to mix, add more water.
- Quickly spray the inside of the outer bowl with cooking spray.
- Just as quickly, pour some concrete into the bowl. (Do not fill the bowl to the top with concrete, because you will be putting your nesting bowl in the concrete and the concrete will rise up the edges of the outer bowl.)
- Quickly spray the bowl that you will be placing in the concrete with cooking spray.
- Gently, push the inner bowl into the concrete.
- Once you feel like the inner bowl is far enough in the concrete to make your bowl deep enough, add bricks or rocks inside the bowl to keep it from rising out of the concrete.
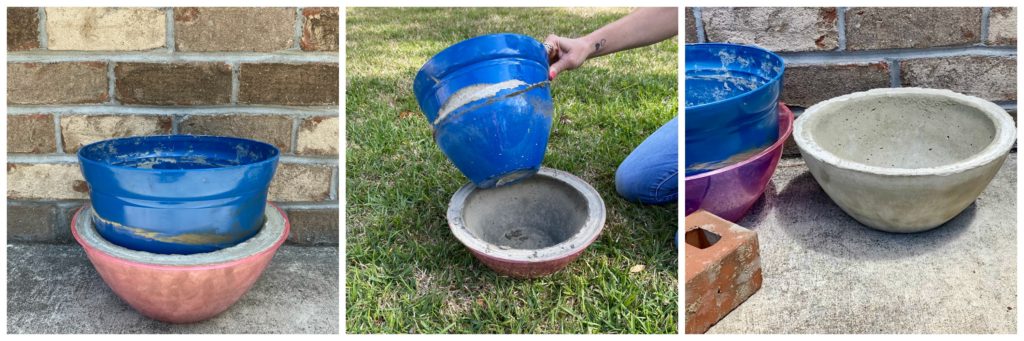
- Allow the concrete to dry at least an hour, ideally overnight.
- Once the concrete is dry, gently try to dislodge the inner bowl from the concrete.
- When the inner bowl has come free from the concrete, gently place the outer bowl upsidedown. (I did this over the grass.) Keep your hand close to the concrete bowl inside in case the concrete bowl comes loose.
- If the concrete bowl doesn't release, you can GENTLY tap the sides of the bowl to help it try to release.
- If the edges are rough, use fine grit sandpaper to smooth them out.
Notes
Have fun experimenting with your bowls! You can use different shapes depending on the shapes of your bowls and the texture is fun to play with too. You can make bowls with more texture to them, rocky looking, or make smooth bowls. The sky's the limit! Have fun creating!!


I want to do this !!!! So beautiful!!!!
I’m so happy you like the idea Jenn! They’re so fun, easy, and inexpensive to make. I’m obsessed! Thank you for stopping by!
[…] DIY that you can use to display the new Pothos plants you propagated? You’re going to love my DIY Concrete Bowl post. They’re perfect for styling inside and outside your […]
[…] too! If you are interested in making your own, you may want to check out my post about how to make DIY Concrete Bowls. Fair warning though, it’s incredibly fun and slightly addicting. Once you start making […]
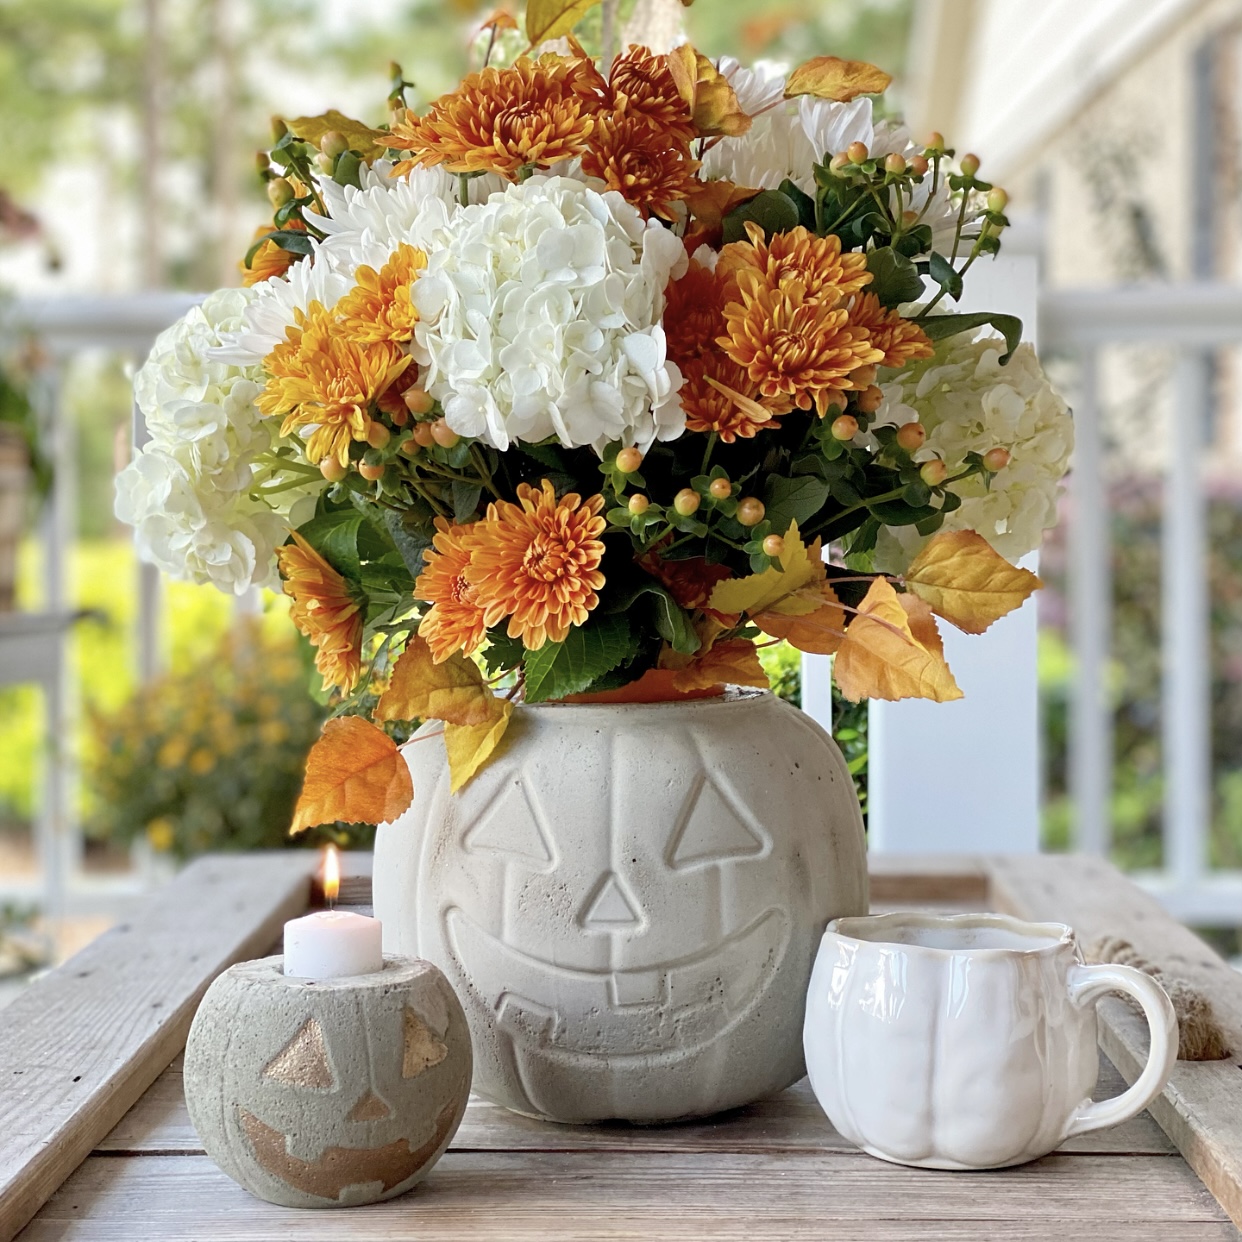
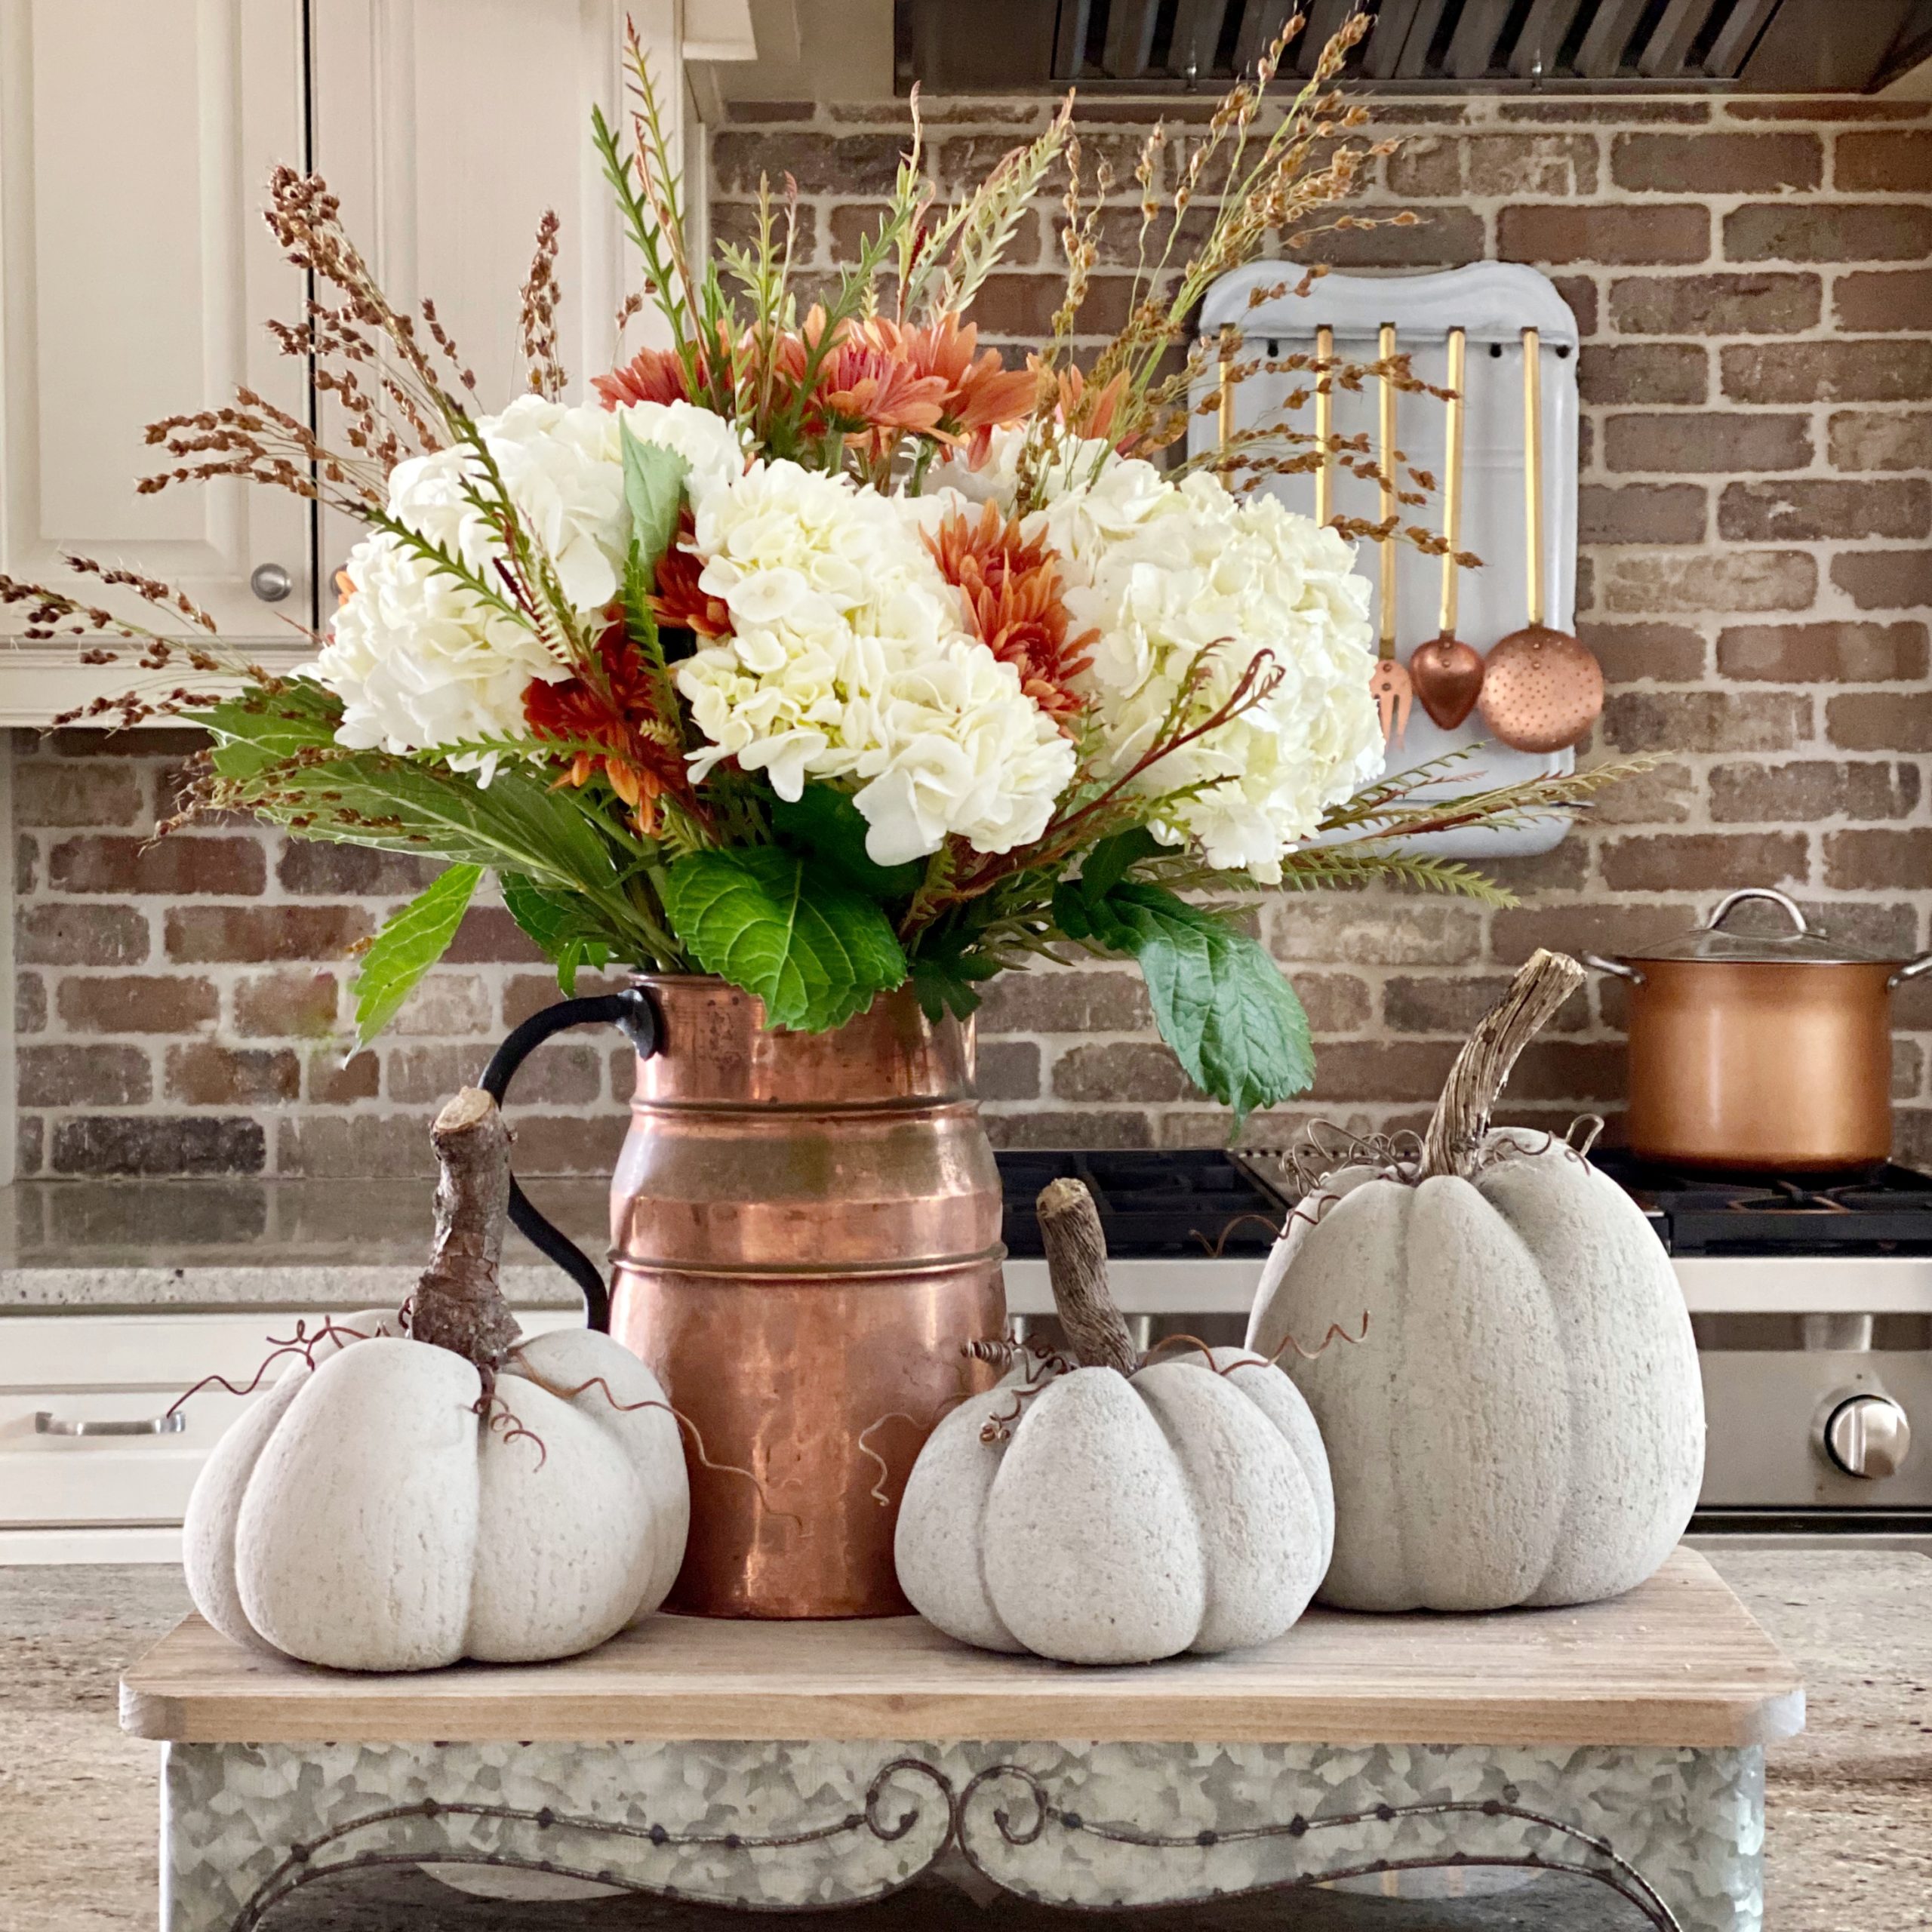
[…] like my obsession with concrete DIYs continues! Y’all may remember how much I loved making DIY concrete bowls in the summertime. Then, last Fall I was a DIY concrete pumpkin making machine. So, when images of […]
[…] DIY Concrete Bowls […]
[…] My love affair with concrete projects started a couple of summers ago when I made my first concrete bowls. After that summer, I made concrete pumpkins for Fall, followed by concrete Jack O’lanterns […]
[…] DIY Concrete Bowls […]
[…] DIY Concrete Bowls […]