
“Trying new things is the only way you’re going to learn what your new passions are.” -Lauren Skonieczny
Today I am excited to share another wonderful project with you. Wait until you see how easy this DIY wood tray is to make!
This year I have discovered many new passions. Some of these include incubating and hatching ducklings, crafting, and DIYs. So when my friend, Kelly, at City Girl Meets Farm Boy challenged me to try her DIY wood tray tutorial, I was all in.
Only 2 things needed to make a DIY wood farmhouse tray.
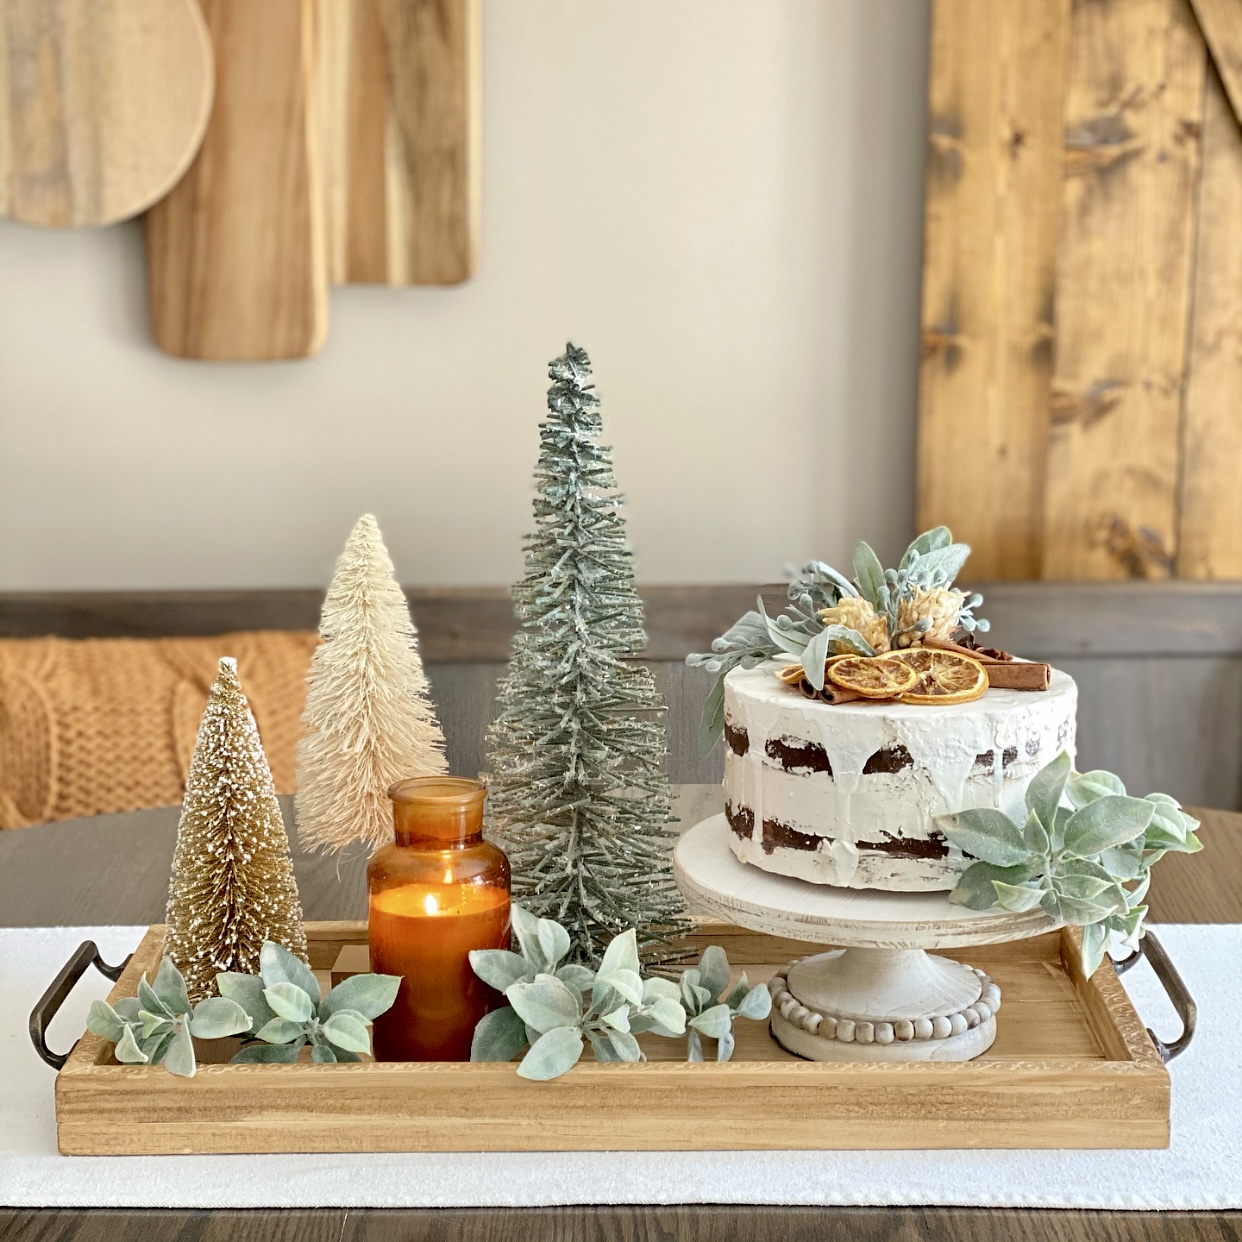
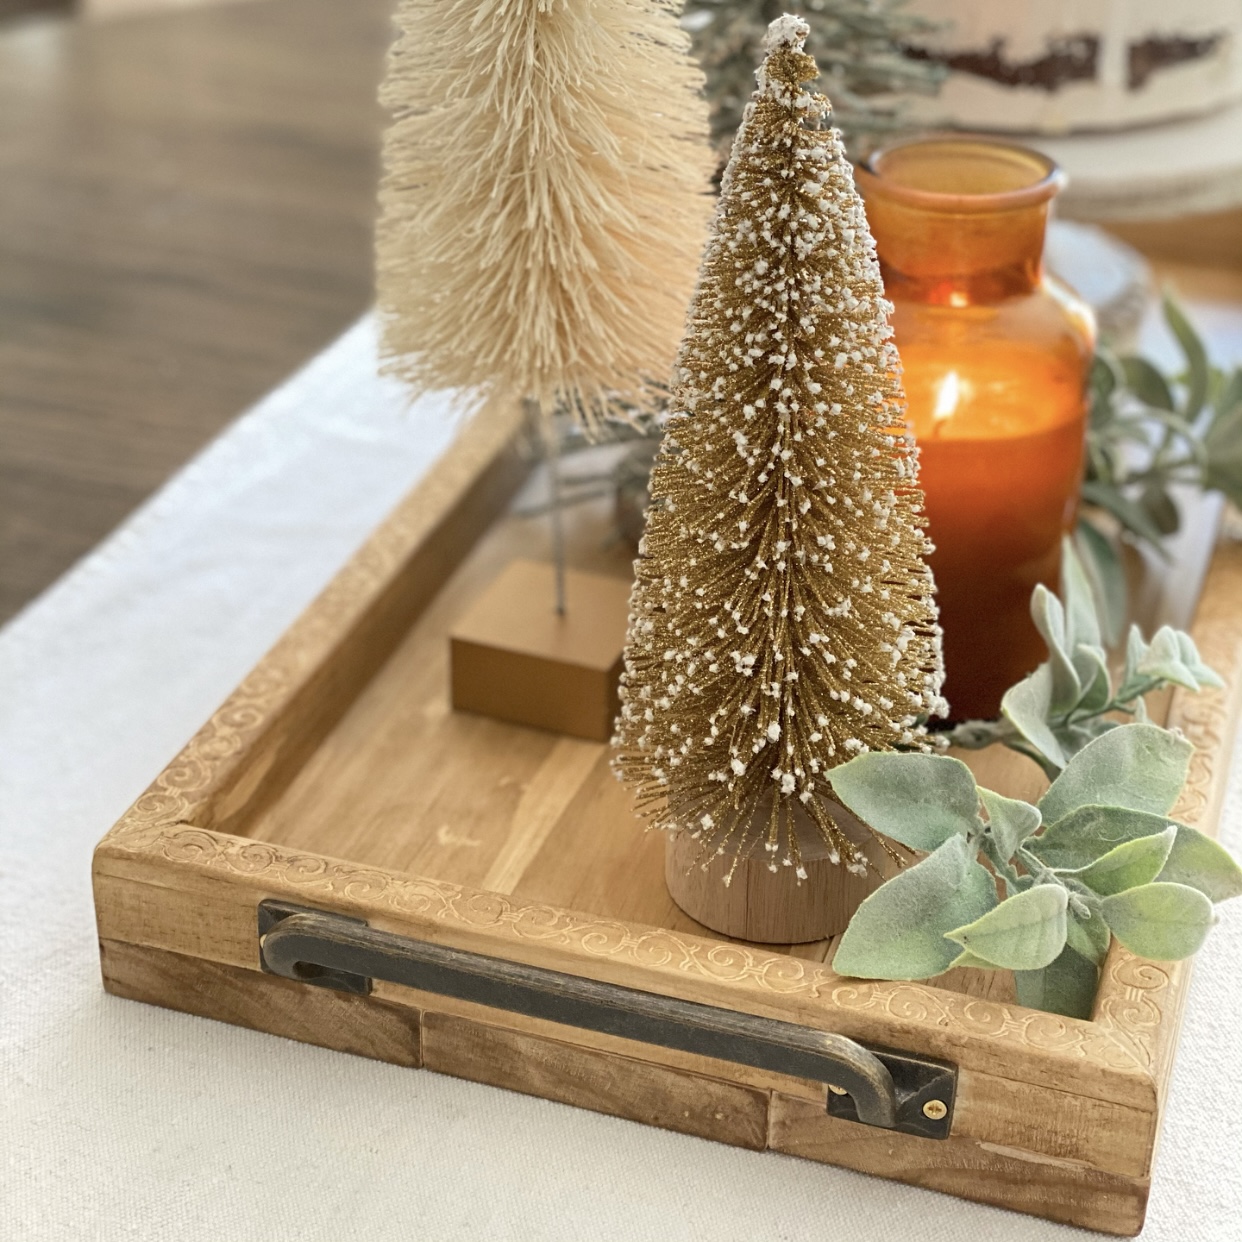
This tray was created using only two things, wood, and glue. Can you believe it!? The result was amazing! I added handles to my DIY wood tray, but you don’t have to add them to yours. Another beauty of DIY is that you can make every project your own by customizing it to your taste and style.
I love using wood trays in the farmhouse.
It’s no secret that trays are one of my favorite home decor essentials. I love styling trays year-round throughout the farmhouse, especially during the holiday season. Whether they are used to serve food and drinks or styled on a coffee table or kitchen island, trays are the perfect example of beautiful AND functional decor.
Practice makes perfect.
Y’all know I’m relatively new to the DIY world. I would definitely classify myself as a beginner. Up until this year, I didn’t know much about tools beyond a screwdriver and a hammer. Electric saws terrified me. My lack of knowledge always kept me from trying DIYs… Until this year. With each new project I finish, I am learning more skills, and my confidence is growing.
I’ve got blogging and Instagram friends that can do some of the most amazing DIYs like building an outdoor pizza oven, making their own dining room tables, and tiling an entire bathroom. I’m not quite there… yet! I would like to get to that skill level one day, but for now, I’m proud of the fact that this year I learned how to use a circular saw and a miter box. Neither is as scary to use as I thought they’d be, by the way.
DIY baby steps are the name of my game. Right now, I am sticking with projects that I know I can do. And, if I can do them, I know you can too!
DIY challenge accepted.
This week I was challenged by my friend, Kelly at City Girl Meets Farm Boy to make a wood tray using only wood glue. No tools?! Challenge accepted!
This DIY wood tray is the perfect beginner project. The material list is short and much of the items needed we had at home, so you might have them too. It only took me an afternoon to make this tray and I couldn’t be happier with the way it turned out.
Here’s what you need to make your own DIY Wood Farmhouse Tray:
Materials:
1X4 pine board – 6-foot long
3/4″ X 36″ square dowels (2)
3/4″ X 3 1/8 pine embellished molding – 8 foot long
Wood glue
Handles (2) with screws to attach to tray (Optional)
Paint, stain, or sealer
Tools:
Circular saw
Hand drill
Measuring tape
Ruler
Pencil
Sandpaper (220 grit)
Clamp(s)
Dry cloth
1. Cut the board.*
Measure the board and mark 24-inch lengths. Make two cuts so you have three 24-inch boards.
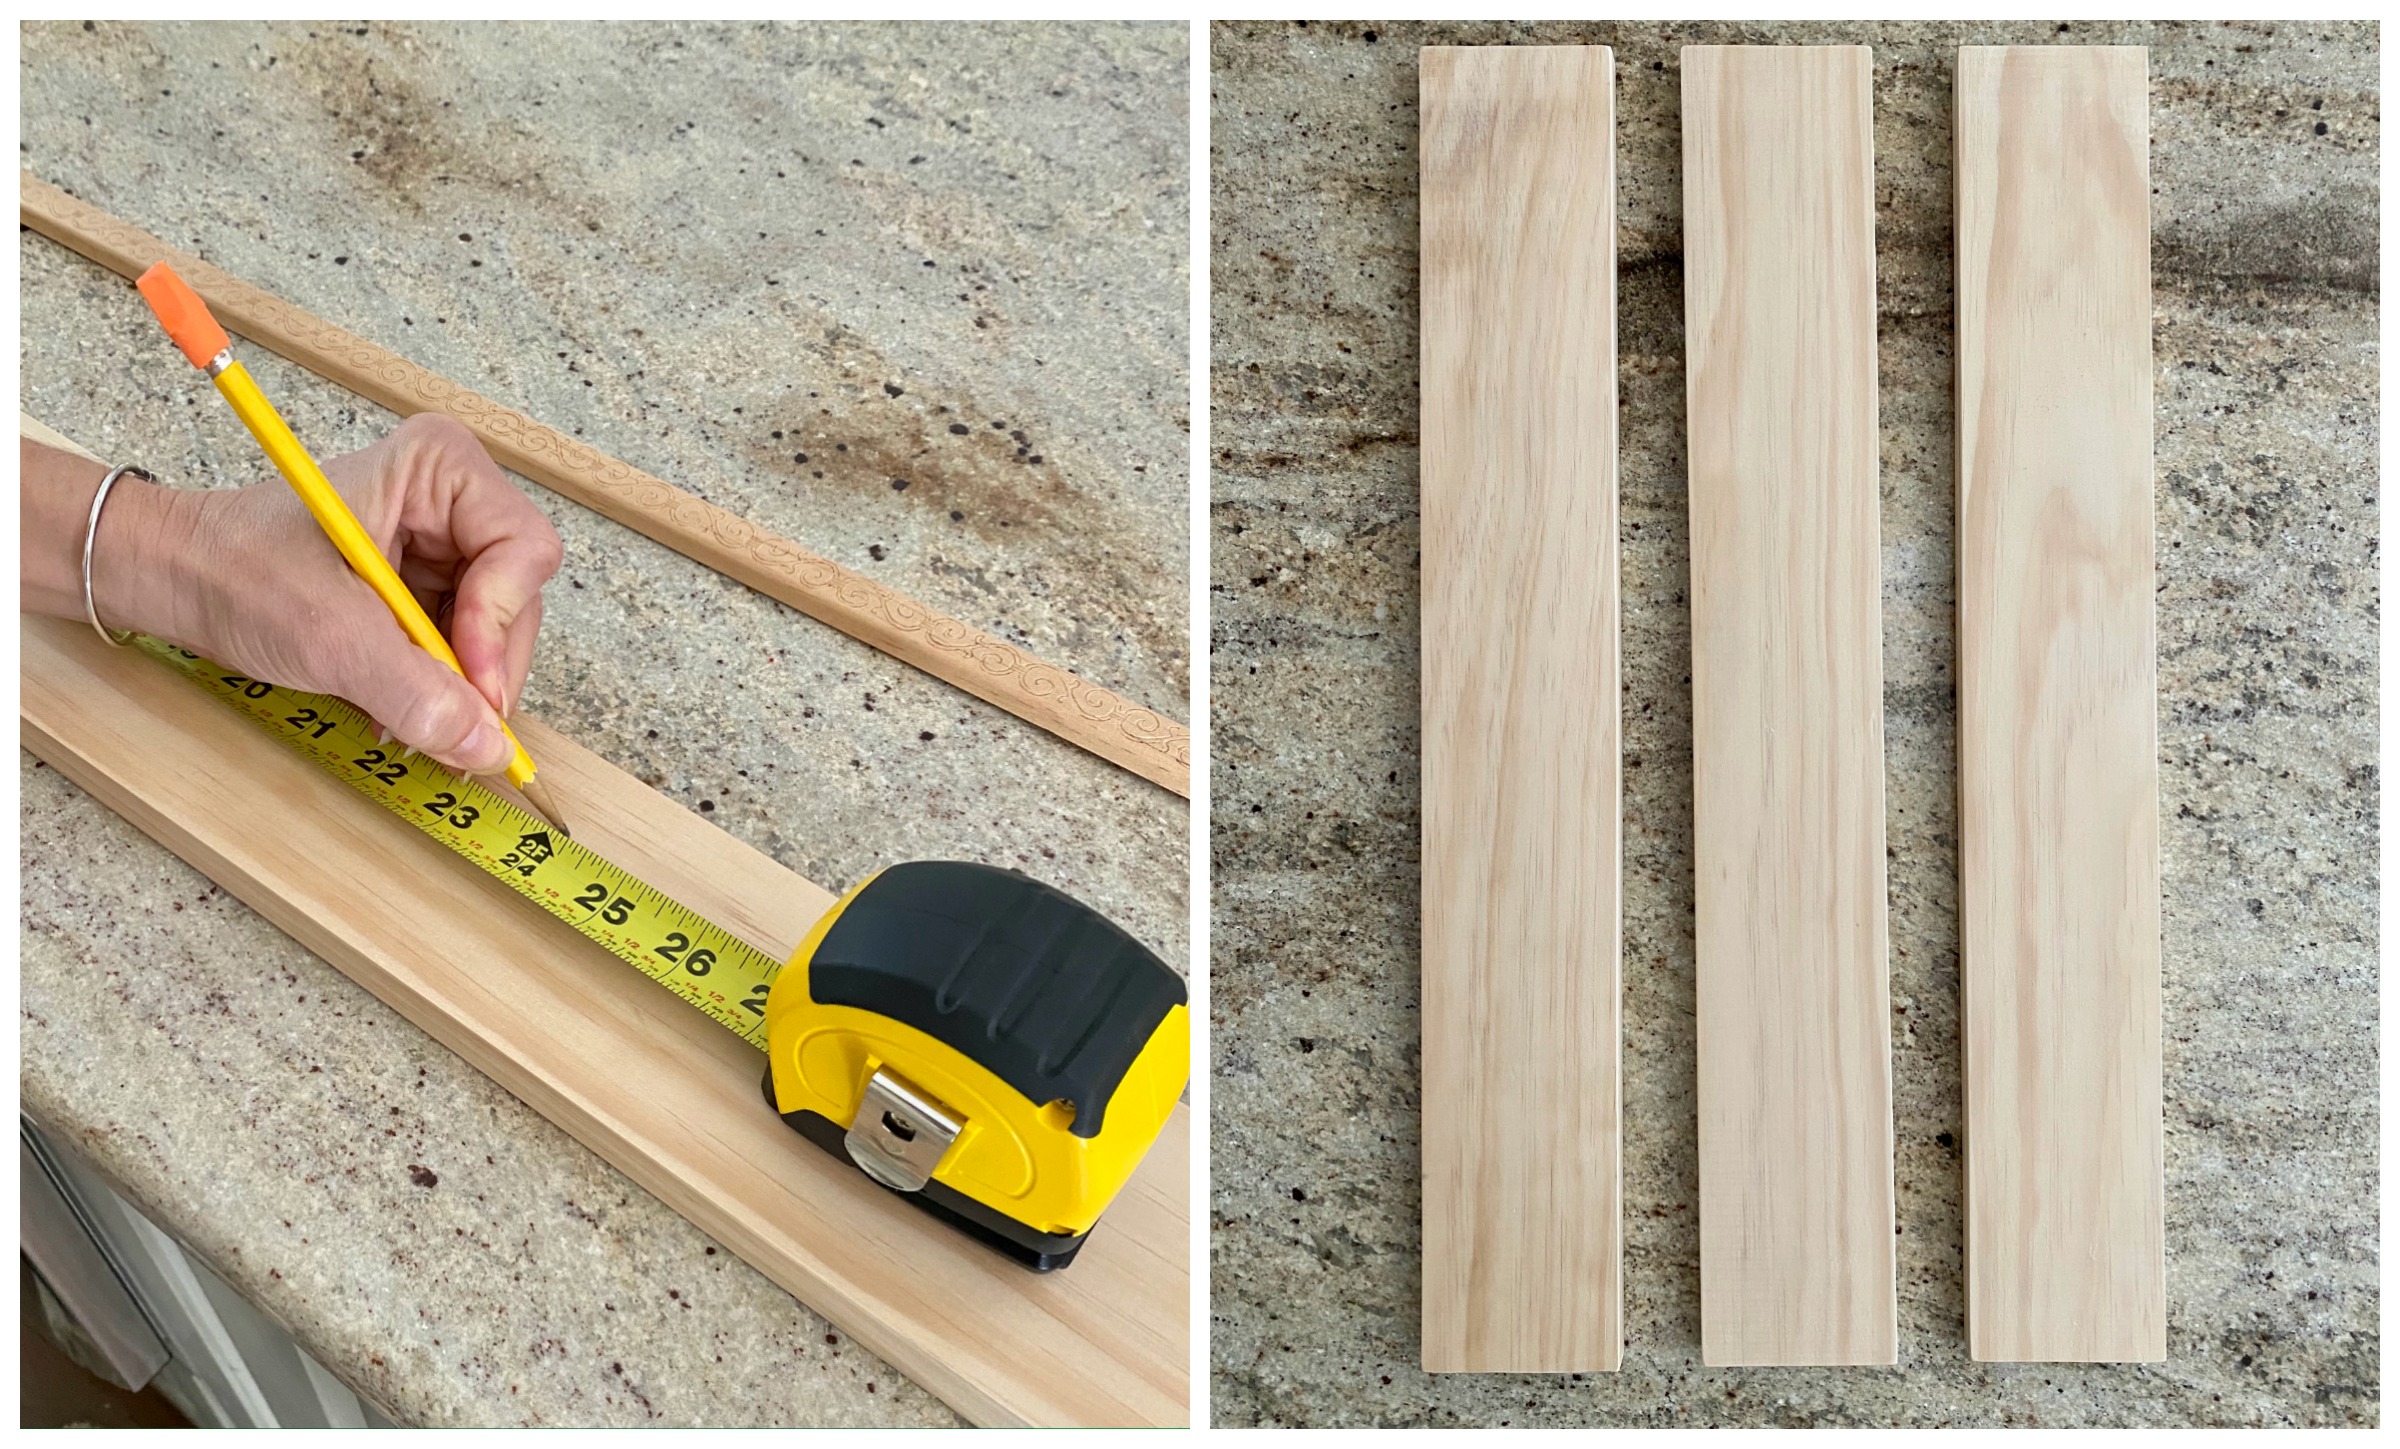
2. Sand the boards.
Wipe the sawdust off the three 24-inch boards with a clean dry cloth so the glue will adhere properly.

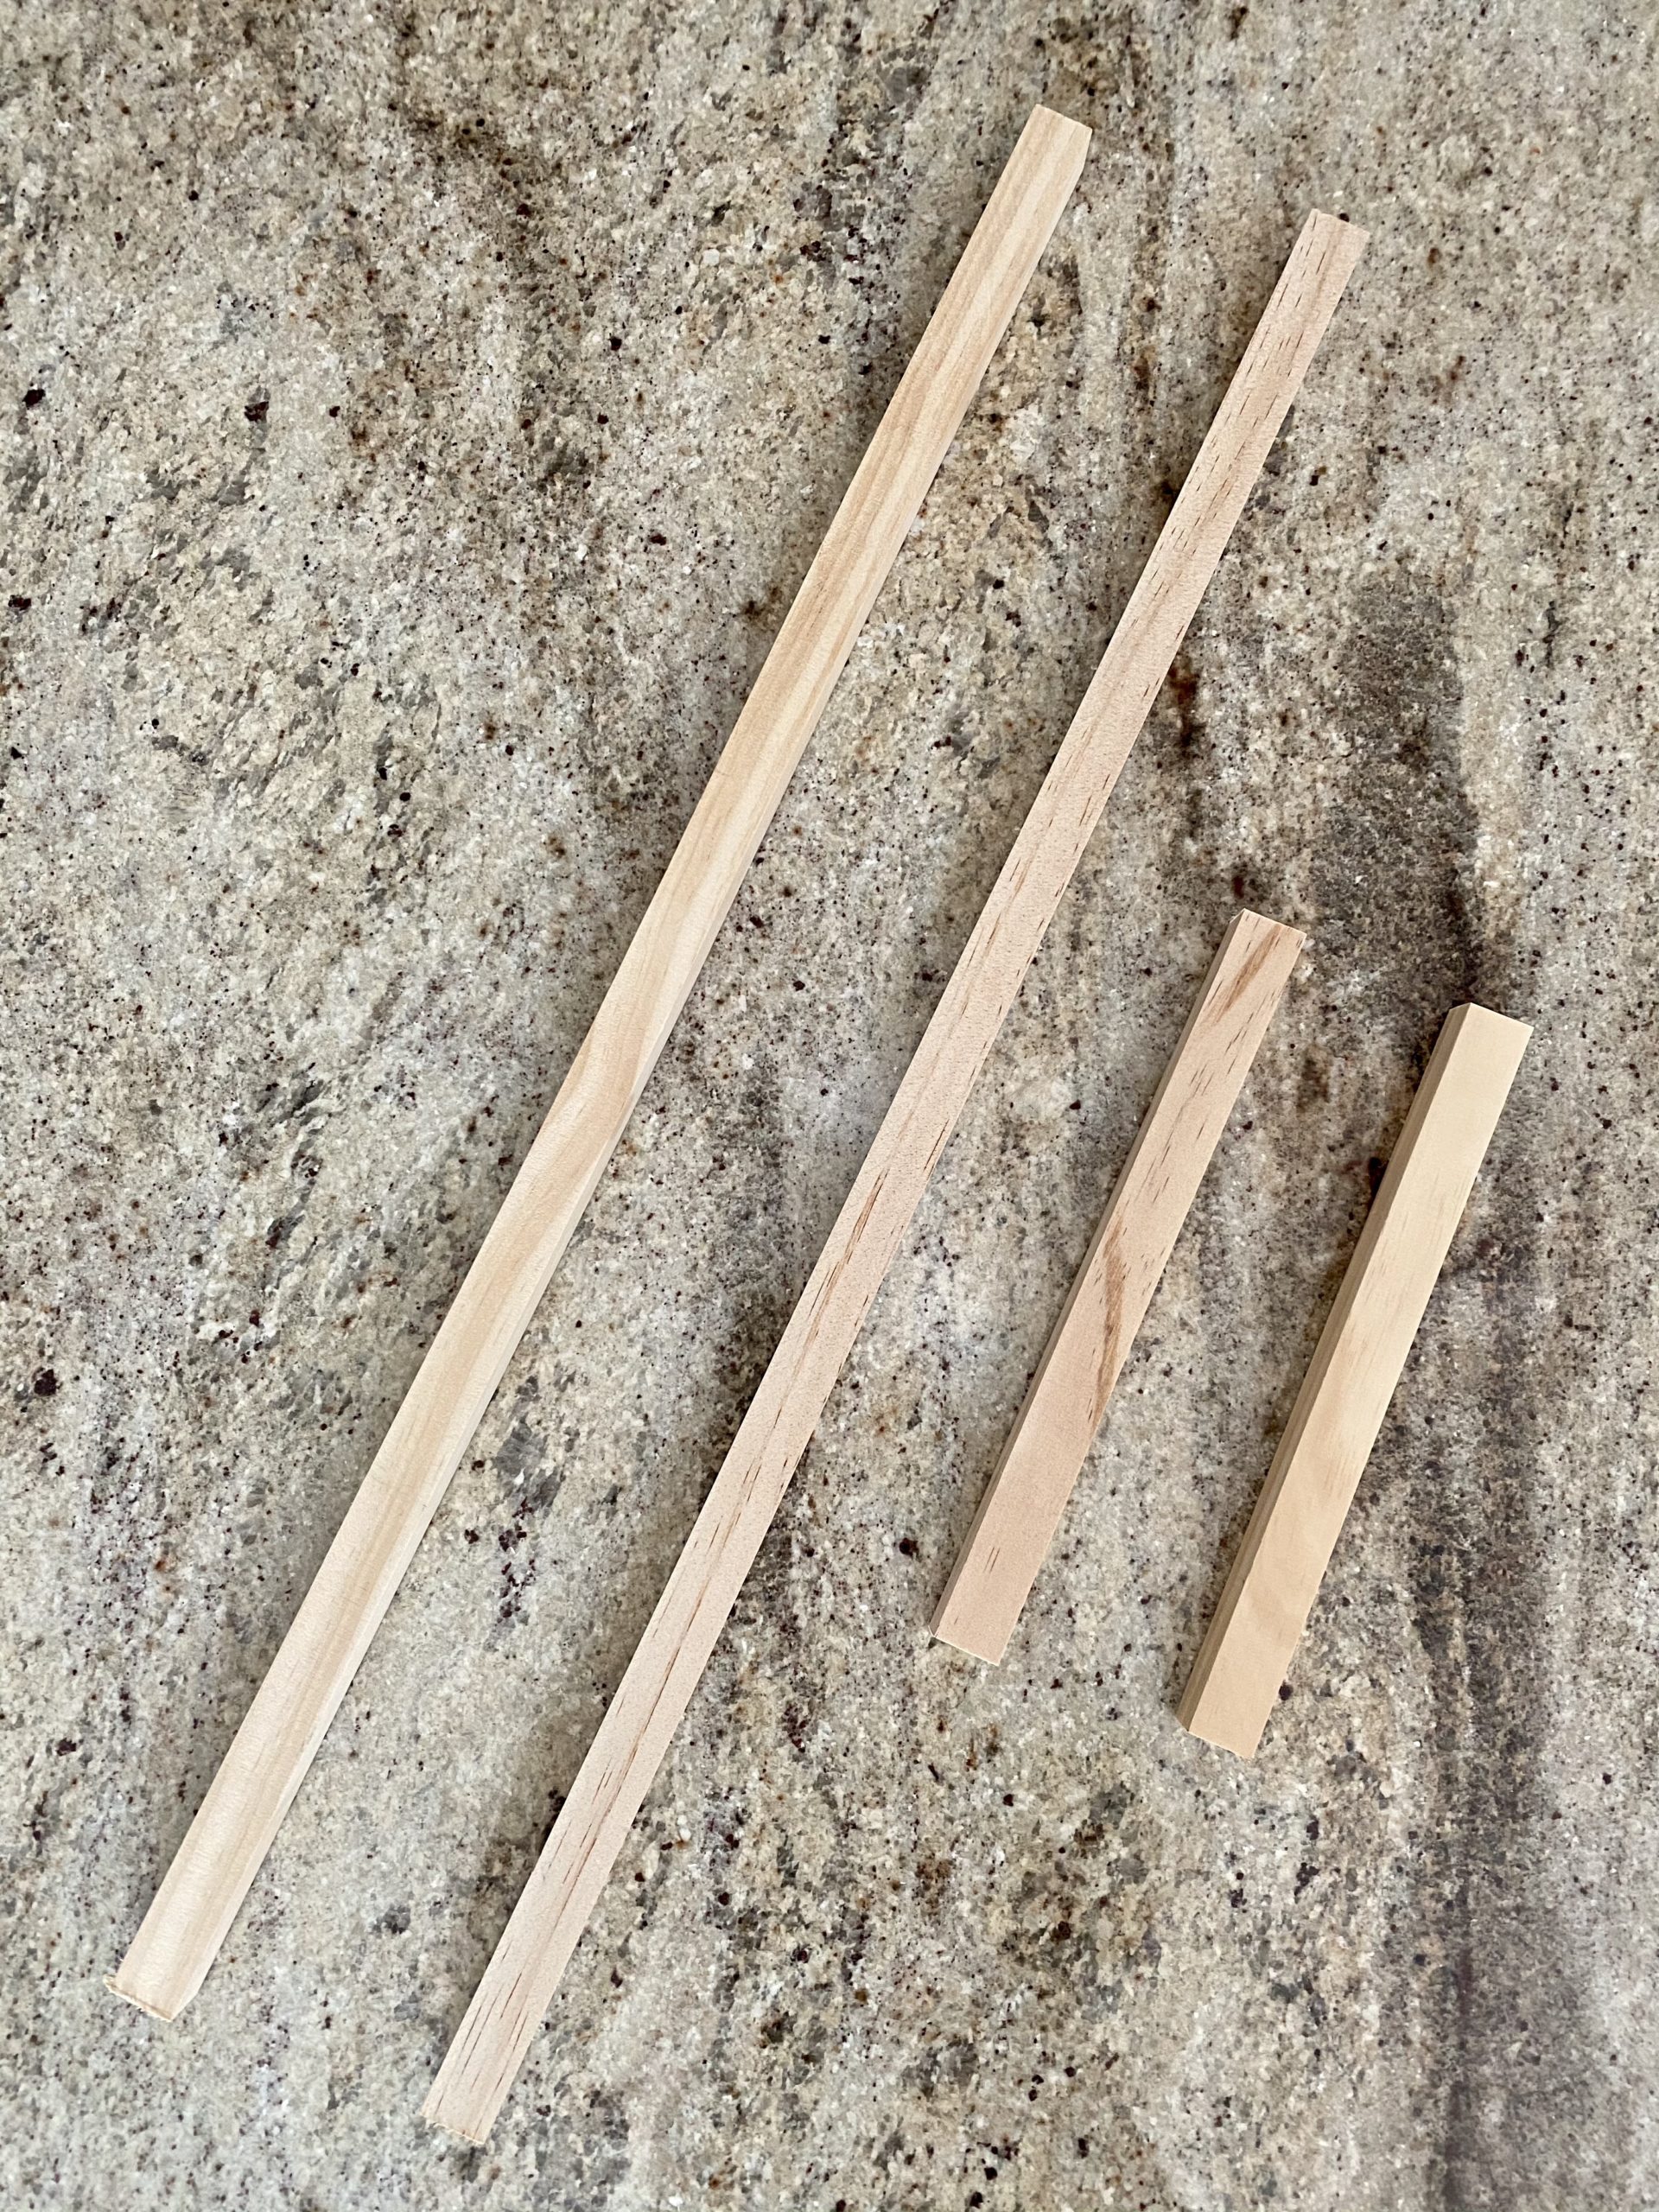
3. Cut the square dowels.
Measure the dowels and mark one 24-inch section and one 9-inch section on each one. These will frame out your tray. If you are using the embellished molding, you will cut the same length pieces.
4. Glue the boards.
Along the length of one of the board, apply glue, and stick the length of the second board to it. Hold for a couple of minutes while the glue begins to set. Along the length of the third board, apply glue, and stick it to the length of the second board you just glued. Again, hold it for a couple of minutes while the glue sets. Once the boards are lined up straight, you can clamp them to ensure firm and even contact.
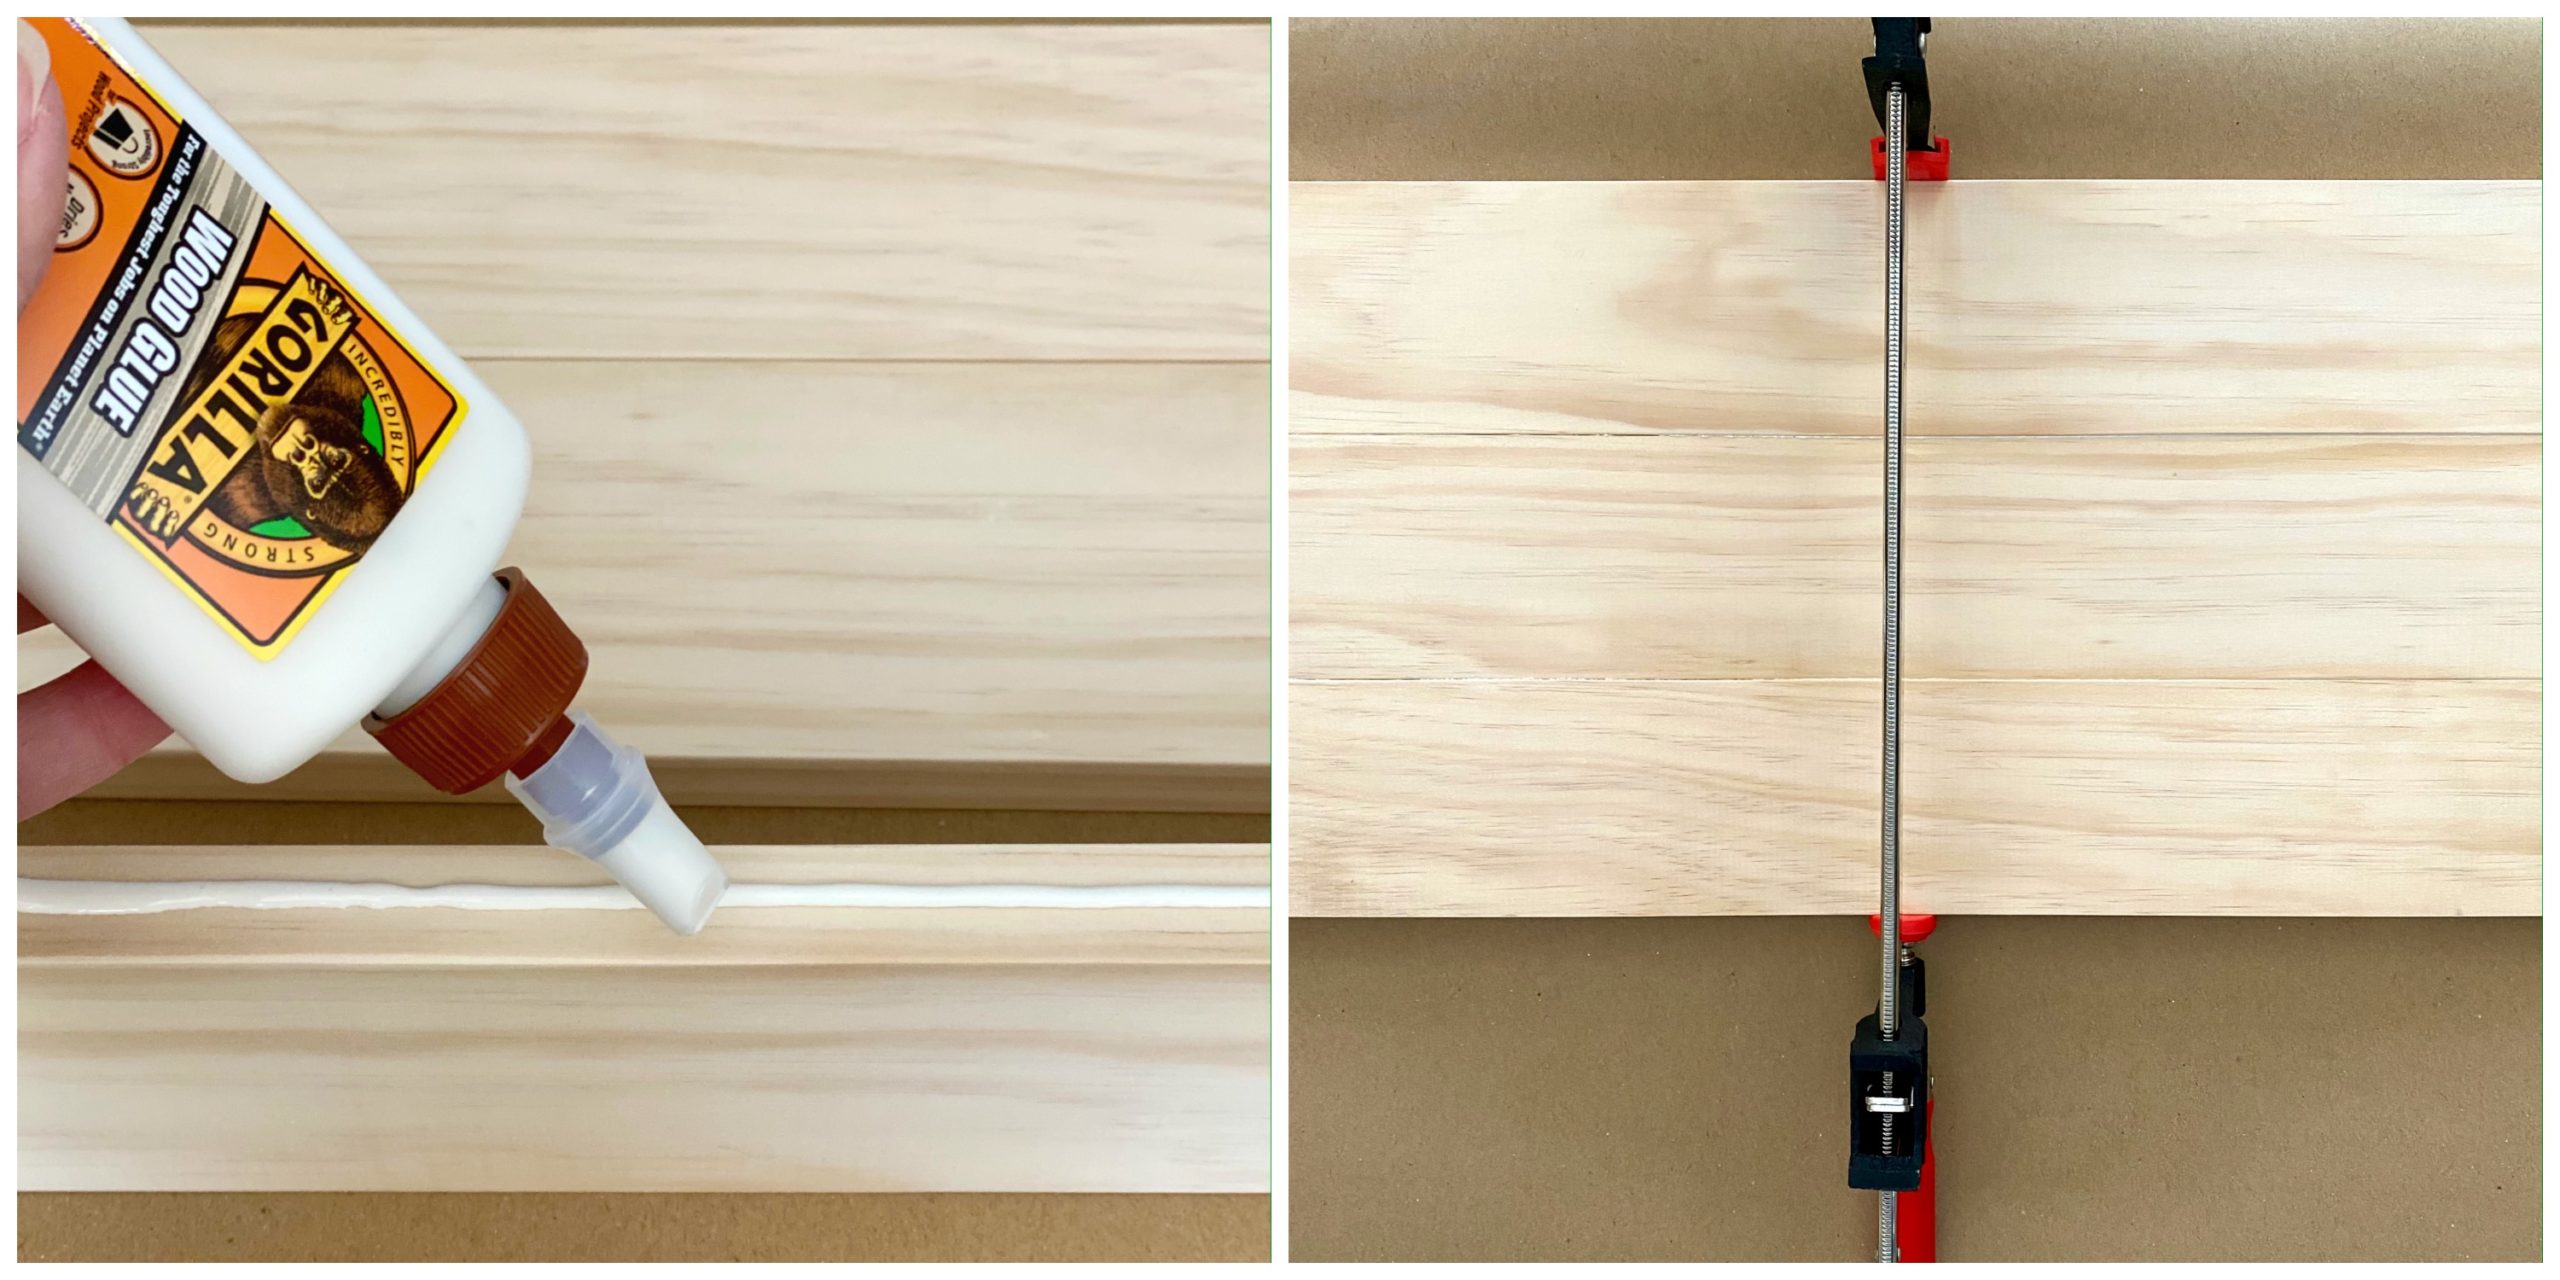
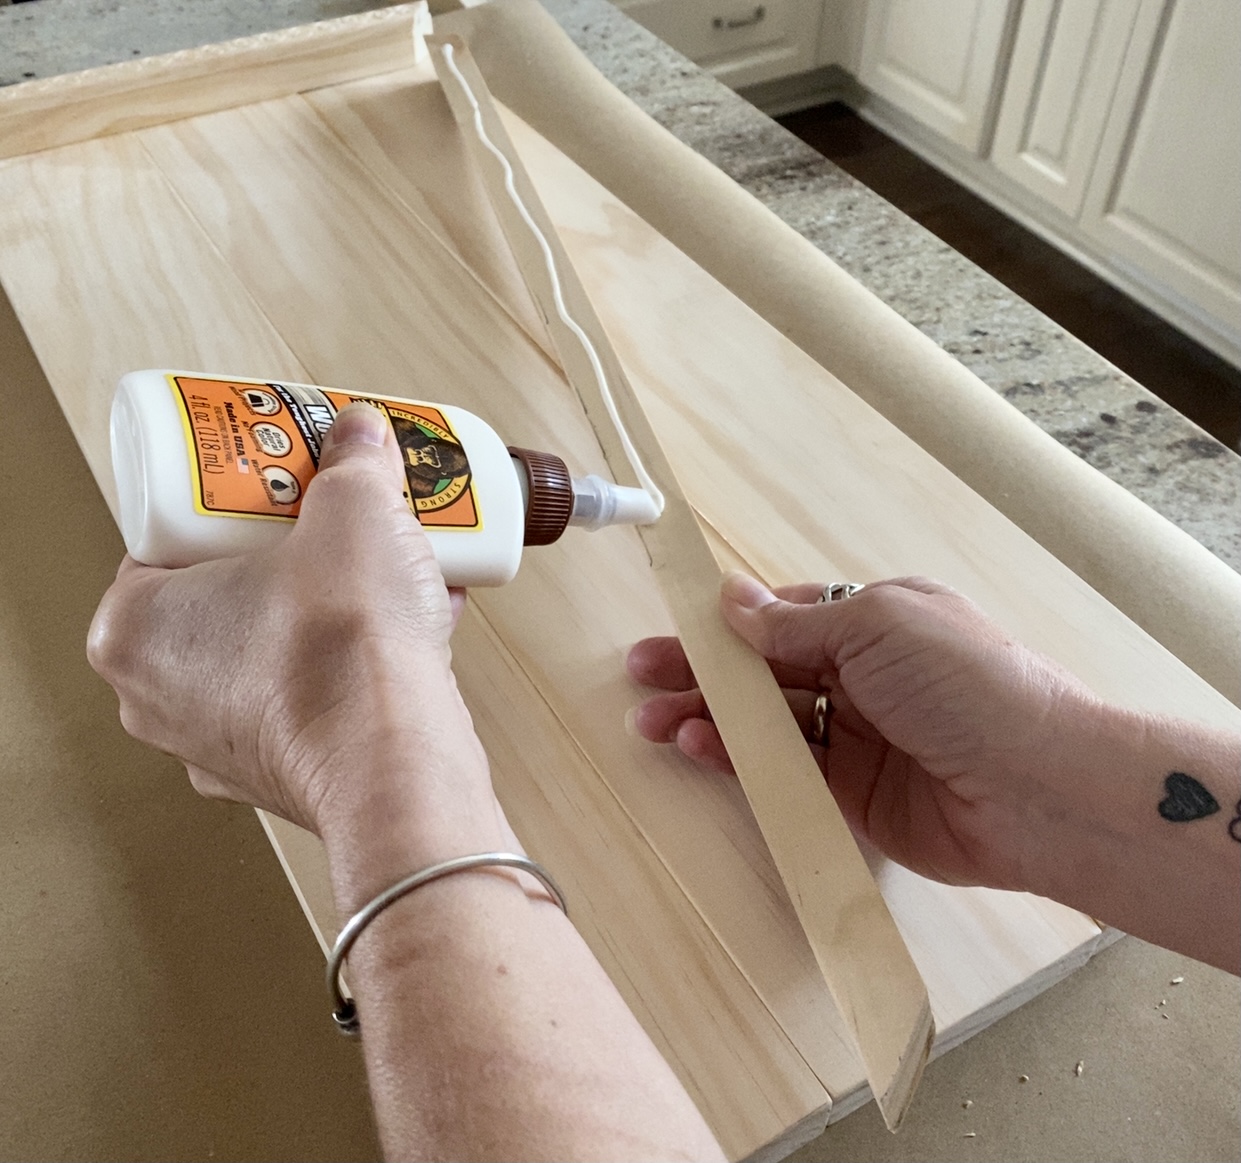
5. Glue the framing pieces on the tray.
Once the glue on the bottom three boards has dried. Begin gluing on the dowels and embellished molding to frame the edges.**
6. Seal, stain, or paint the tray.
I chose to stain my tray. A word to the wise, I did not realize that the stain would not cover the wood glue once it was dry. Since I used a light stain, the stain coverage wasn’t a big issue. However, if you use a darker stain, it could be a problem because you will have much lighter spots where the glue dried on the wood.
In the end, it all worked out. I wanted a tray that looked rustic. The difference in stain coverage actually helped me achieve the look. In hindsight though, I should have been more diligent (less messy) with the application of the wood glue knowing I wanted to stain it.
If you paint your tray, you do not need to worry about the glue issue, the paint will cover it.
7. Attach handles on sides of the tray.
Attach handles by measuring where you want them and using screws.
Notes:
* If you do not have a circular saw to cut the boards, you can ask an employee of Home Depot to help you. They are very helpful and always willing to make the cuts for you. Don’t be afraid to ask.
** I found that it was easier to glue the embellished molding to the square dowels before gluing the dowels on the bottom of the tray. I did this while the bottom boards were drying.
Enjoy the learning process.
My DIY wood tray isn’t perfect and after making it, there are things I would do differently if I had to do it again. That is what I have enjoyed so much about trying different DIYs. Not only do I learn new skills with each new project, but I learn so much from each experience. I take what I learned from each project and use it to make every project I work on in the future better.
I hope you enjoy this easy and beautiful DIY wood tray project as much as I did. It’s a wonderful feeling to look at the tray on our kitchen table and feel a tremendous sense of pride knowing that I made it on my own.
Don’t be afraid to try new things.
Now, it’s time to go plan my next DIY project! 


Fabulous tray. Love the look and you make it see. So easy!!!!!
I’m so happy you like the tray, Carol! It looks easy because it is easy! 😉
Love the tray … think I’ll pass it on to Jimmy so that he’ll have another project. Now, about that cake!!?? You should probably share the recipe … it looks so lovely!!
[…] DIY Wood Farmhouse Tray […]
[…] I style a tray or a riser on the kitchen island with seasonal touches. I use a tray or riser is because of […]
[…] DIY Wood Farmhouse Tray […]
[…] all, I have made plenty of trays before including a wood farmhouse tray and a wood riser. Why not try my hand at making a tiered jewelry tray?! Guess what? I’m proud […]
[…] added to the kitchen when I used it as a riser or tray, I tried my hand at making a wood riser and wood farmhouse tray of my own. They were surprisingly easy to make and they turned out […]
[…] Wood Farmhouse Tray […]