
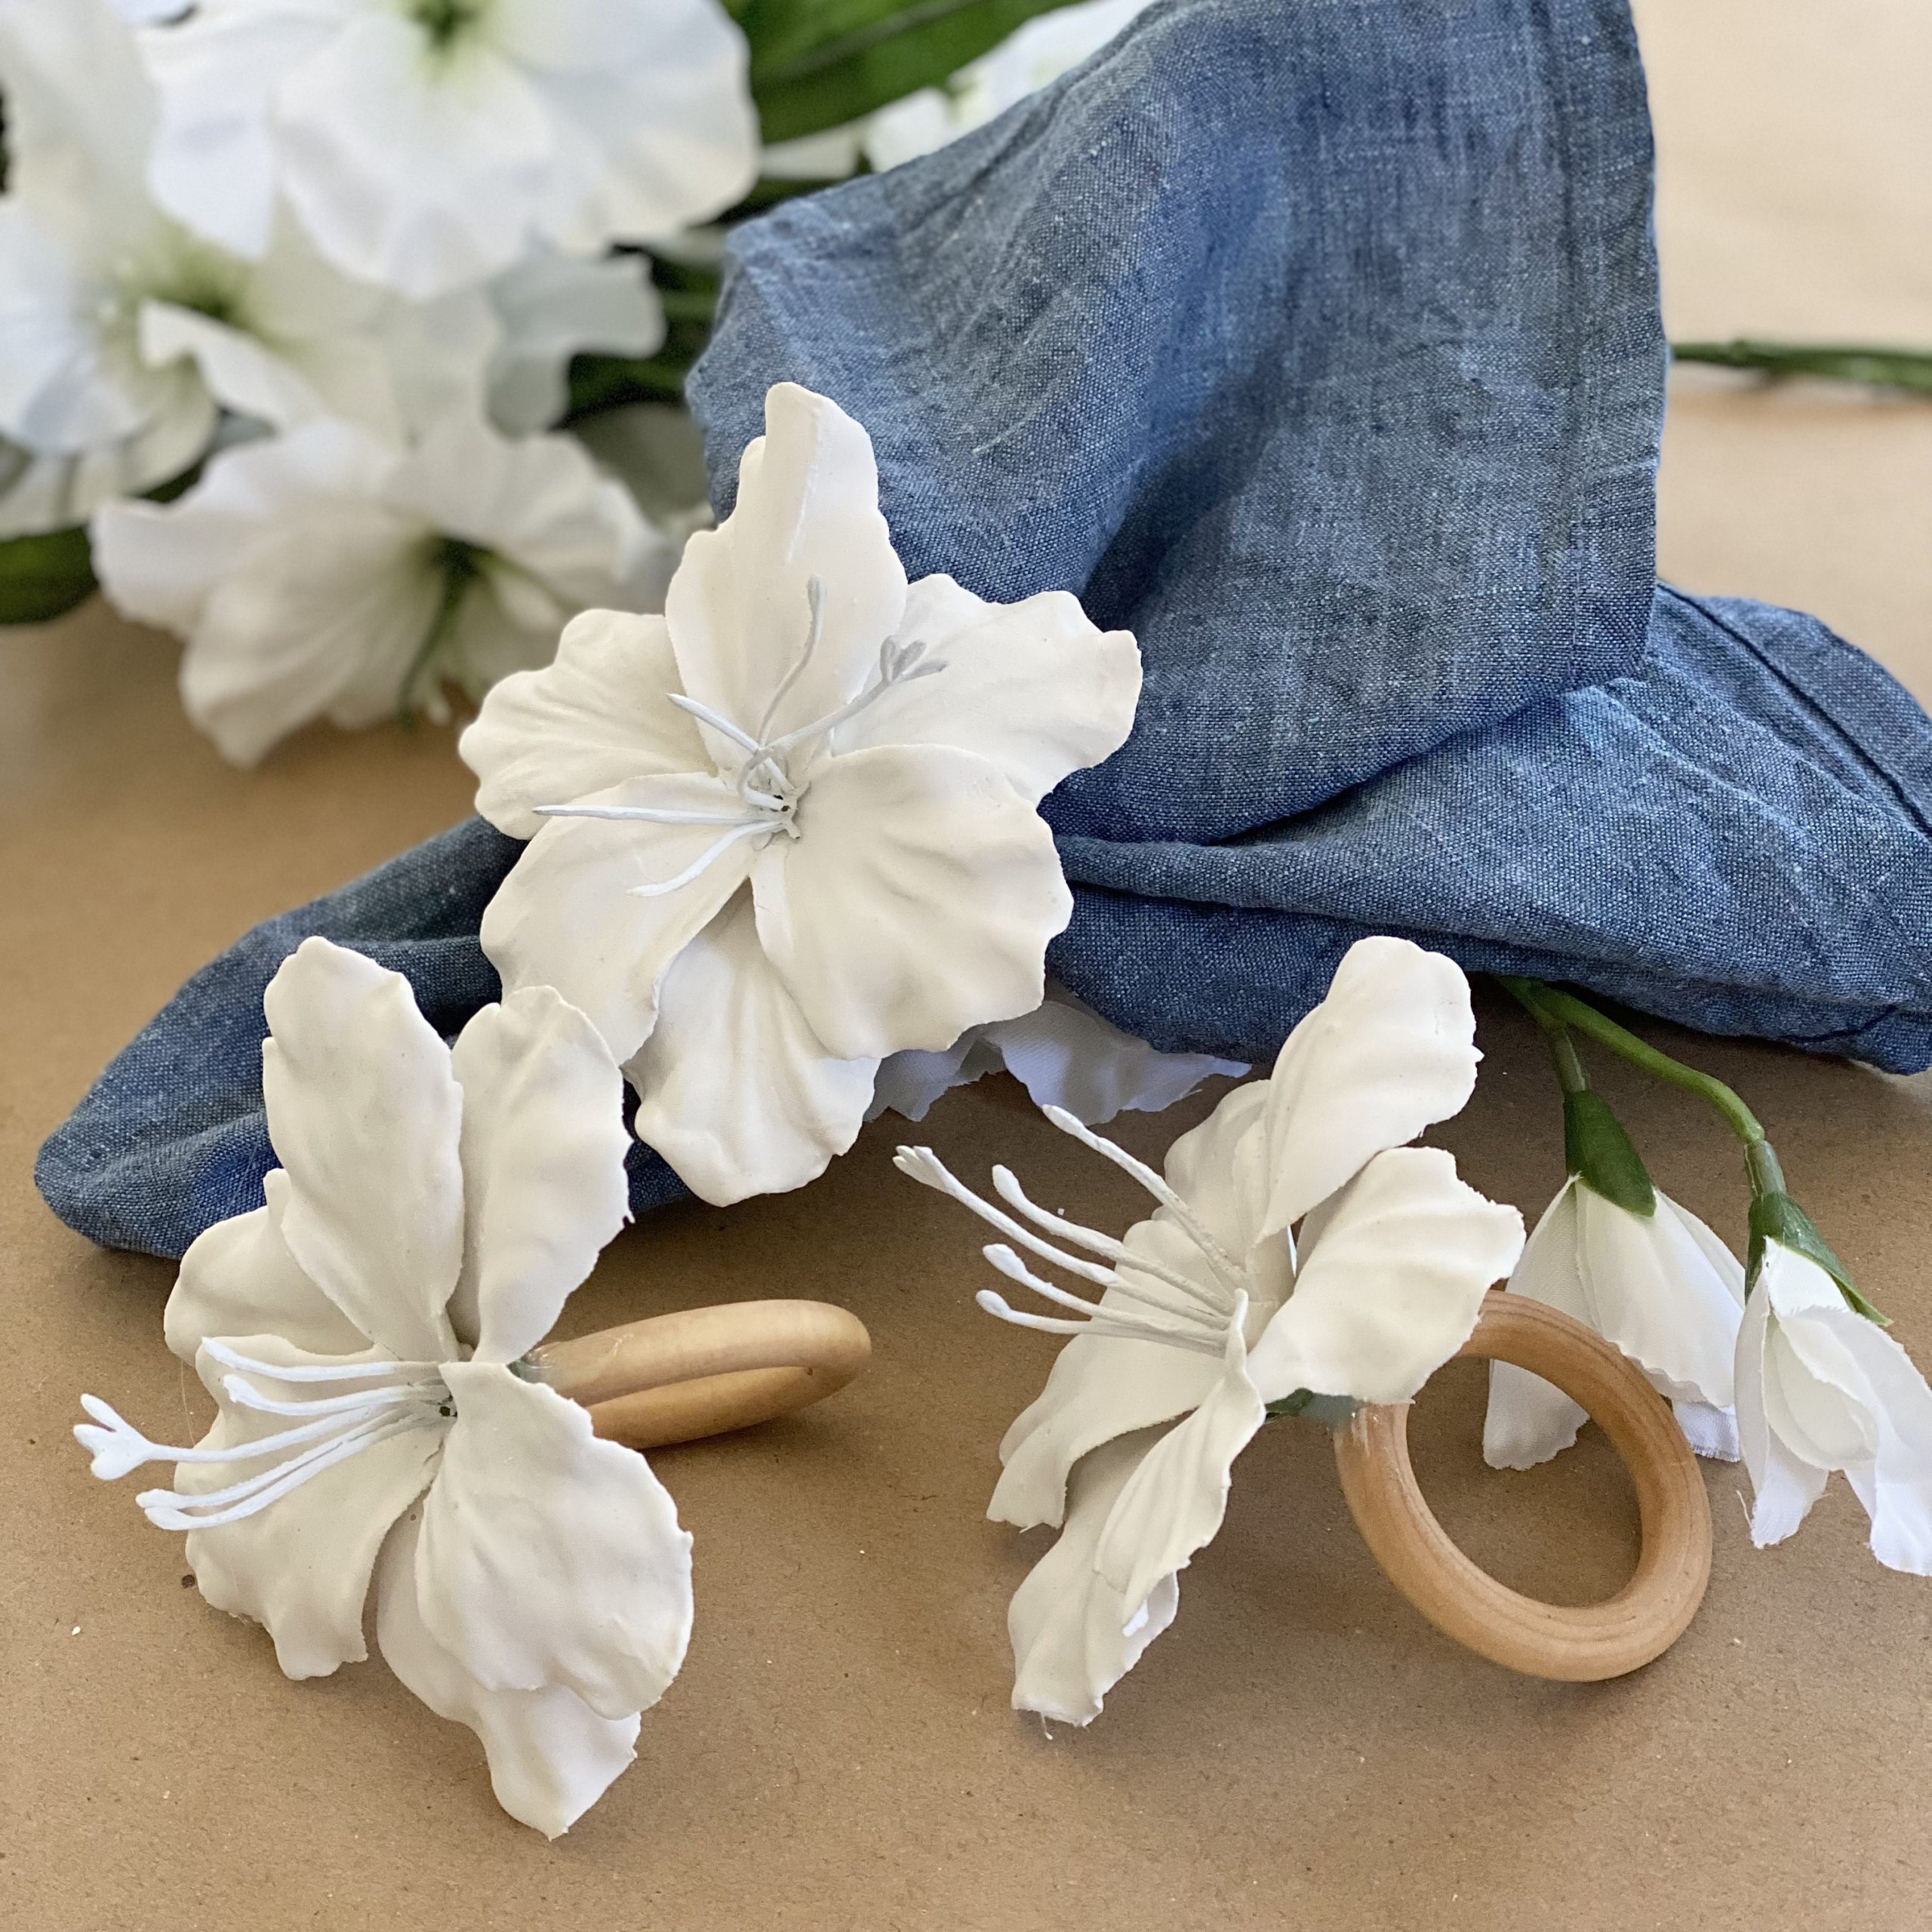
These DIY plaster of paris floral napkin rings are the perfect way to dress up any table and add some extra love to it for those who gather around.
I get so much joy from setting a beautiful table. Mixing and matching different dishes with beautiful linens, arranging flowers, and finding the perfect candles are just a few of my favorite things about designing a tablescape for everyone to enjoy. My goal is always to create a pretty table. More than that though, I want guests to feel comfortable and welcome.
Homemade with love is the best.
One of my favorite ways of making guests that dine with us feel special is to add my personal touch to the table. Nothing is more personal than something homemade. Last Fall, I had so much fun making twine pumpkin napkin rings for the Thanksgiving table. They were so fun and easy to make! The best part was that our family and friends loved them. When they found out I made the napkin rings, they were extra touched by the sentiment. That warmed my heart.
With the arrival of Summer, I wanted to make some napkin rings for the gatherings we plan to have for family and friends on the farm. It’s no secret that I love flowers, so I wanted to come up with a floral napkin ring. Sure, I could have hot glued some faux flowers onto napkin rings, but I wanted to do something a little more than that. After spending some time on Pinterest, I fell in love with the light, airy, and delicate look of plaster of paris florals. I was determined to try and make them work for my Summer DIY napkin rings.
If I can make these napkin rings, you can too.
Like every DIY I share here, this one is perfect for beginners. If I can make these plaster of paris floral napkin rings, you can too! There was a learning curve with this project. The beauty of the curve is that I can take what I learned and pass the helpful information on to you. This will save you a tremendous amount of trial and error time.
Do as I say, not as I do.
What you should know first is that I had never worked with plaster of paris before making plaster of paris floral napkin rings. If you’ve never worked with it either, don’t let that stop you from trying this project. Though it’s a tad bit messy, it is super fun to work with and I would definitely work with it again. Here is what I learned while making my plaster of paris floral napkin rings:
When it comes to plaster of paris, work in small batches.
As the directions say on the container, you have 6-10 minutes to work with plaster of paris before it starts to dry. Once it starts to dry it gets very clumpy and difficult to work with. When I started this project I used one cup of plaster to 2 cups of water (the mixing ratio is 1:2). I didn’t come close to using all the plaster before it dried. The next time I mixed it, I used 1/3 cup plaster to 2/3 water and that was much easier to use up before it started to dry. Small batches are the way to go!
The fewer the petals on the faux flowers, the better.
During my first attempt at making plaster of paris flowers for napkin rings, I learned a lot. For one, the more petals the faux flowers have, the more difficult this project is. I originally tried making plaster of paris flowers with peonies, ranunculus, and roses. Big mistake! All the petals stuck together once the plaster of paris was applied. It became very difficult to tell that there was a beautiful flower underneath the clumpy plaster of paris. (Separating the petals by hand before the plaster of paris got clumpy and/or dry was a messy disaster!) For the plaster of paris novice, I do not recommend using faux flowers with several layers of petals for this project.
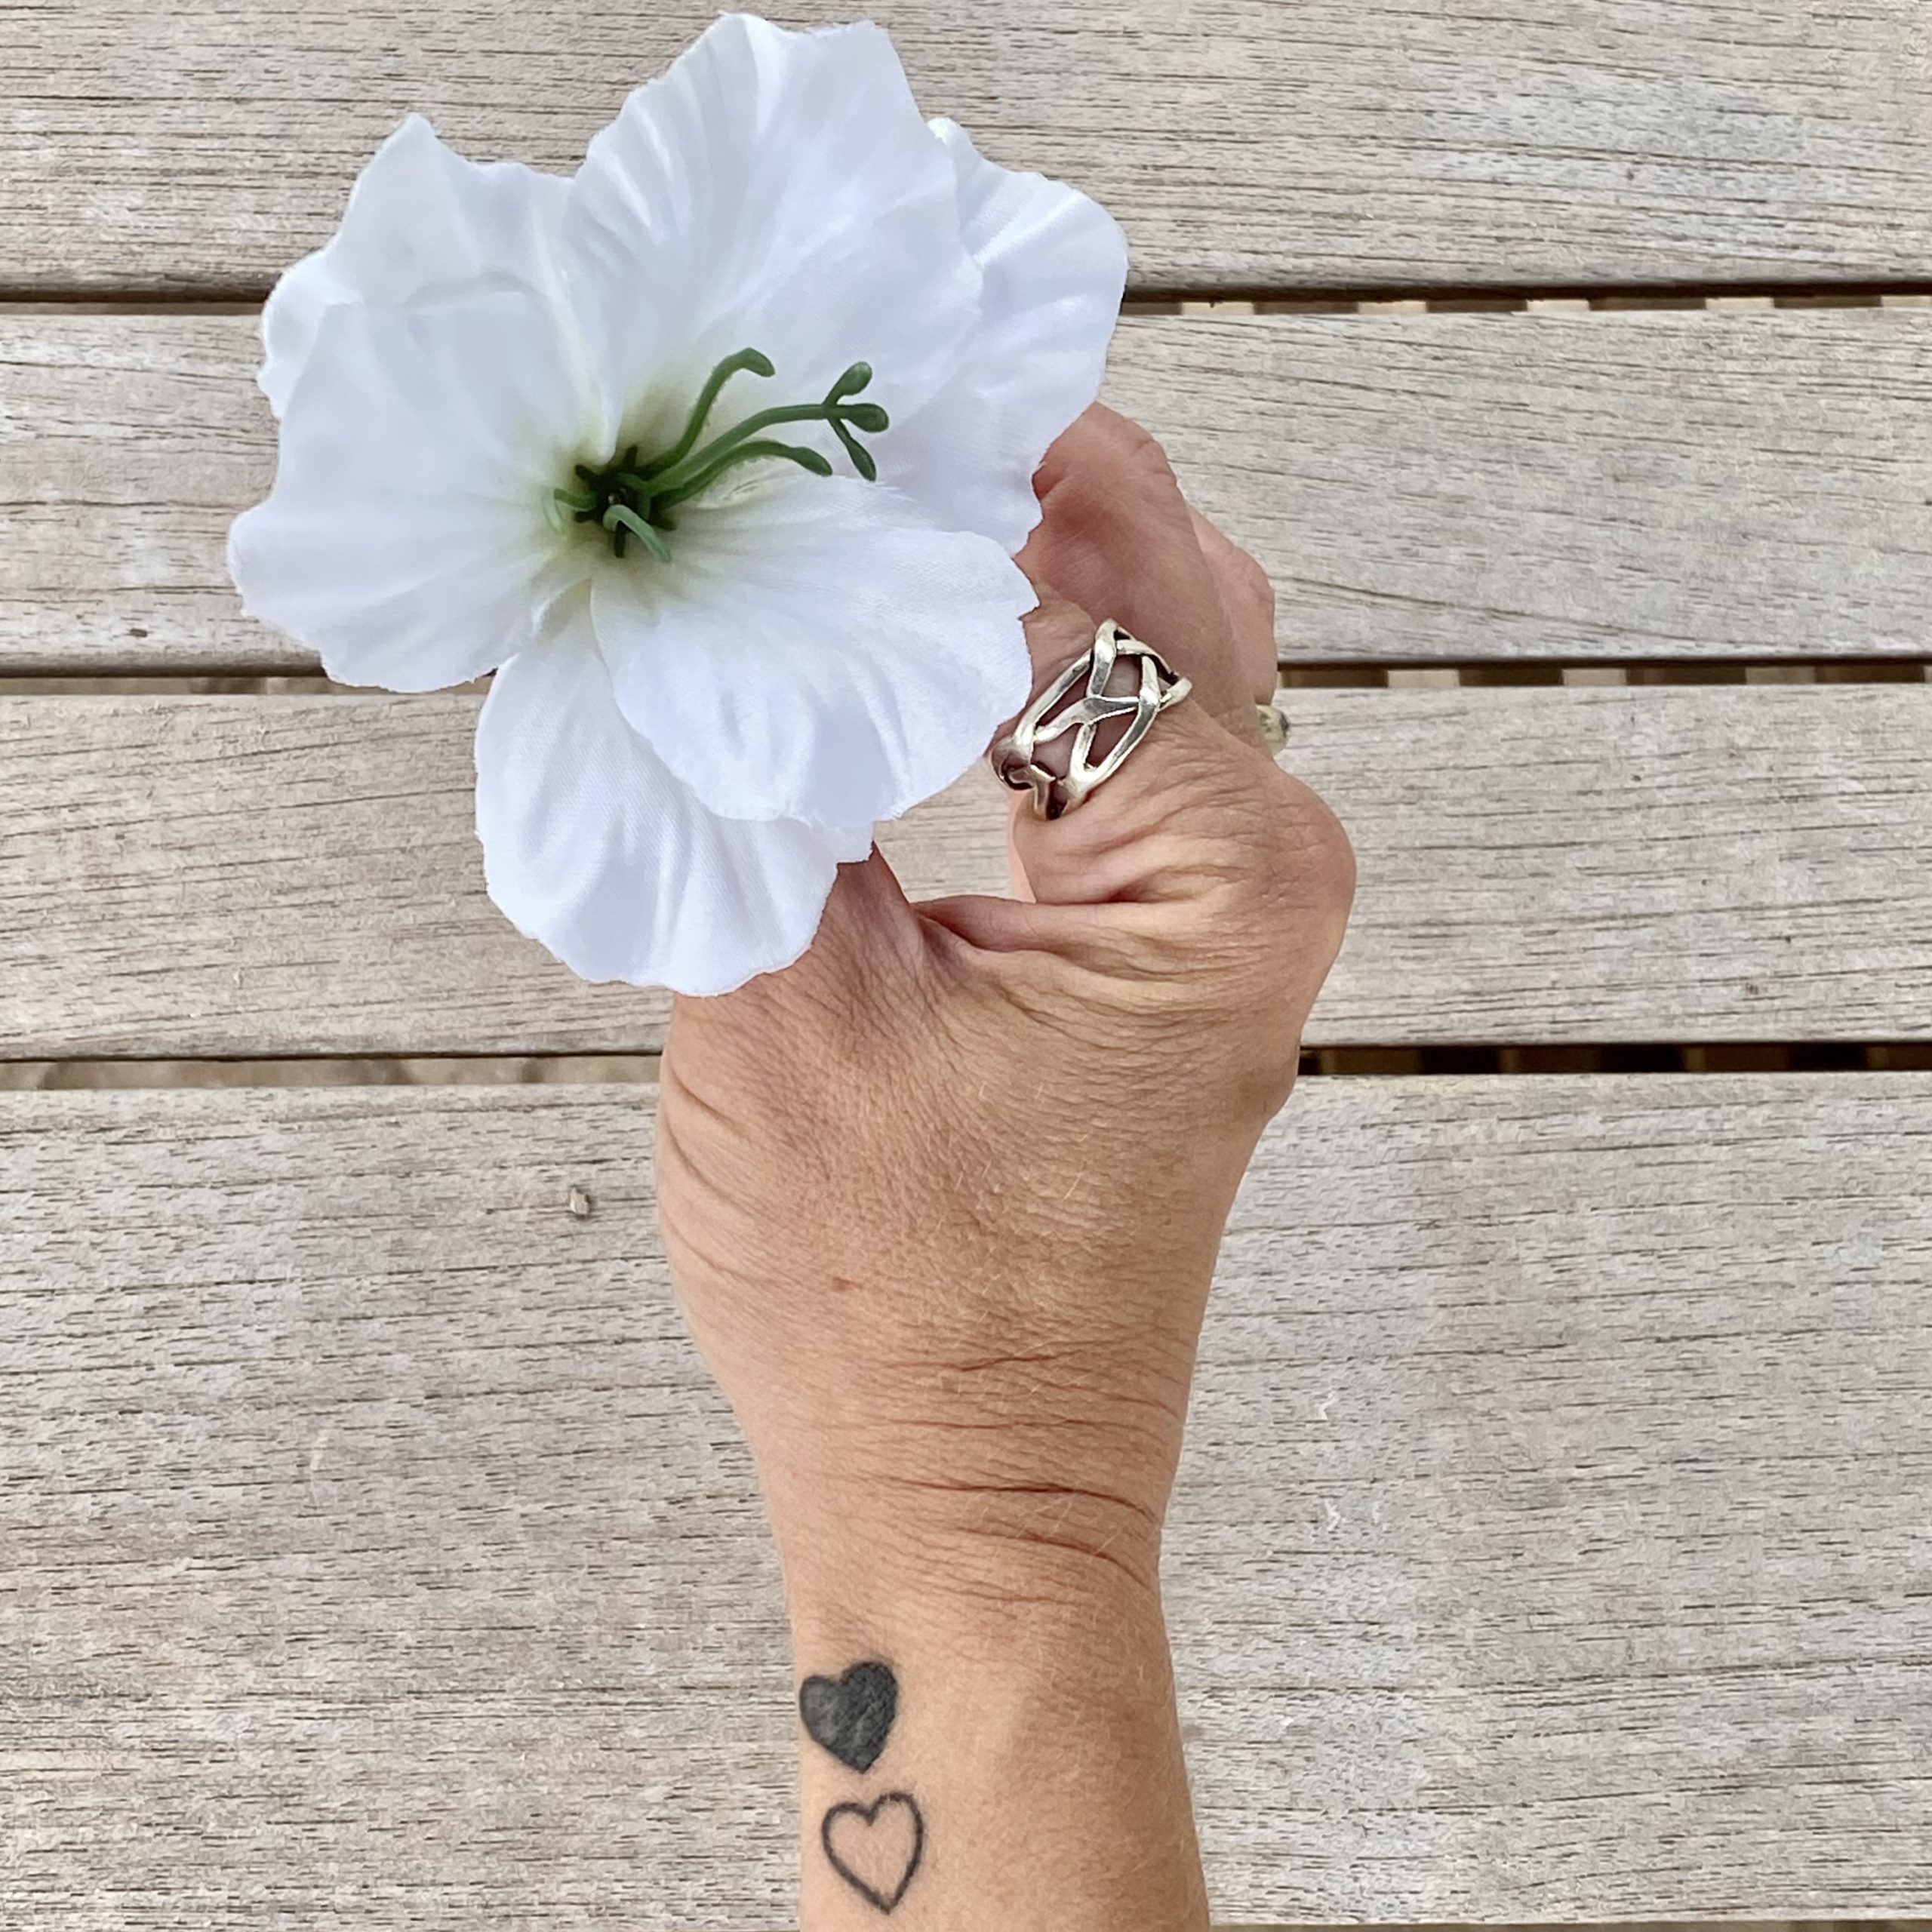
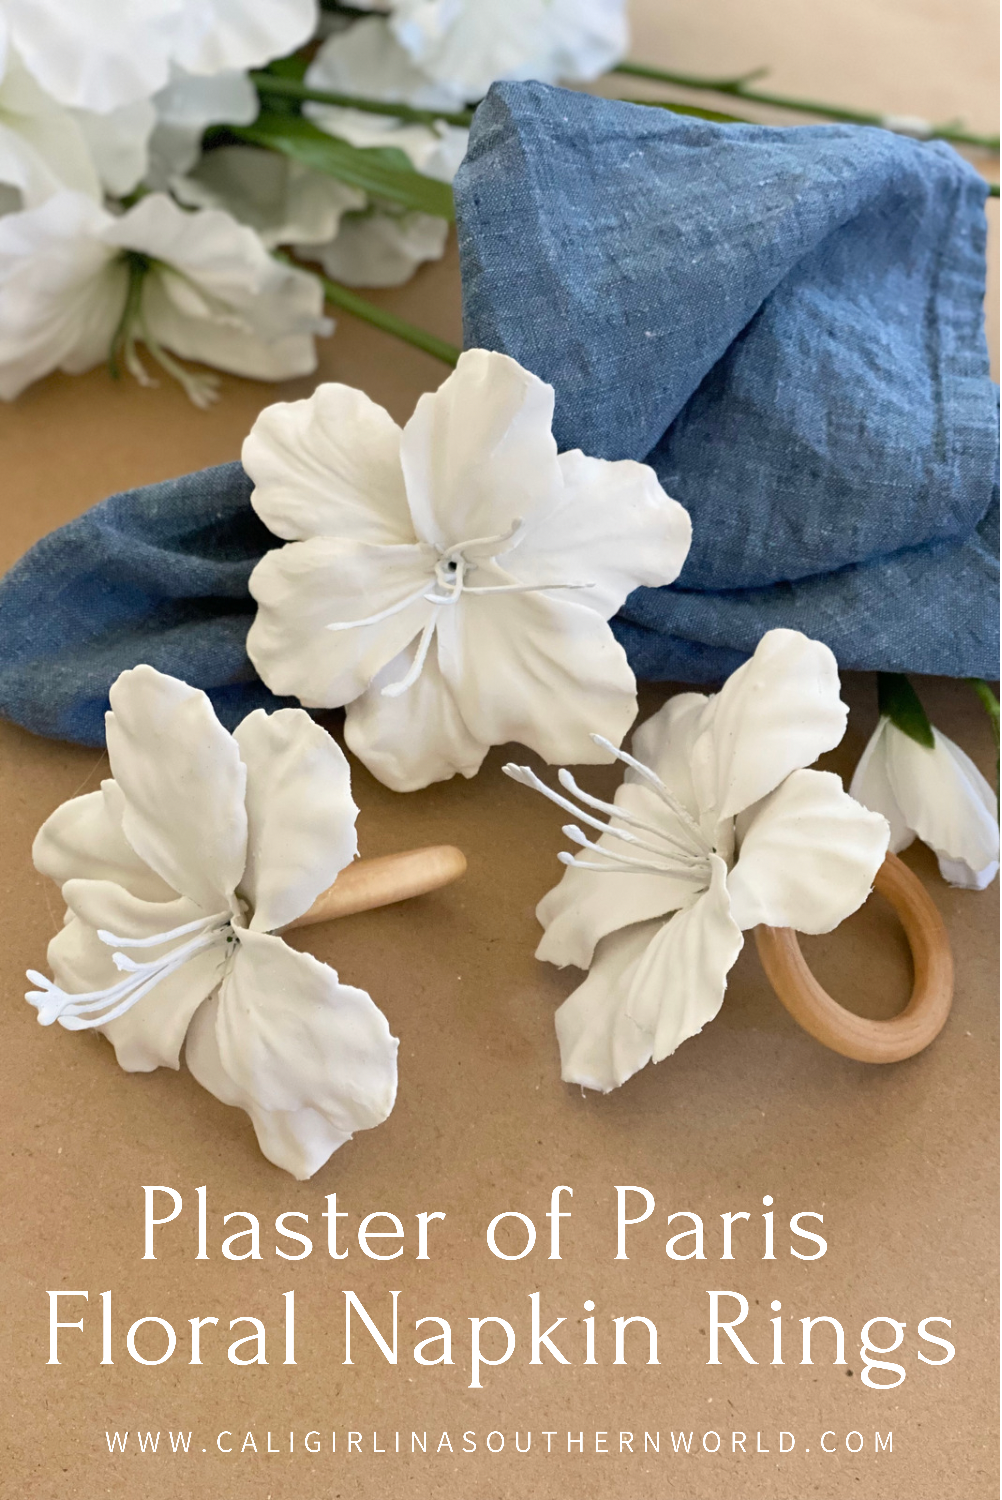
What worked best for me was Gladiolus flowers. I found a bush of stems on sale at my local craft store. They were the perfect size flower to fit on my napkin rings and they only had two simple layers of petals. One bush had several stems on it and each stem had about five flowers. This meant I had plenty of extra flowers in case I needed them. (I always build in a buffer because I know my failure rate when it comes to new DIY projects!)
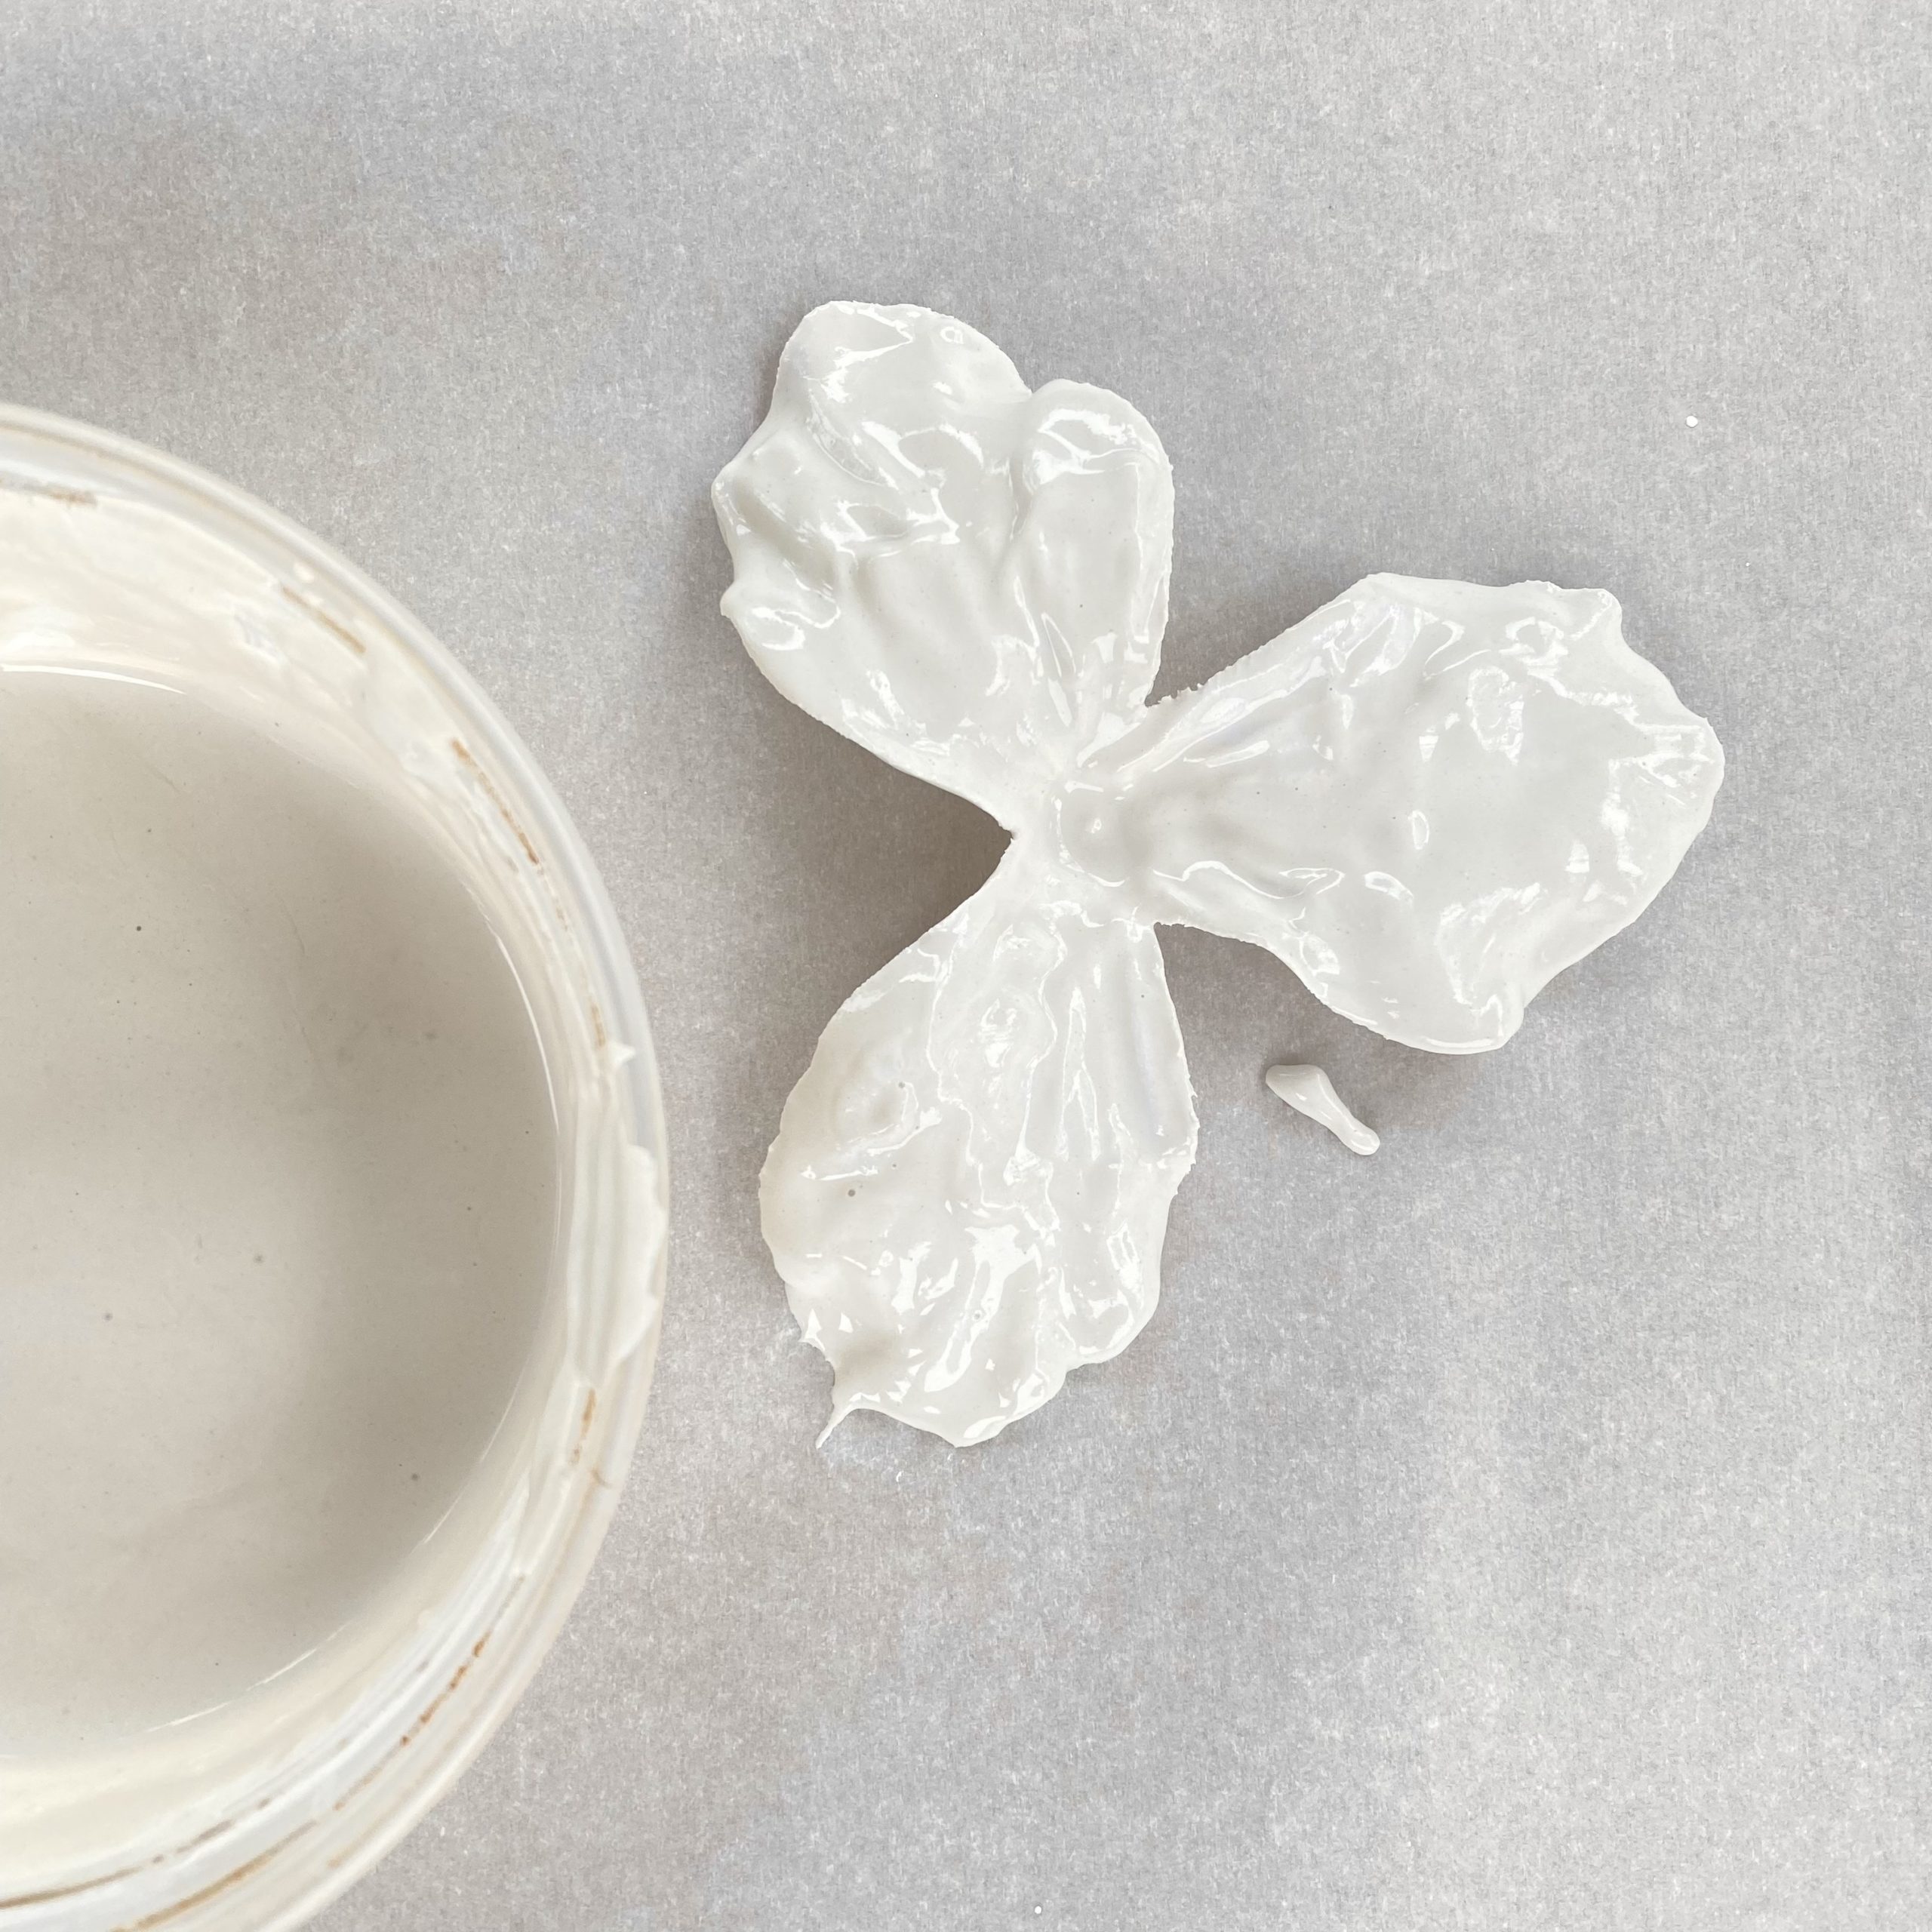
When applying plaster of paris to the flowers, dipping is better than painting.
After reading and watching many tutorials about how to make plaster of paris flowers it seemed as though the majority of people who tried it preferred to paint the plaster of paris on the faux flowers. For my first attempt at making my own, I tried to paint it on the flowers also. I did not prefer this method. Not only was it difficult to get good coverage on each petal before the plaster started drying, but I also wasn’t a fan of the brush strokes that were left on the petals. It was difficult to find a way to remedy the brush strokes.
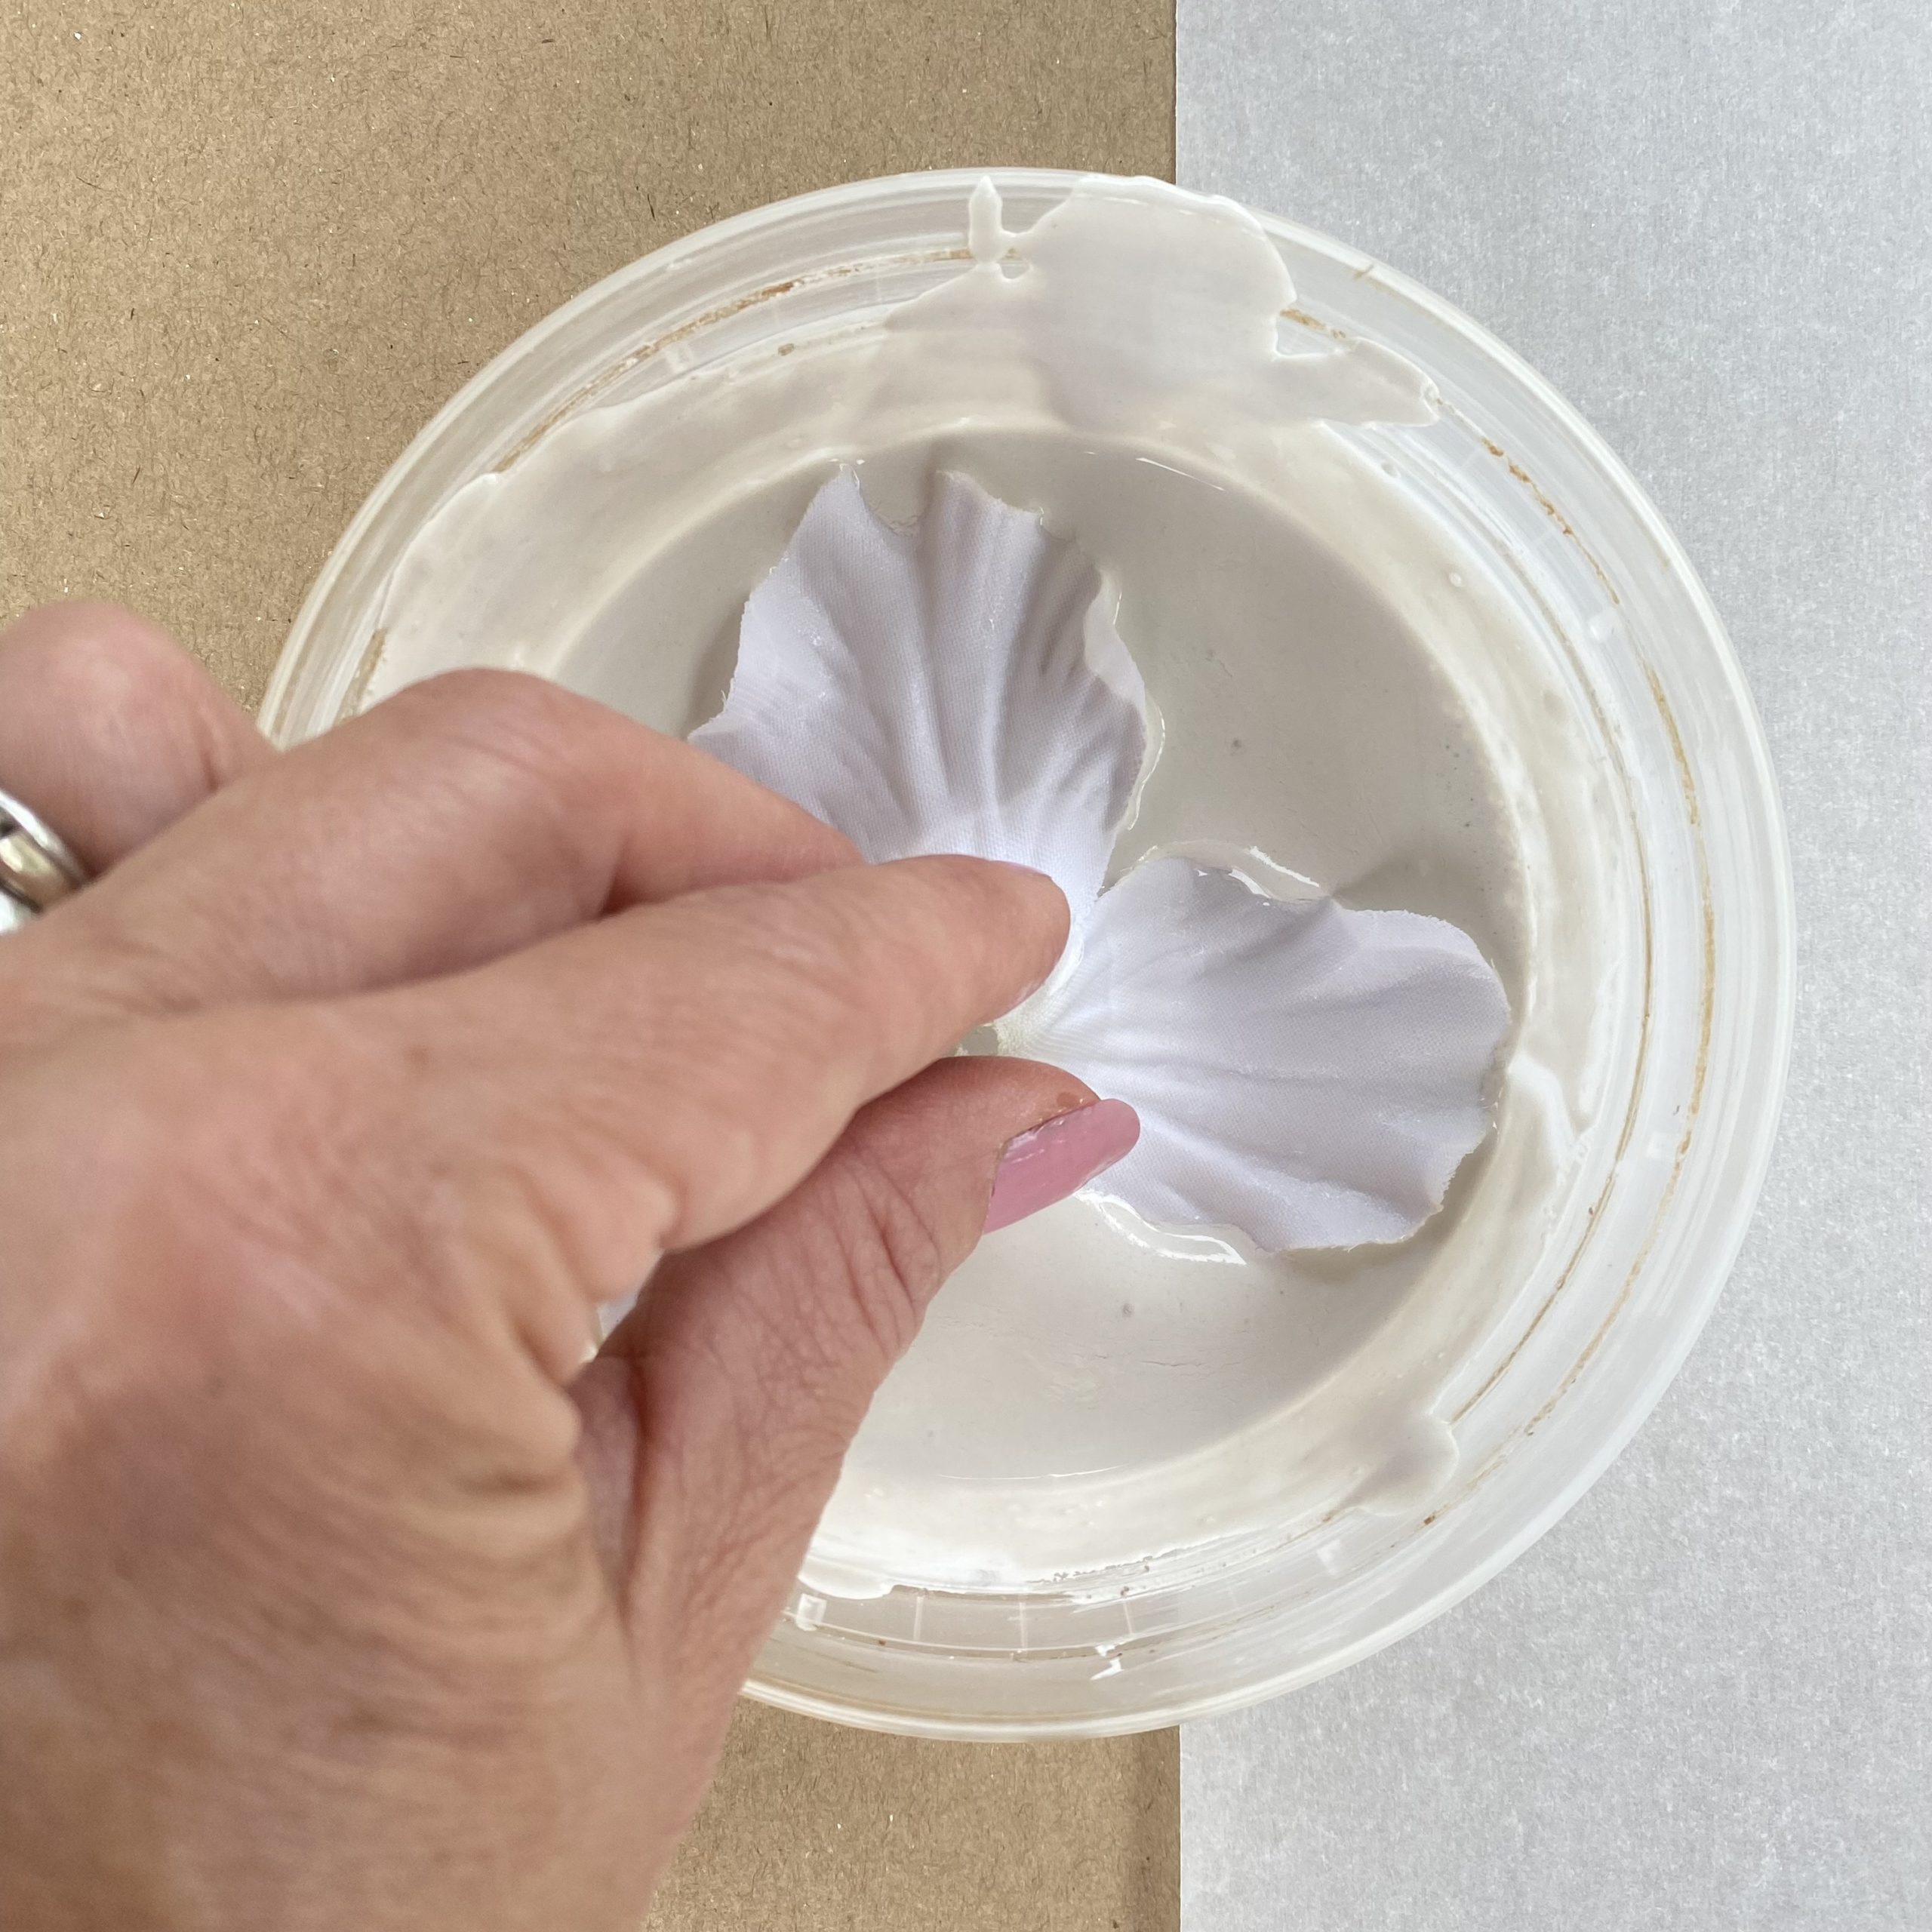
The failed attempt at painting on the plaster of paris led me to try the dipping method. I found it to be so much better than the painting method. The flowers looked like they were literally made out of plaster or clay which is the desired look. The flowers not only looked beautiful but dipping the petals was an easier and quicker application process. Win-win-win!
Take the time to completely separate the petal layers of your faux flowers.
Initially, I did not separate the petals of my flowers and I regretted it immediately. Whether I tried painting or dipping the flowers, they did not turn out the way I envisioned. In trying to save time, by not separating them, I created a mess for myself. In the end, the finished products were far less than desirable.
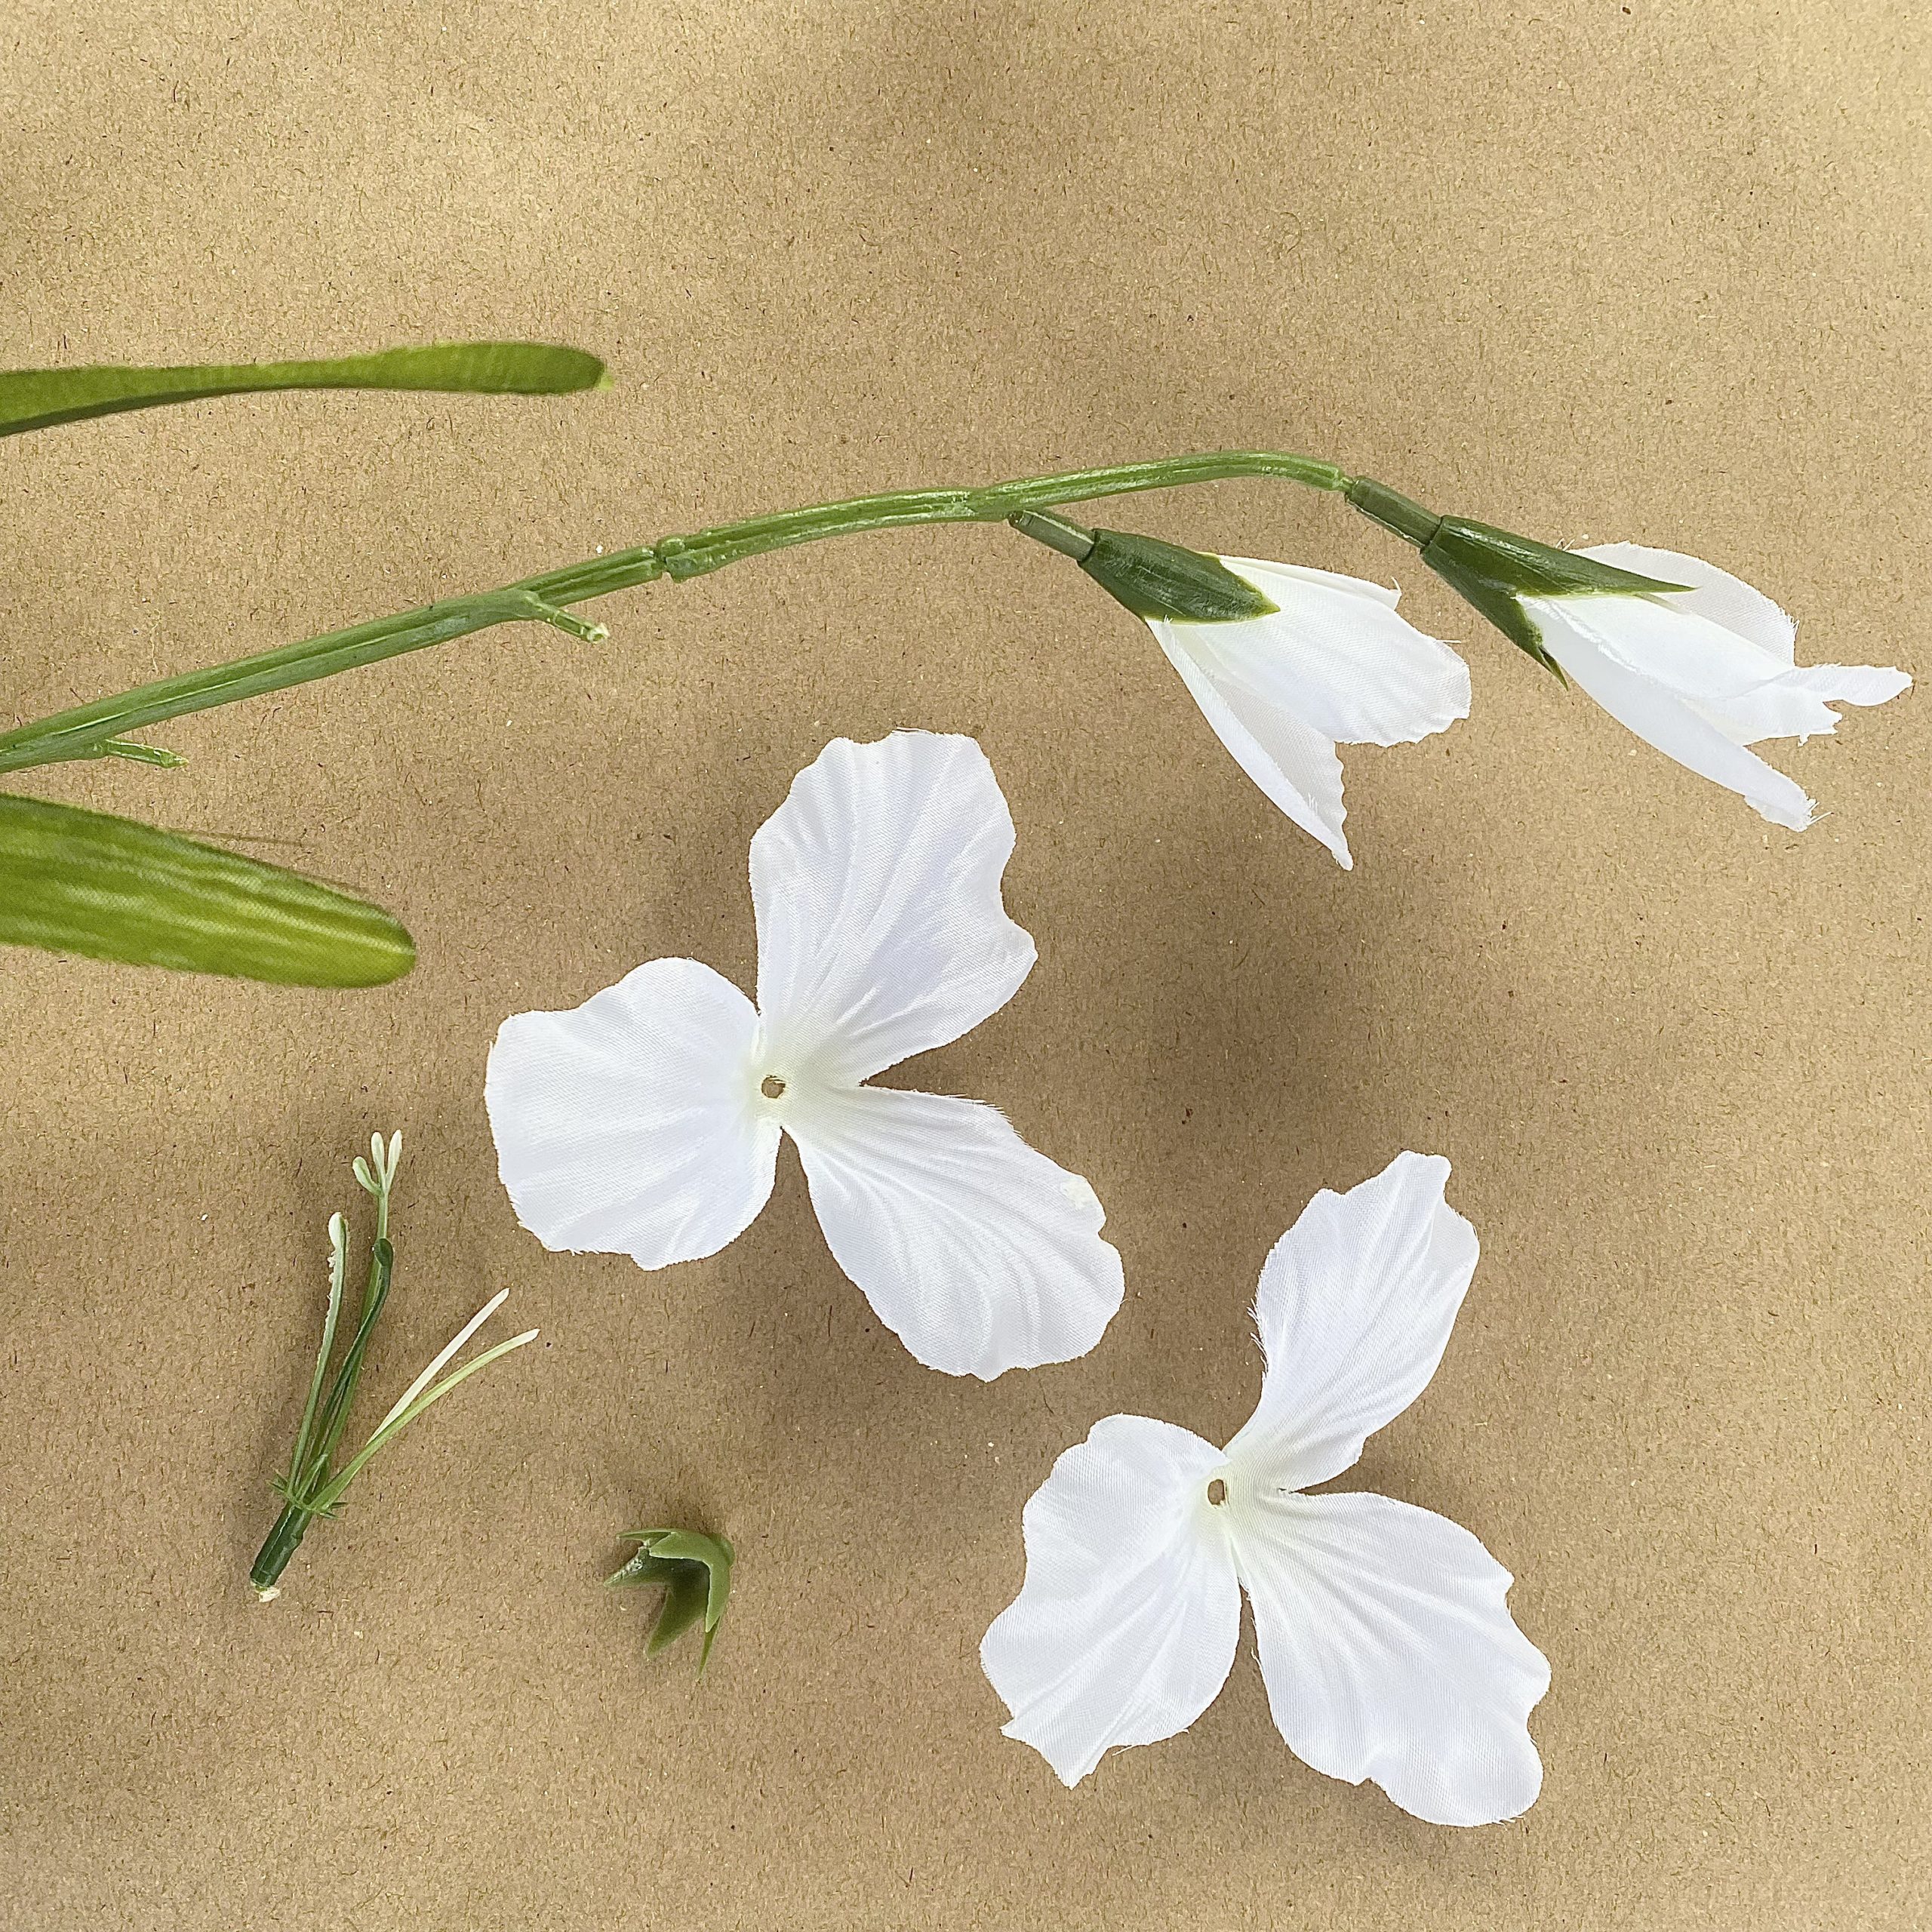
The gladiolus that I used only had two layers of petals, so separating them didn’t take much time. I removed the plastic back piece, took out the centerpiece of the flower, and the two layers of petals were separated. They were also easy to reassemble once the petals were dry.
By separating the petals, I was able to dip them in the plaster quicker before it started to dry. The application of plaster on each petal was smoother and more thorough with them separated.
Plaster of paris does not adhere to plastic.
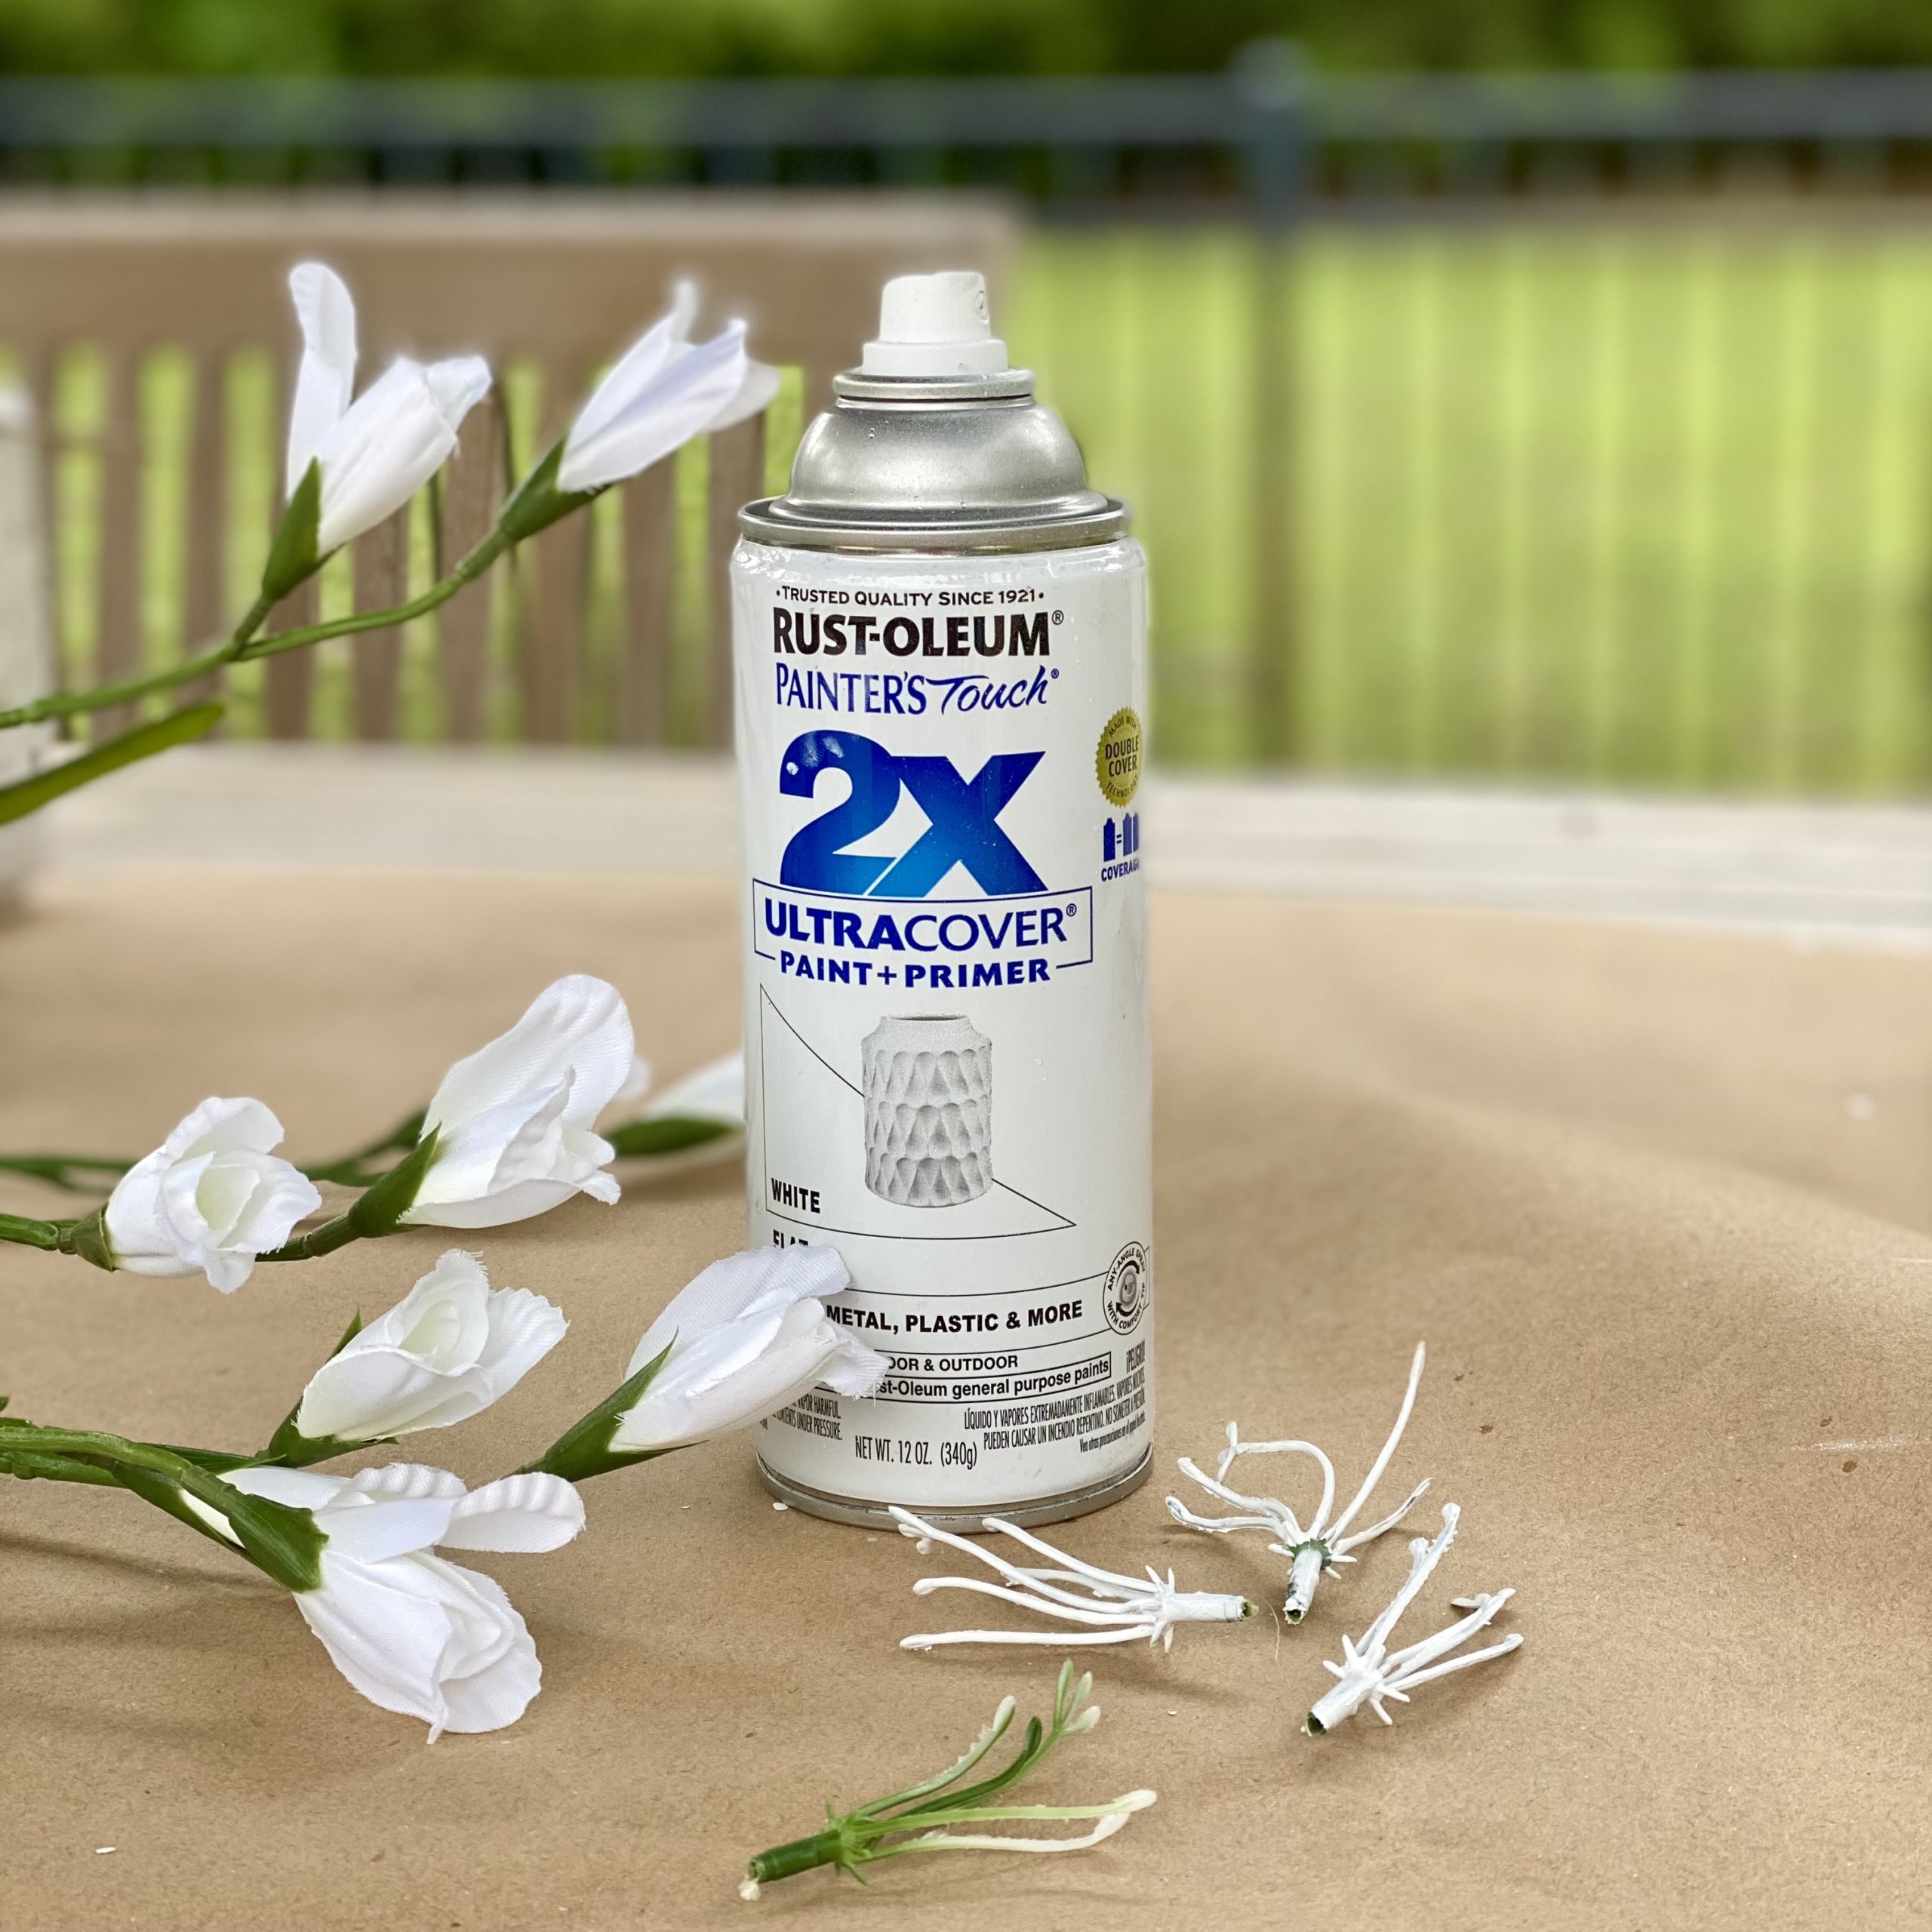
This information alone is going to save you hours of time! The center (the Stigma and the Stamen) of the gladiolus I used is plastic. Turns out, plaster of paris does not adhere to plastic. I tried so hard to get the plaster to adhere to the plastic and it failed every time. In the end, I decided to use some leftover spray paint and paint those pieces before I reassembled the flowers.
The moral of this story is that if the flowers you use have plastic pieces, consider painting them or just leaving them.
What you need to make plaster of paris floral napkin rings:
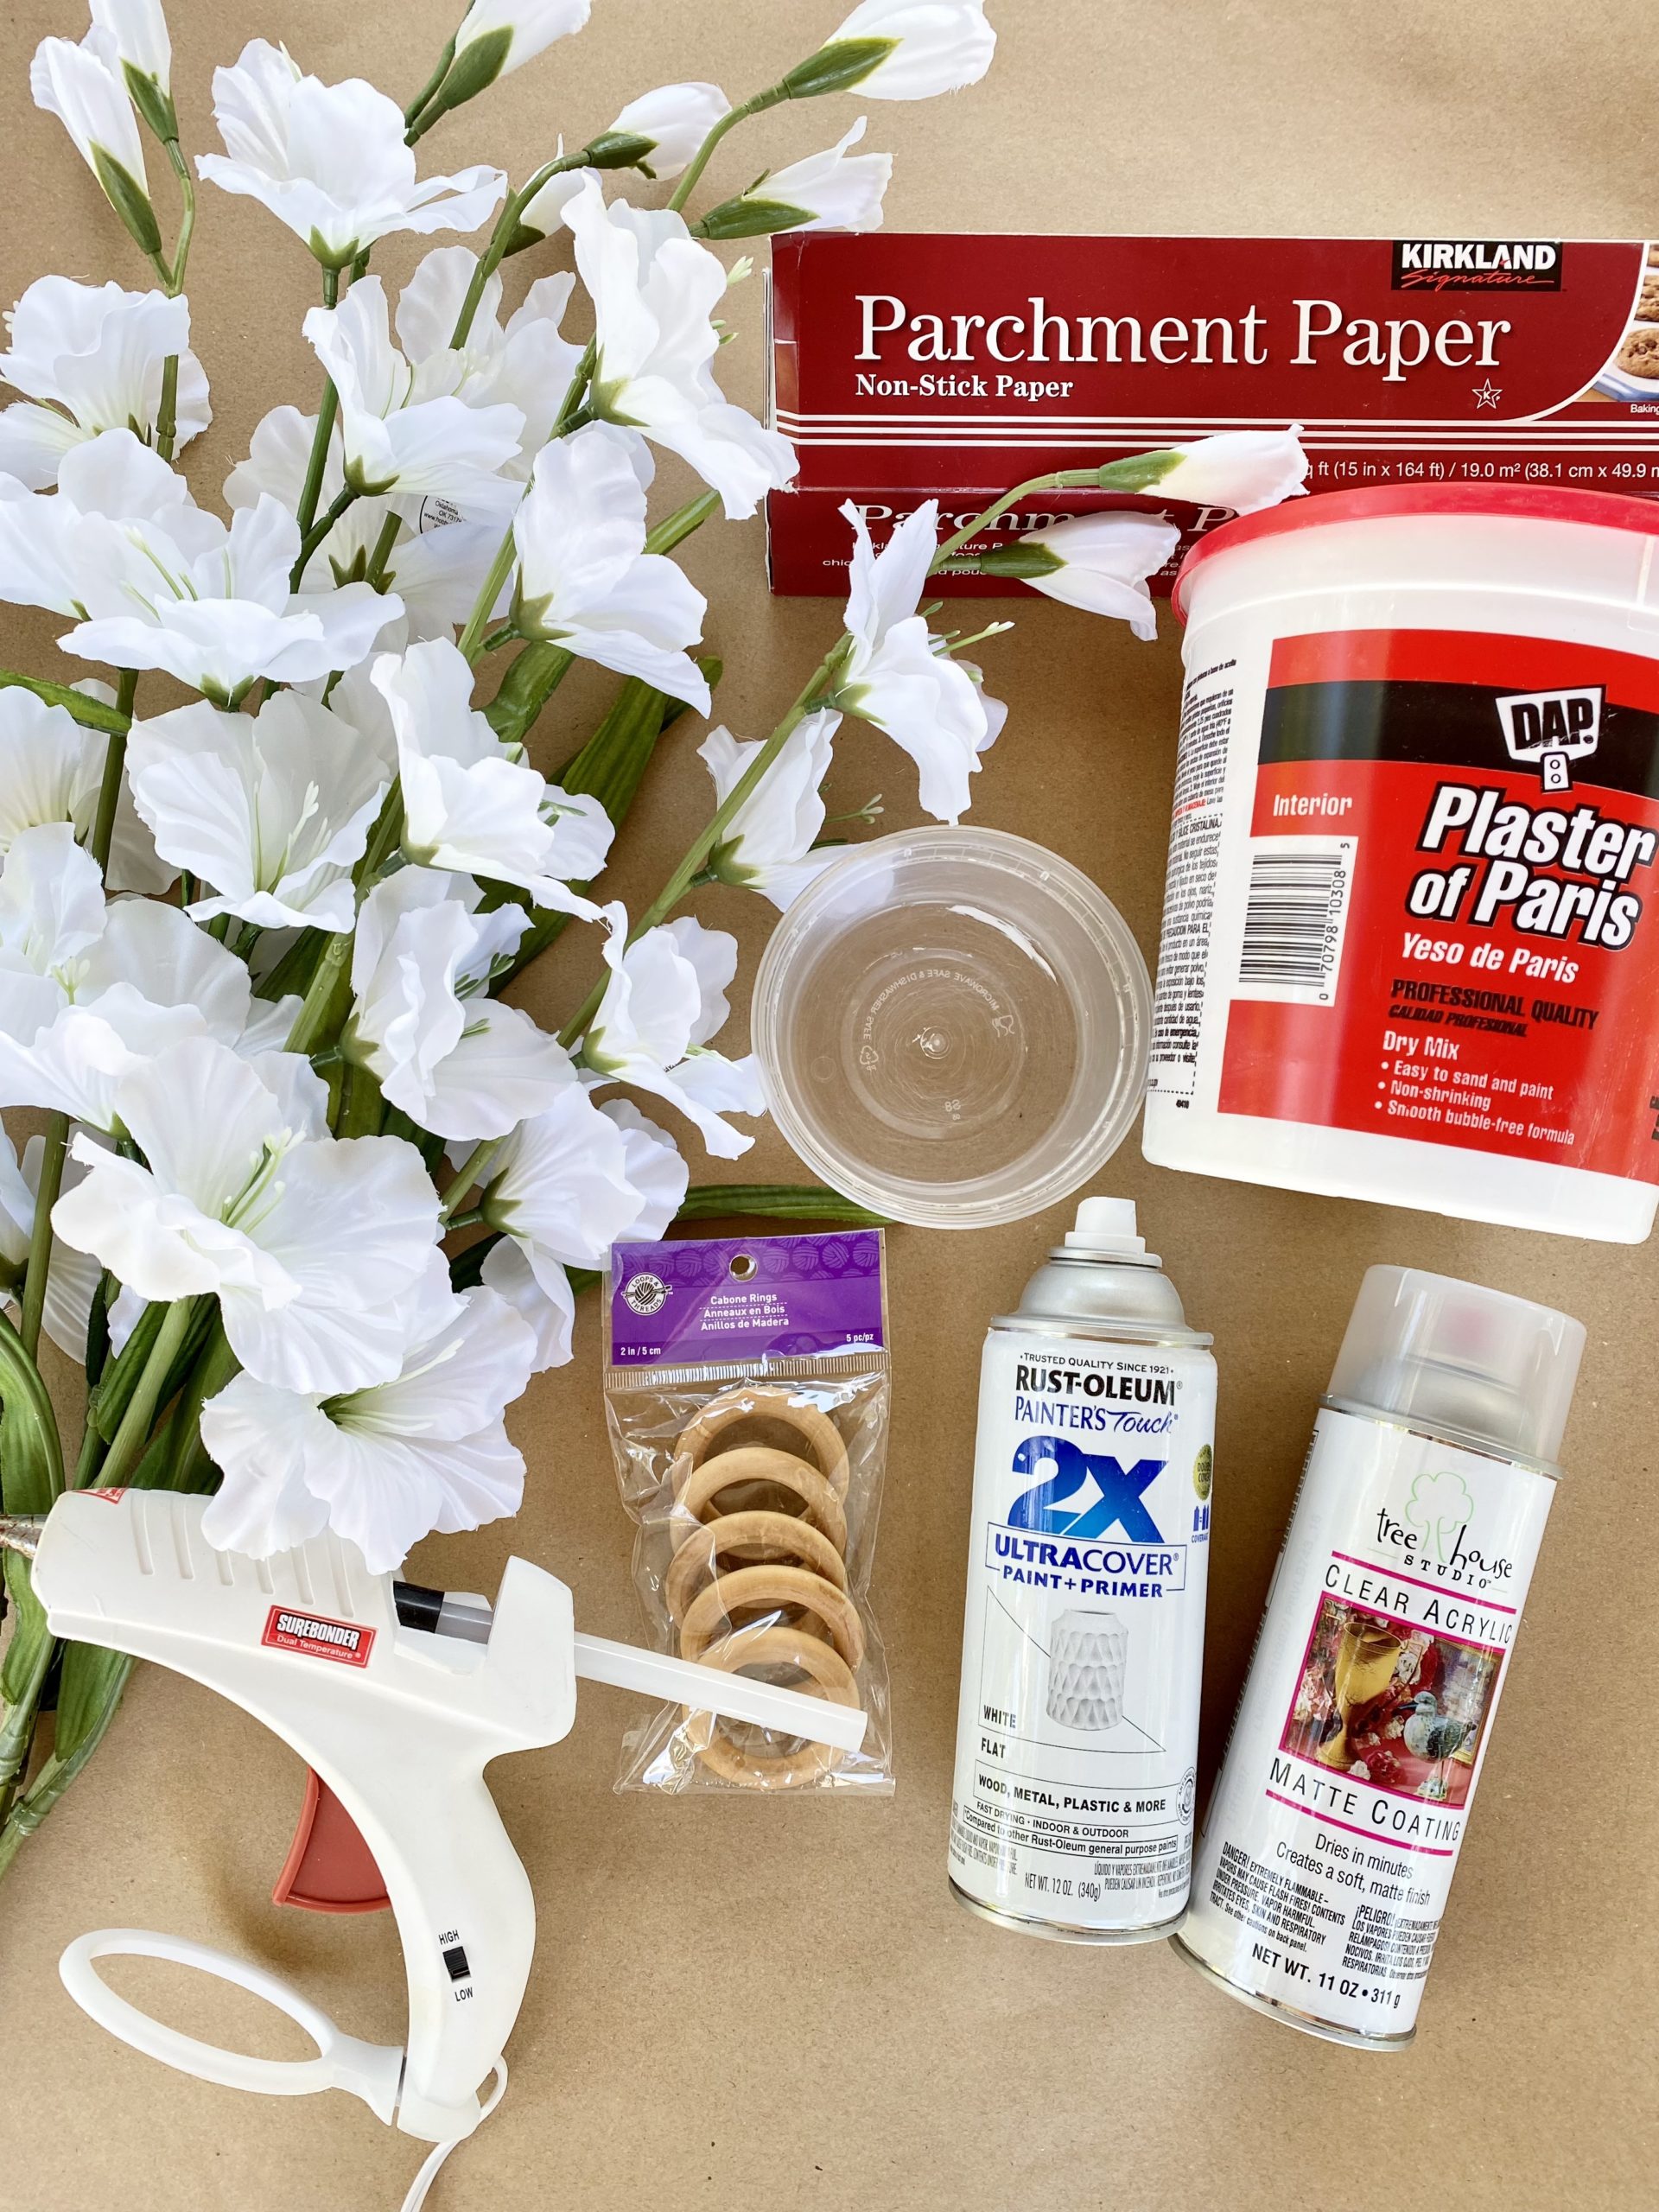
- Workspace protective covering to work on (plastic tarp or paper)
- Parchment paper
- Faux flowers (I used these.)
- Plaster of paris
- Napkin rings (I used these.)
- Hot glue
- Disposable plastic bowl
- Toothpick
- Plastic gloves (optional)
- Spray paint (optional)
- Stain (optional)
- Clear acrylic matte spray (optional)
How to make plaster of paris floral napkin rings:
- Prepare the work surface. (I used brown paper on the table and a sheet of parchment paper on a cookie sheet to put my petals on to dry after they were dipped in the plaster of paris. The cookie sheet made them easy to transport carefully.)
- Take the faux flower off the stem and remove the back piece holding the layers (petals) of the flower together. Separate the layers and the center from the back piece.

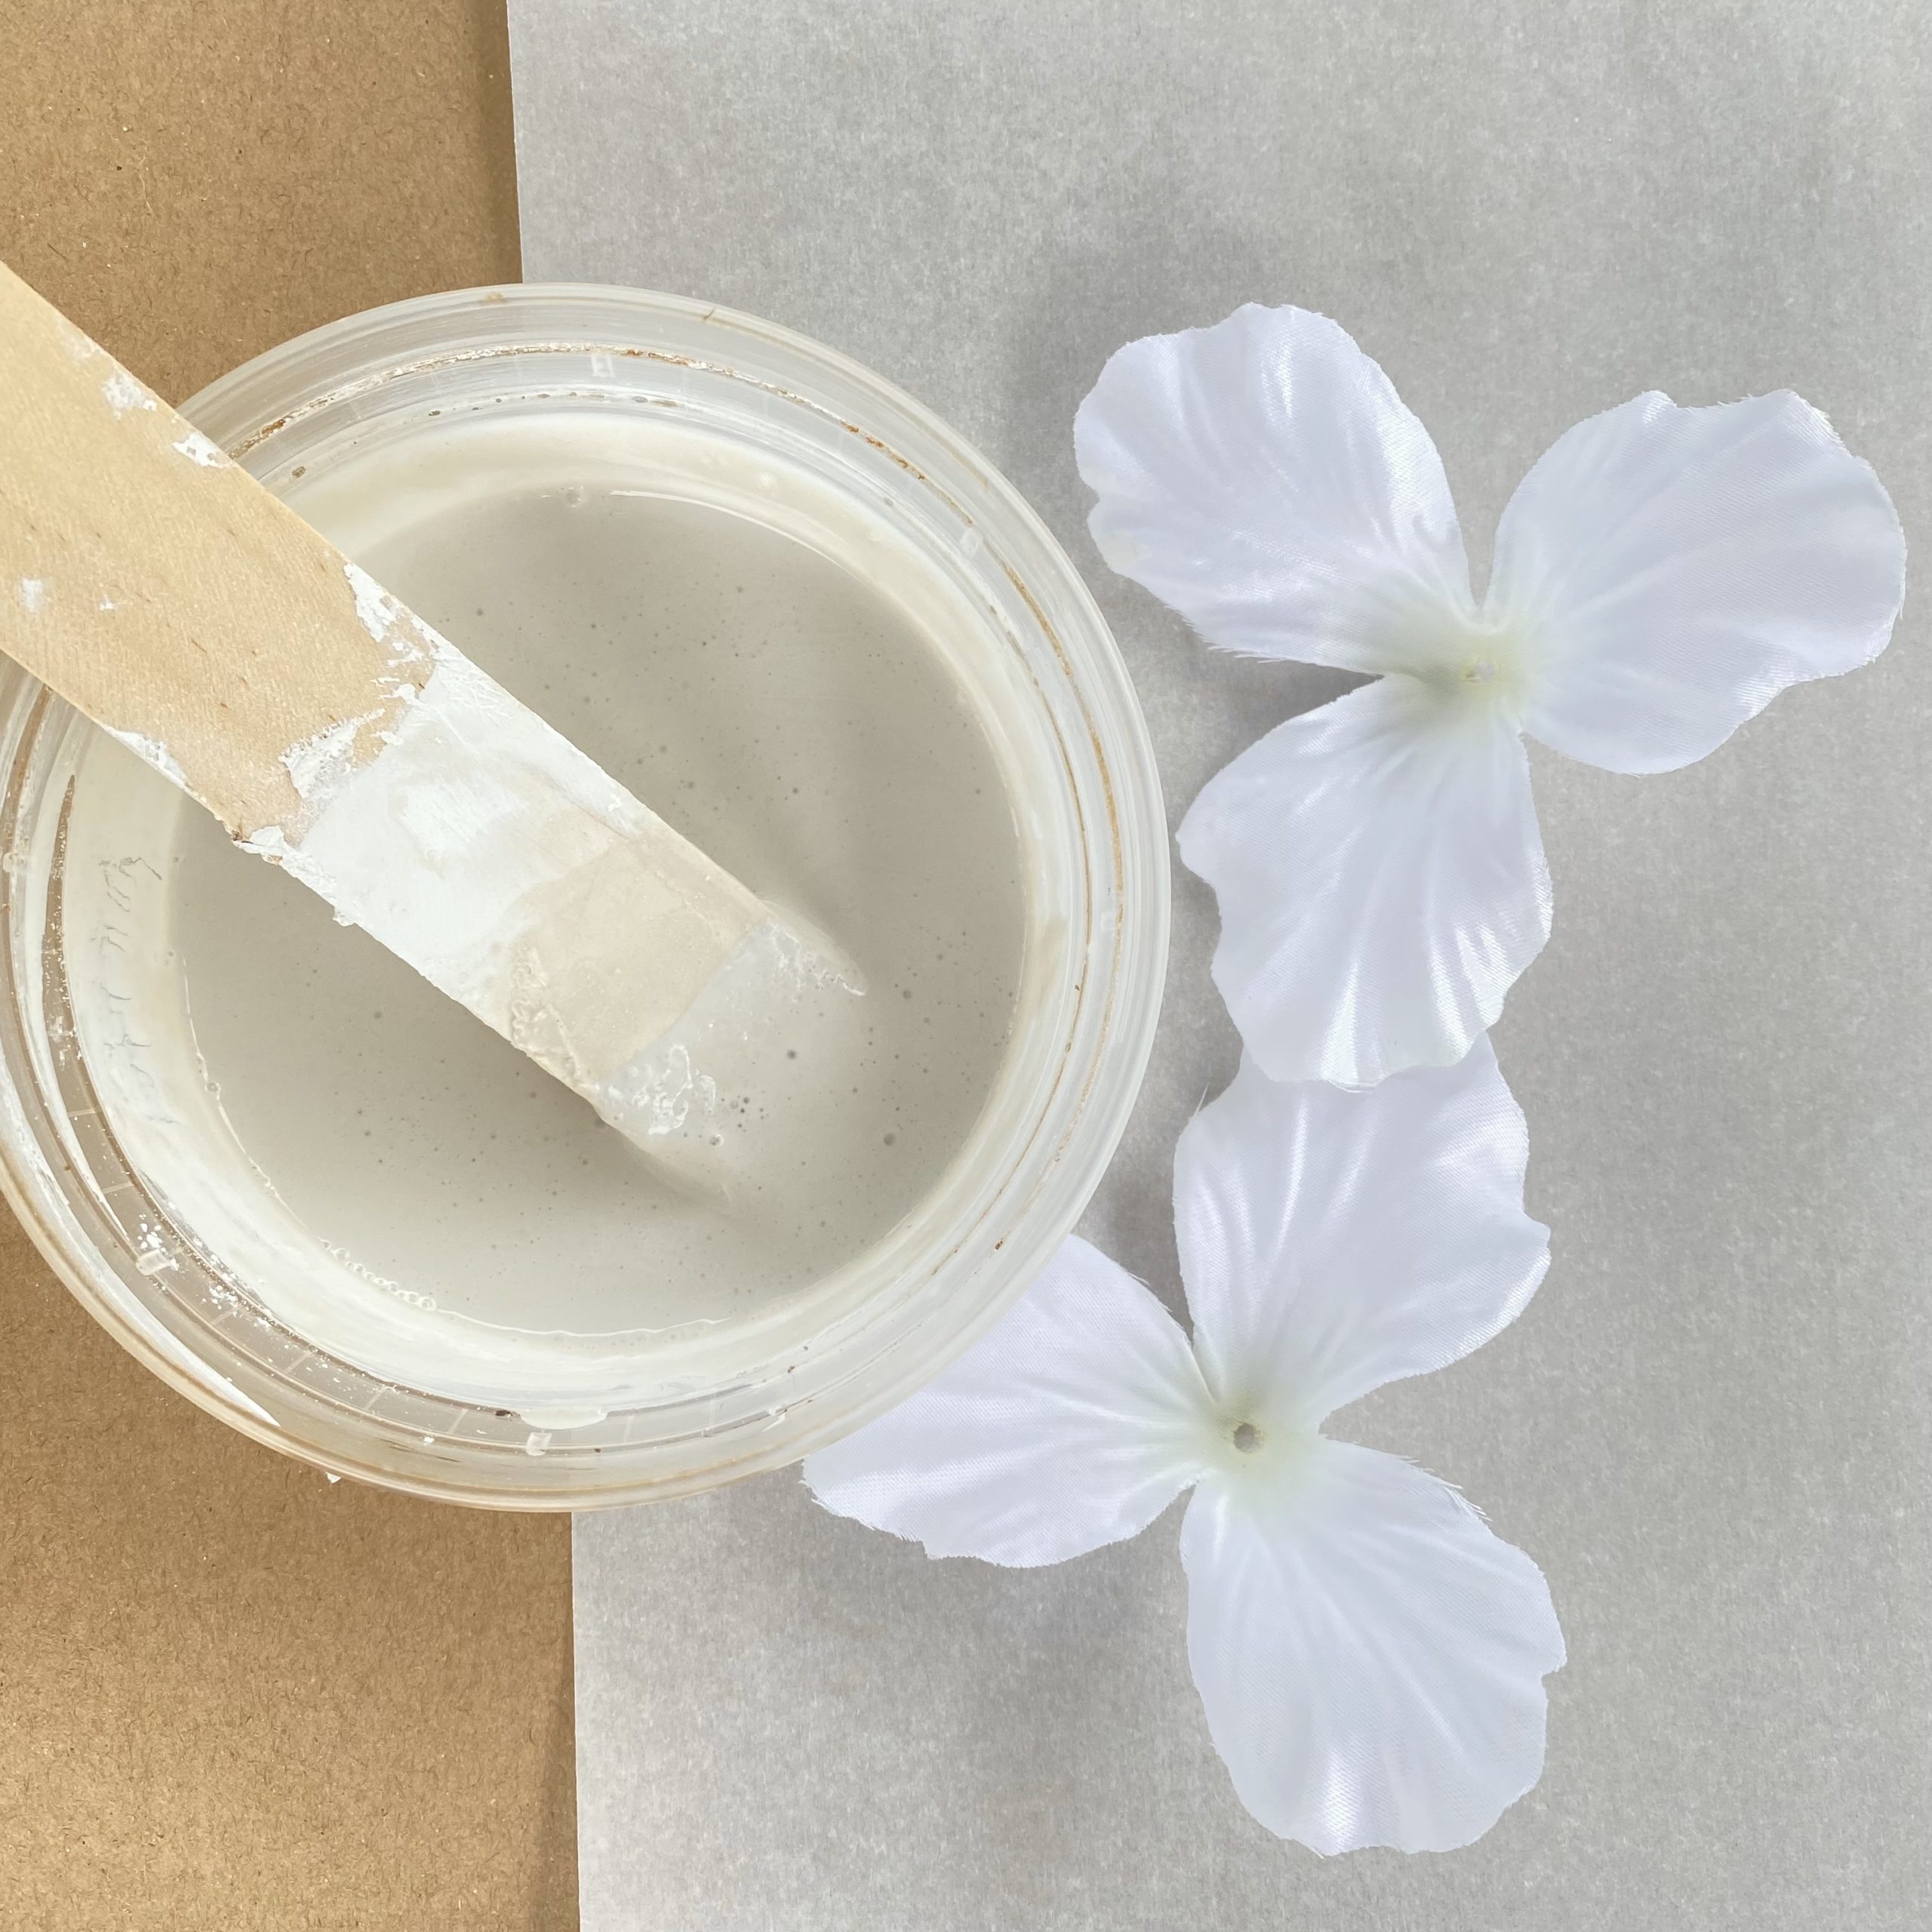
- Mix up a small batch of plaster of paris according to the directions on the container. (I used 1/3 of a cup of plaster of paris per batch.) The consistency of the plaster should be slightly looser than pudding.
- Quickly, but carefully, dip the front and back of the petals. (You may want to use plastic gloves, this gets messy.) Gently, shake off any excess (dripping) plaster. Place it carefully on the parchment to dry. Continue dipping each petal until the plaster of paris gets too hard to work with. Depending on the number of flowers you are making, you may need to mix up a few batches. (Once the petals are on the parchment to dry, I use a toothpick to make sure the hole in the middle doesn’t fill up with plaster. Keeping this hole open makes it much easier to reassemble the flowers.)
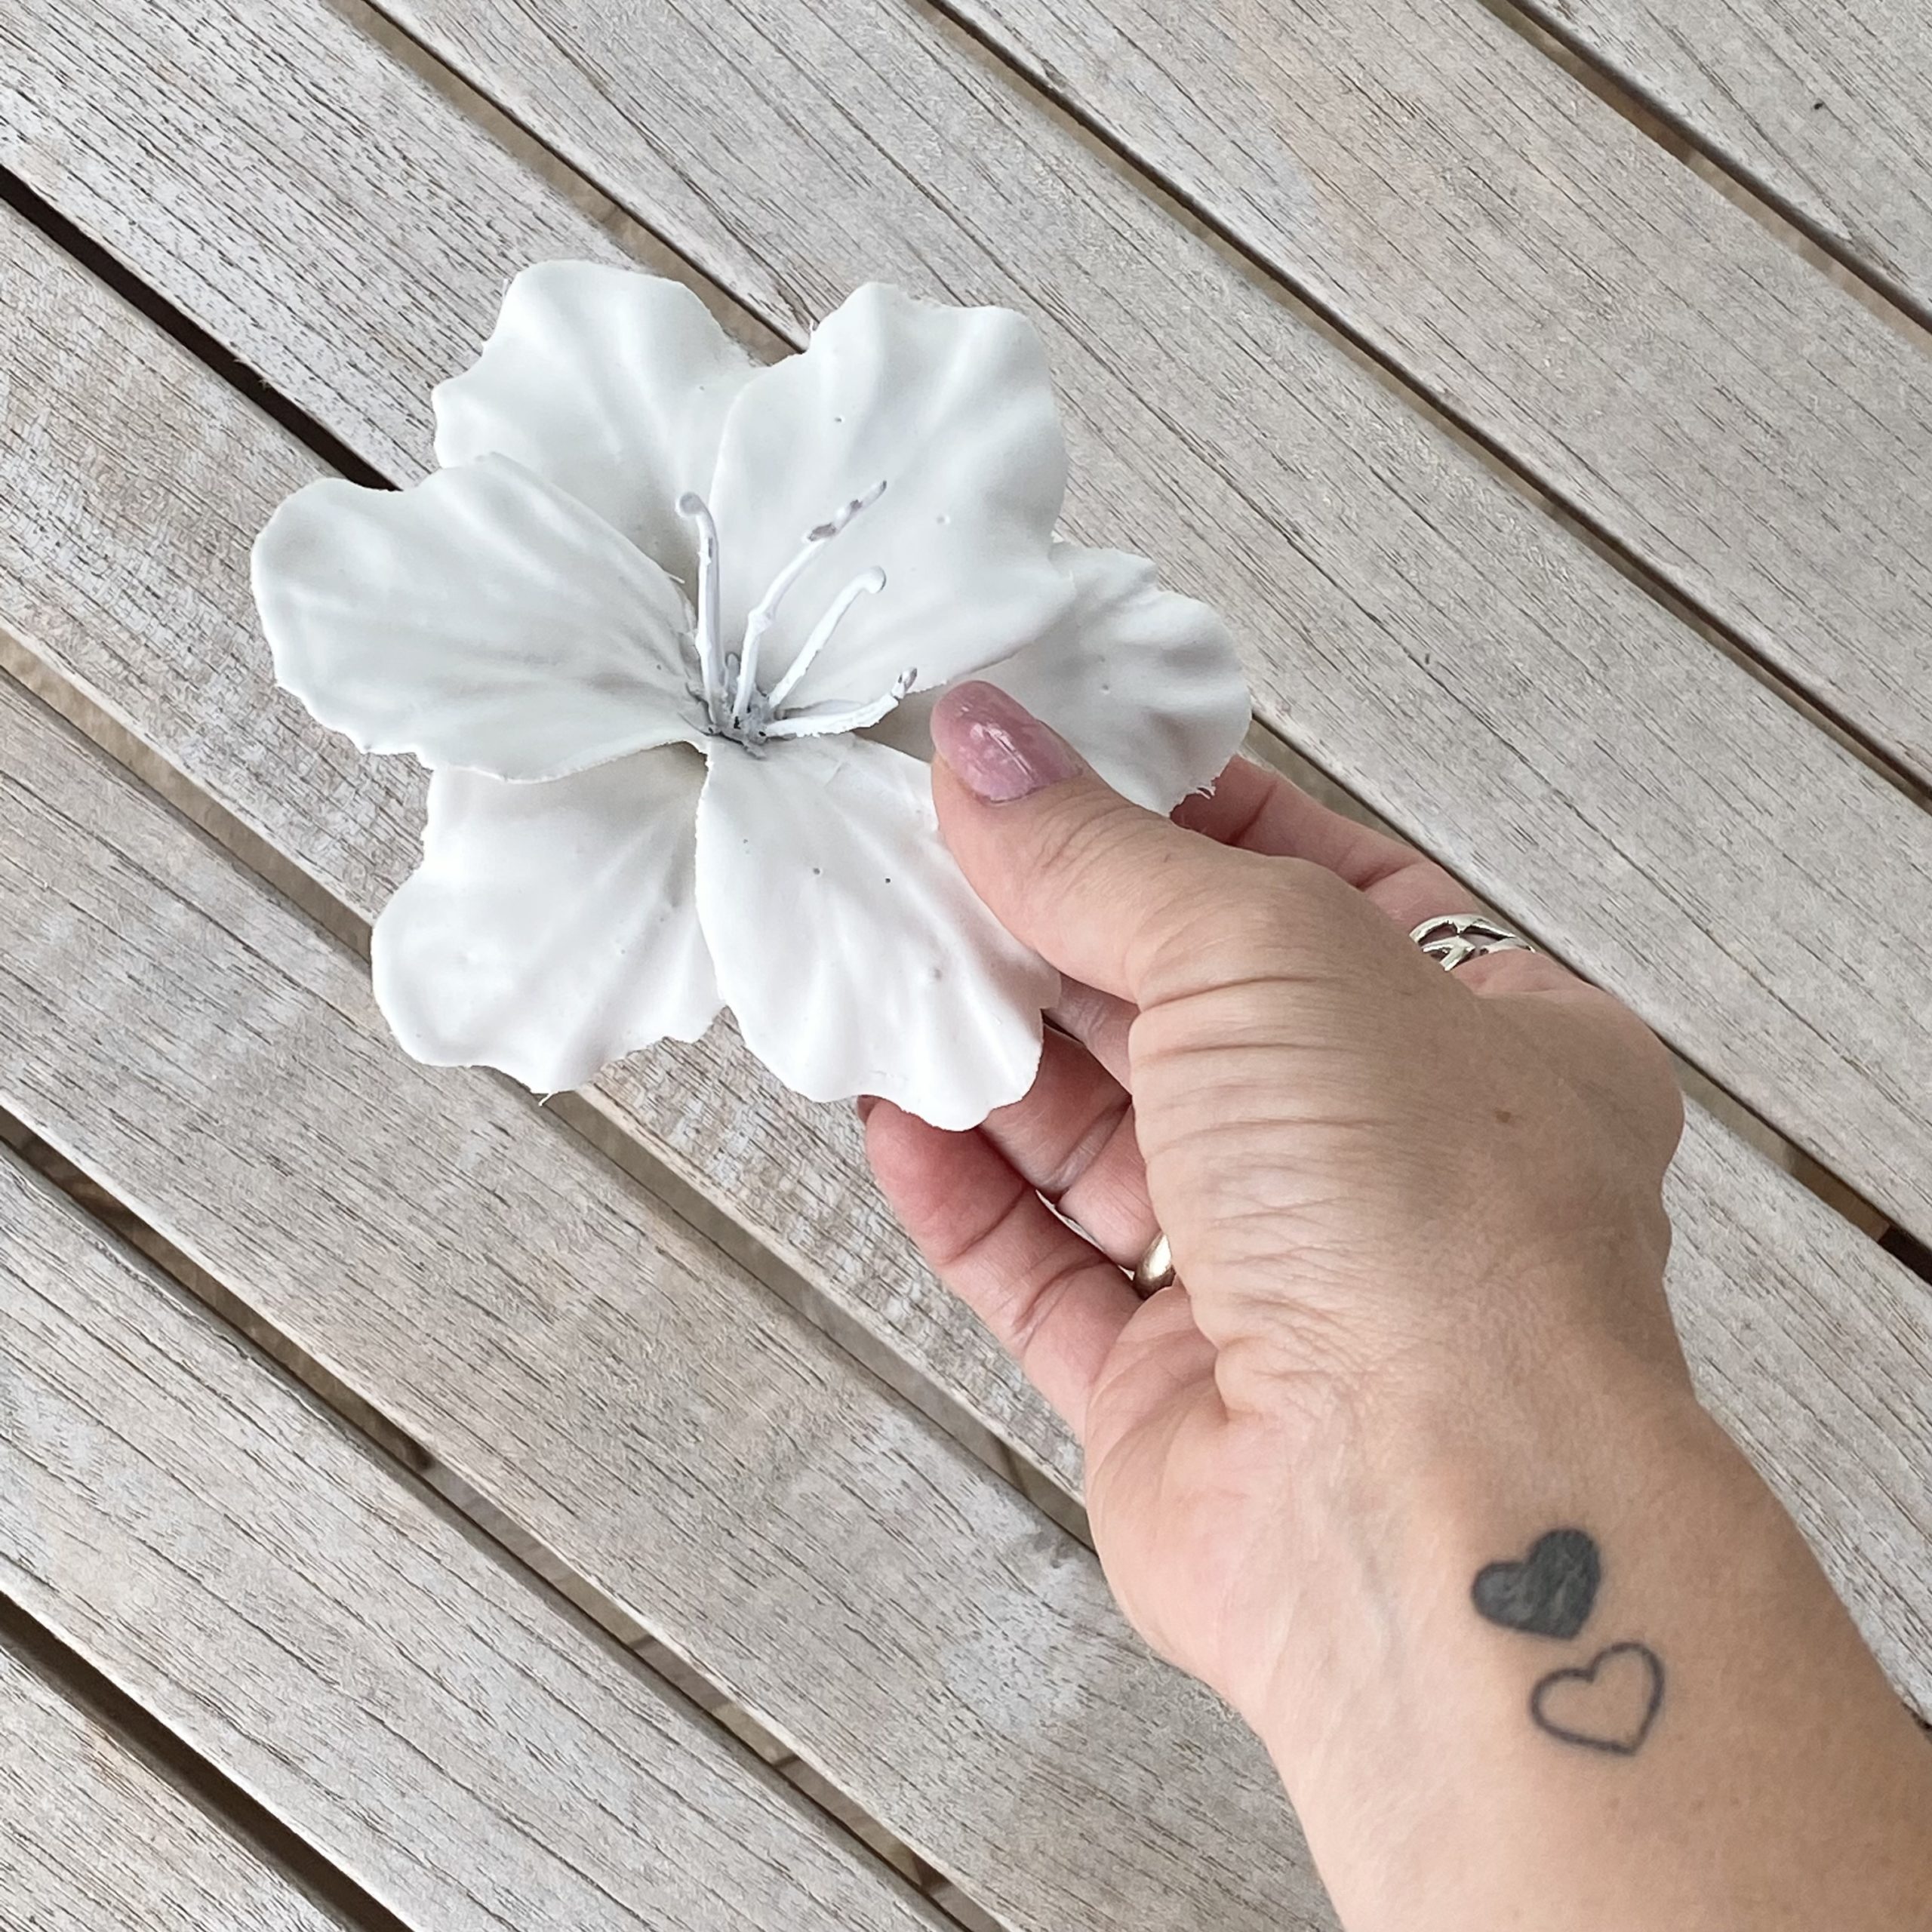
- Allow the petals to dry thoroughly, preferably overnight.
- While the plaster of paris is drying on the petals, spray paint any plastic pieces of the flowers and allow them to dry. This is also a good time to stain the napkin rings if you want.
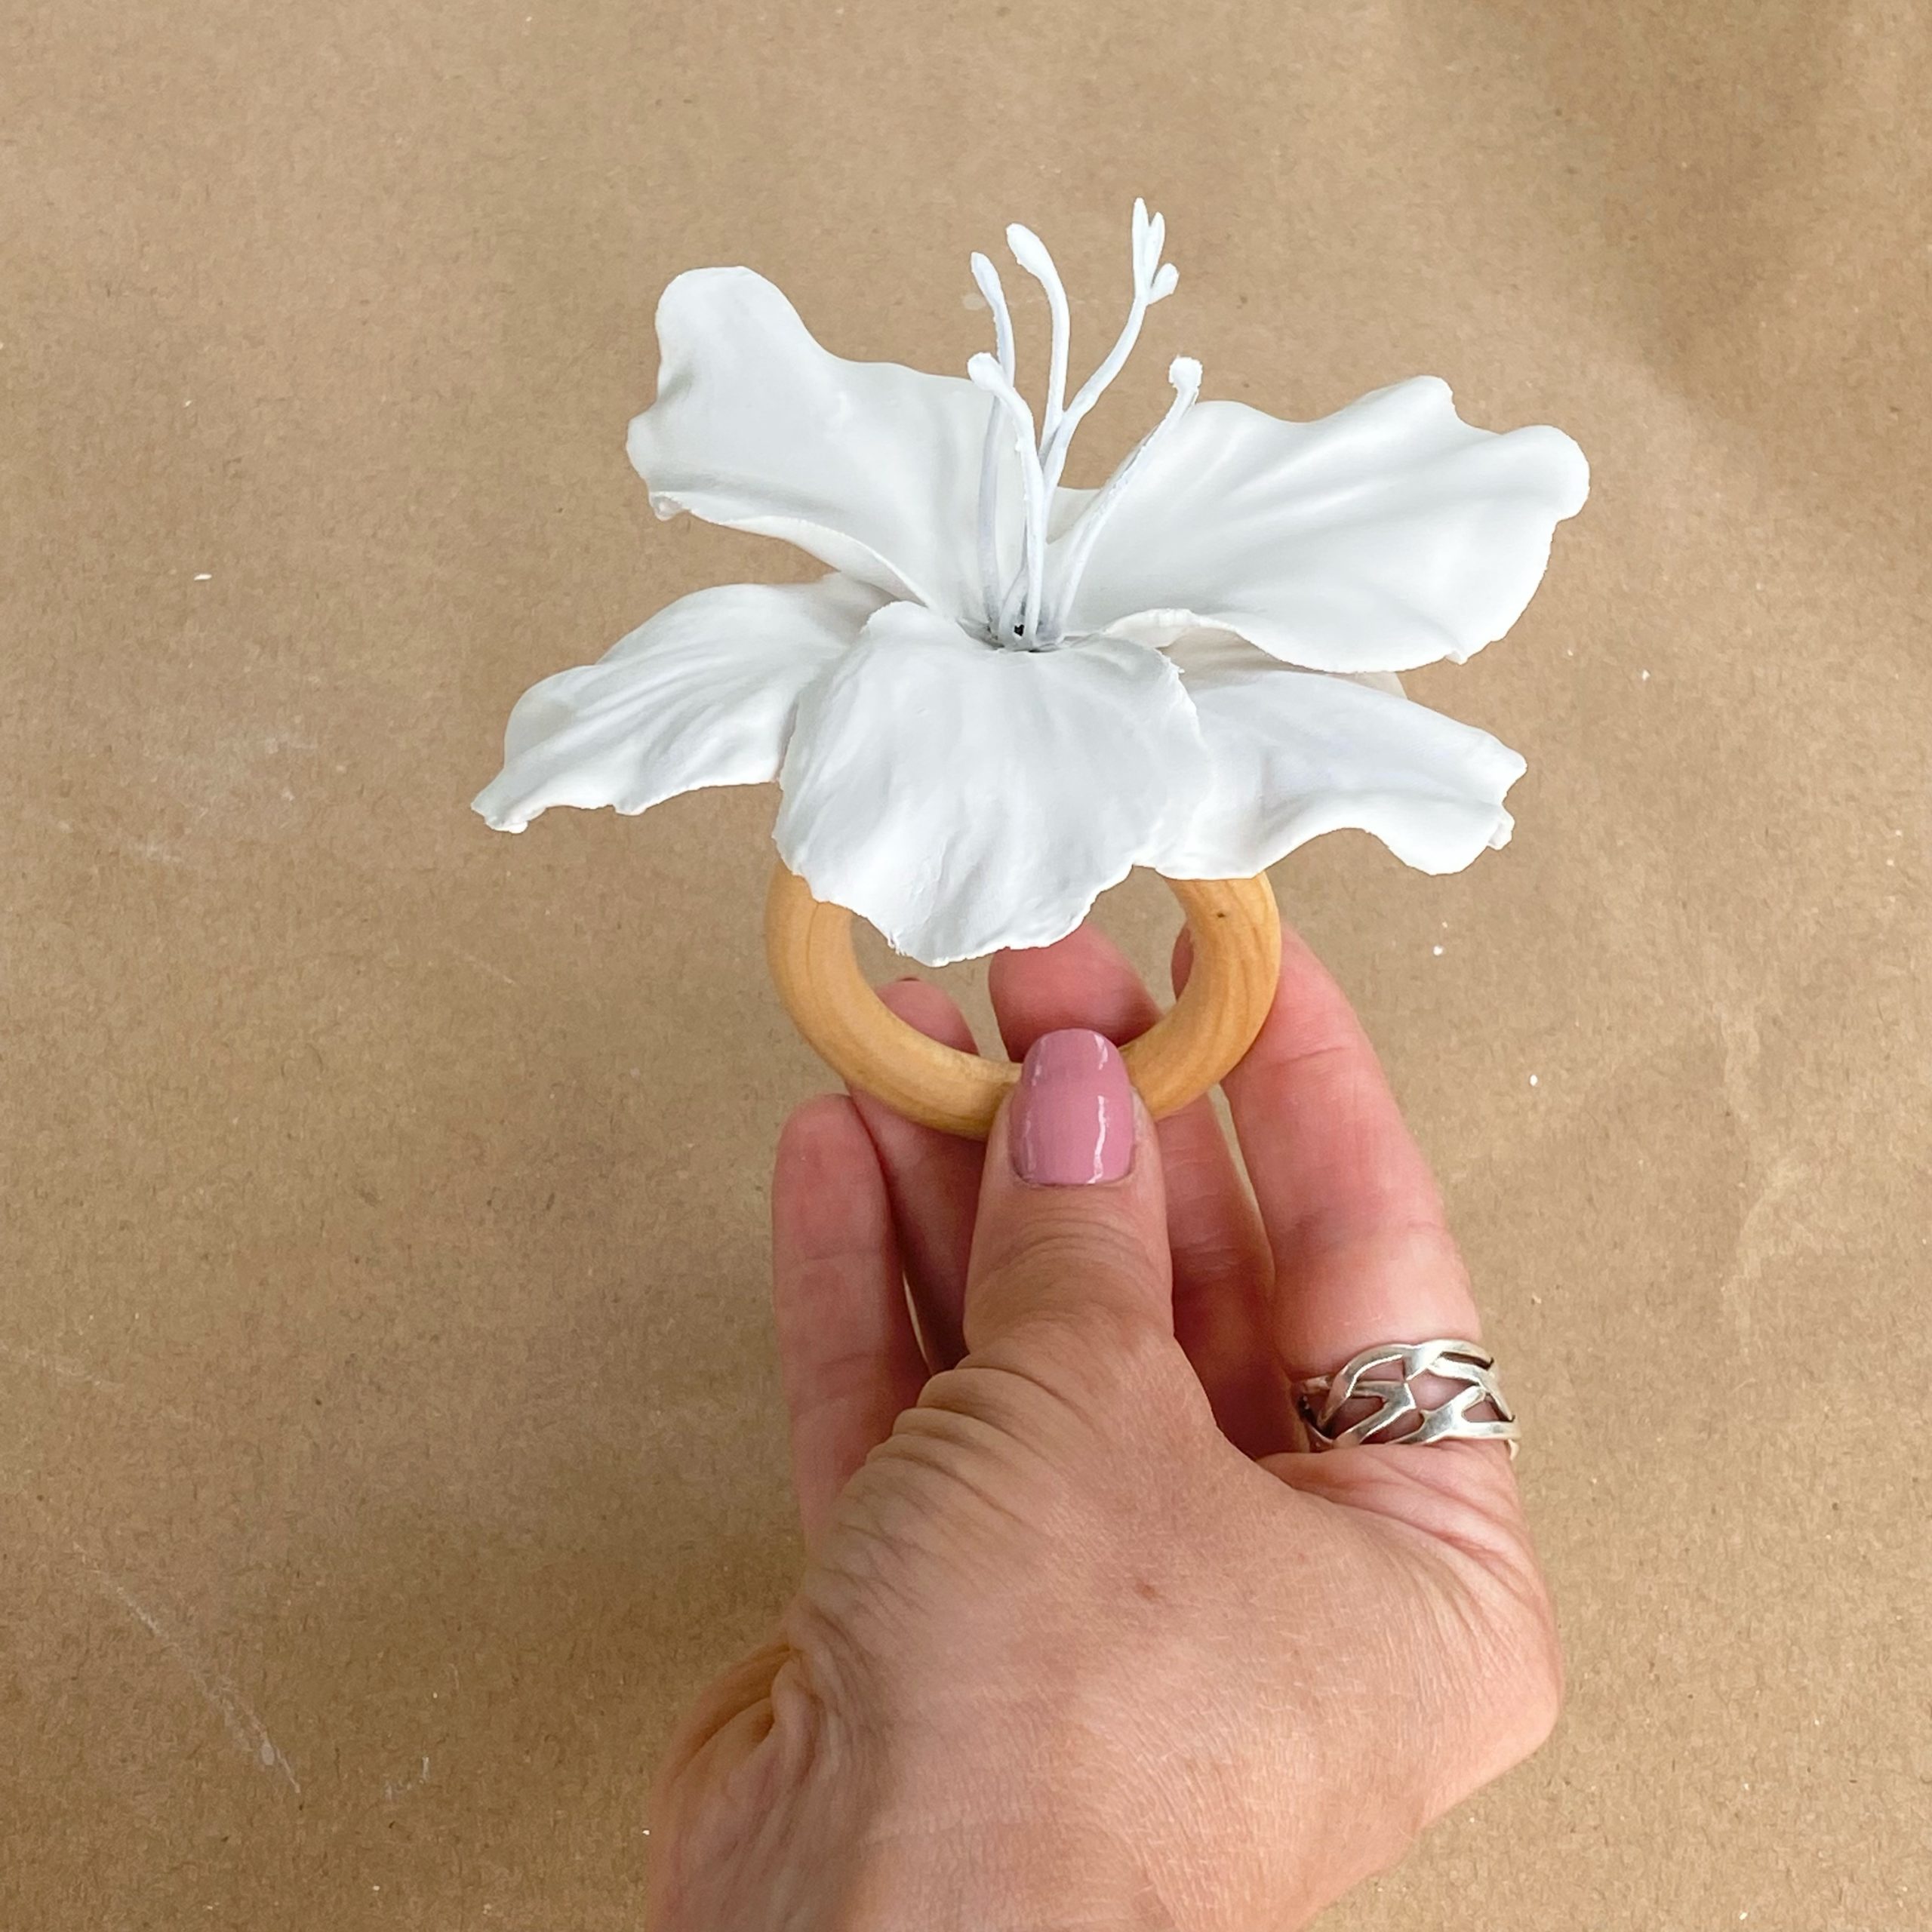
- Once the petals and plastic center pieces of the flowers have dried completely, carefully, reassemble the flowers starting with the center piece, then the petals, and then resecure the back piece.
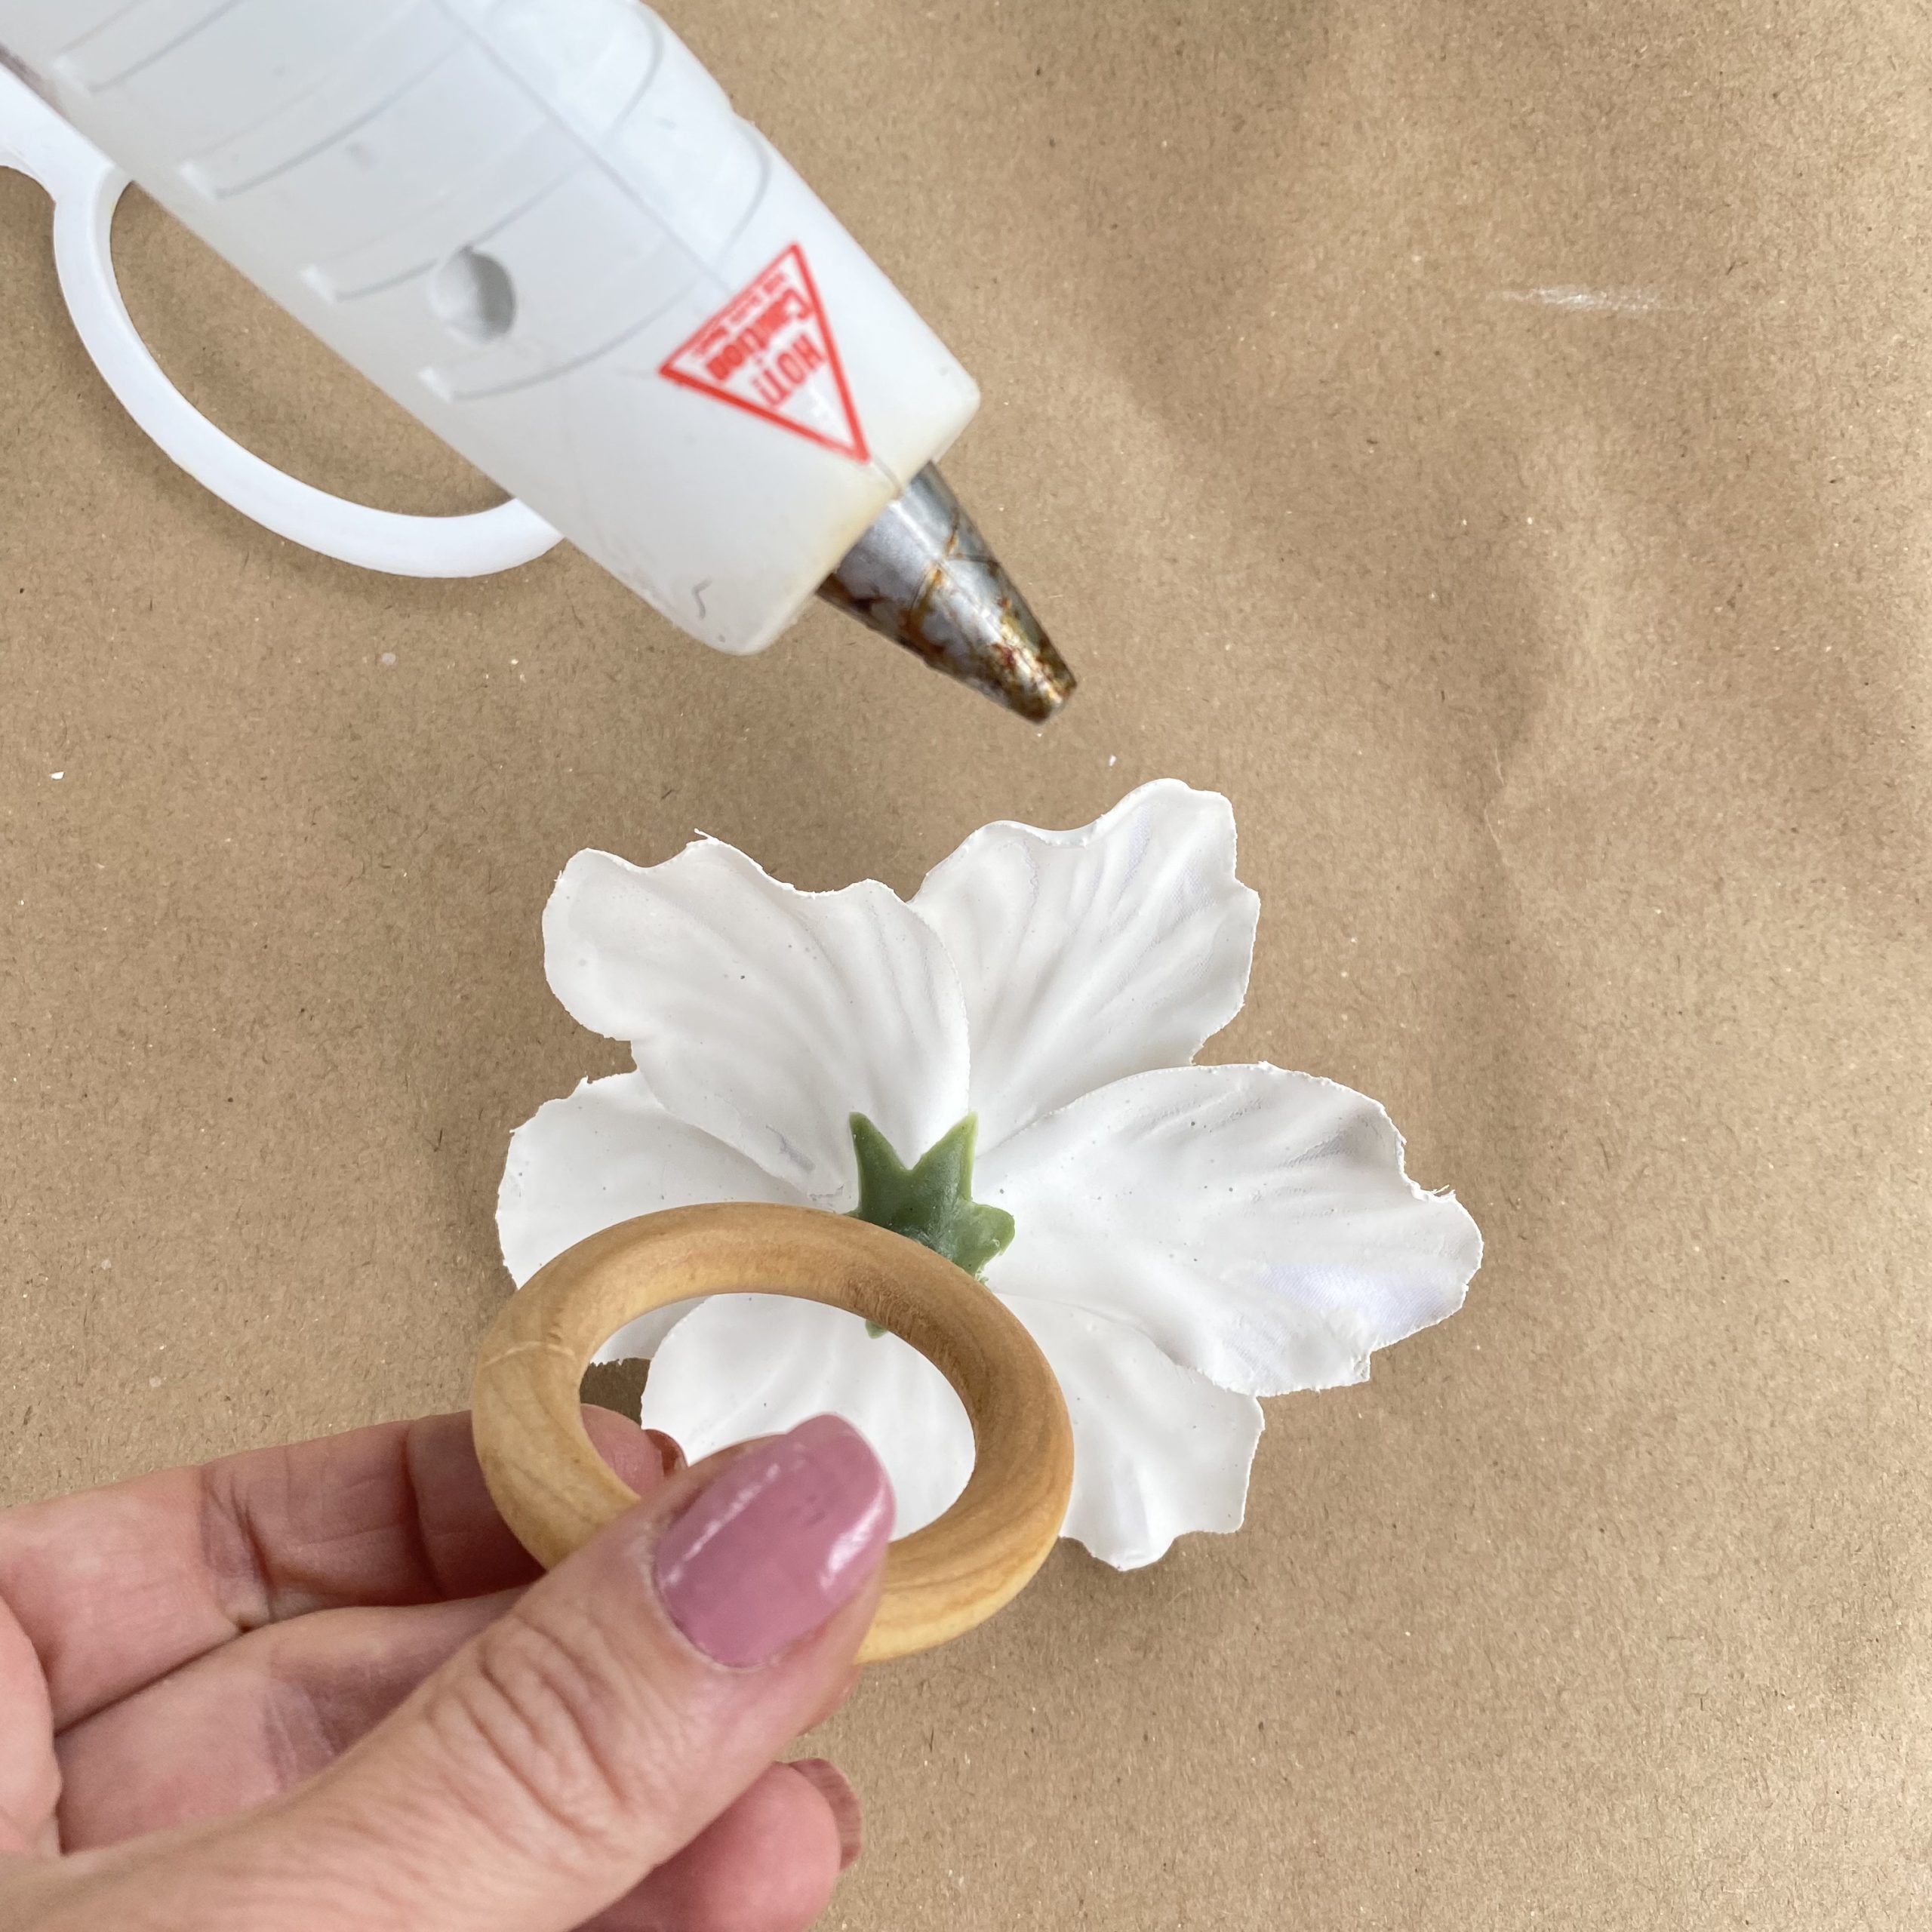
- With the plaster of paris flowers reassembled, use a pea-sized dot of hot glue to secure the flowers on the napkin rings and allow the glue to dry completely.
- To strengthen the plaster of paris on the flowers on the napkin rings, spray a clear matte acrylic on them. Take care when storing the napkin rings for the next use.
Time to set the table.
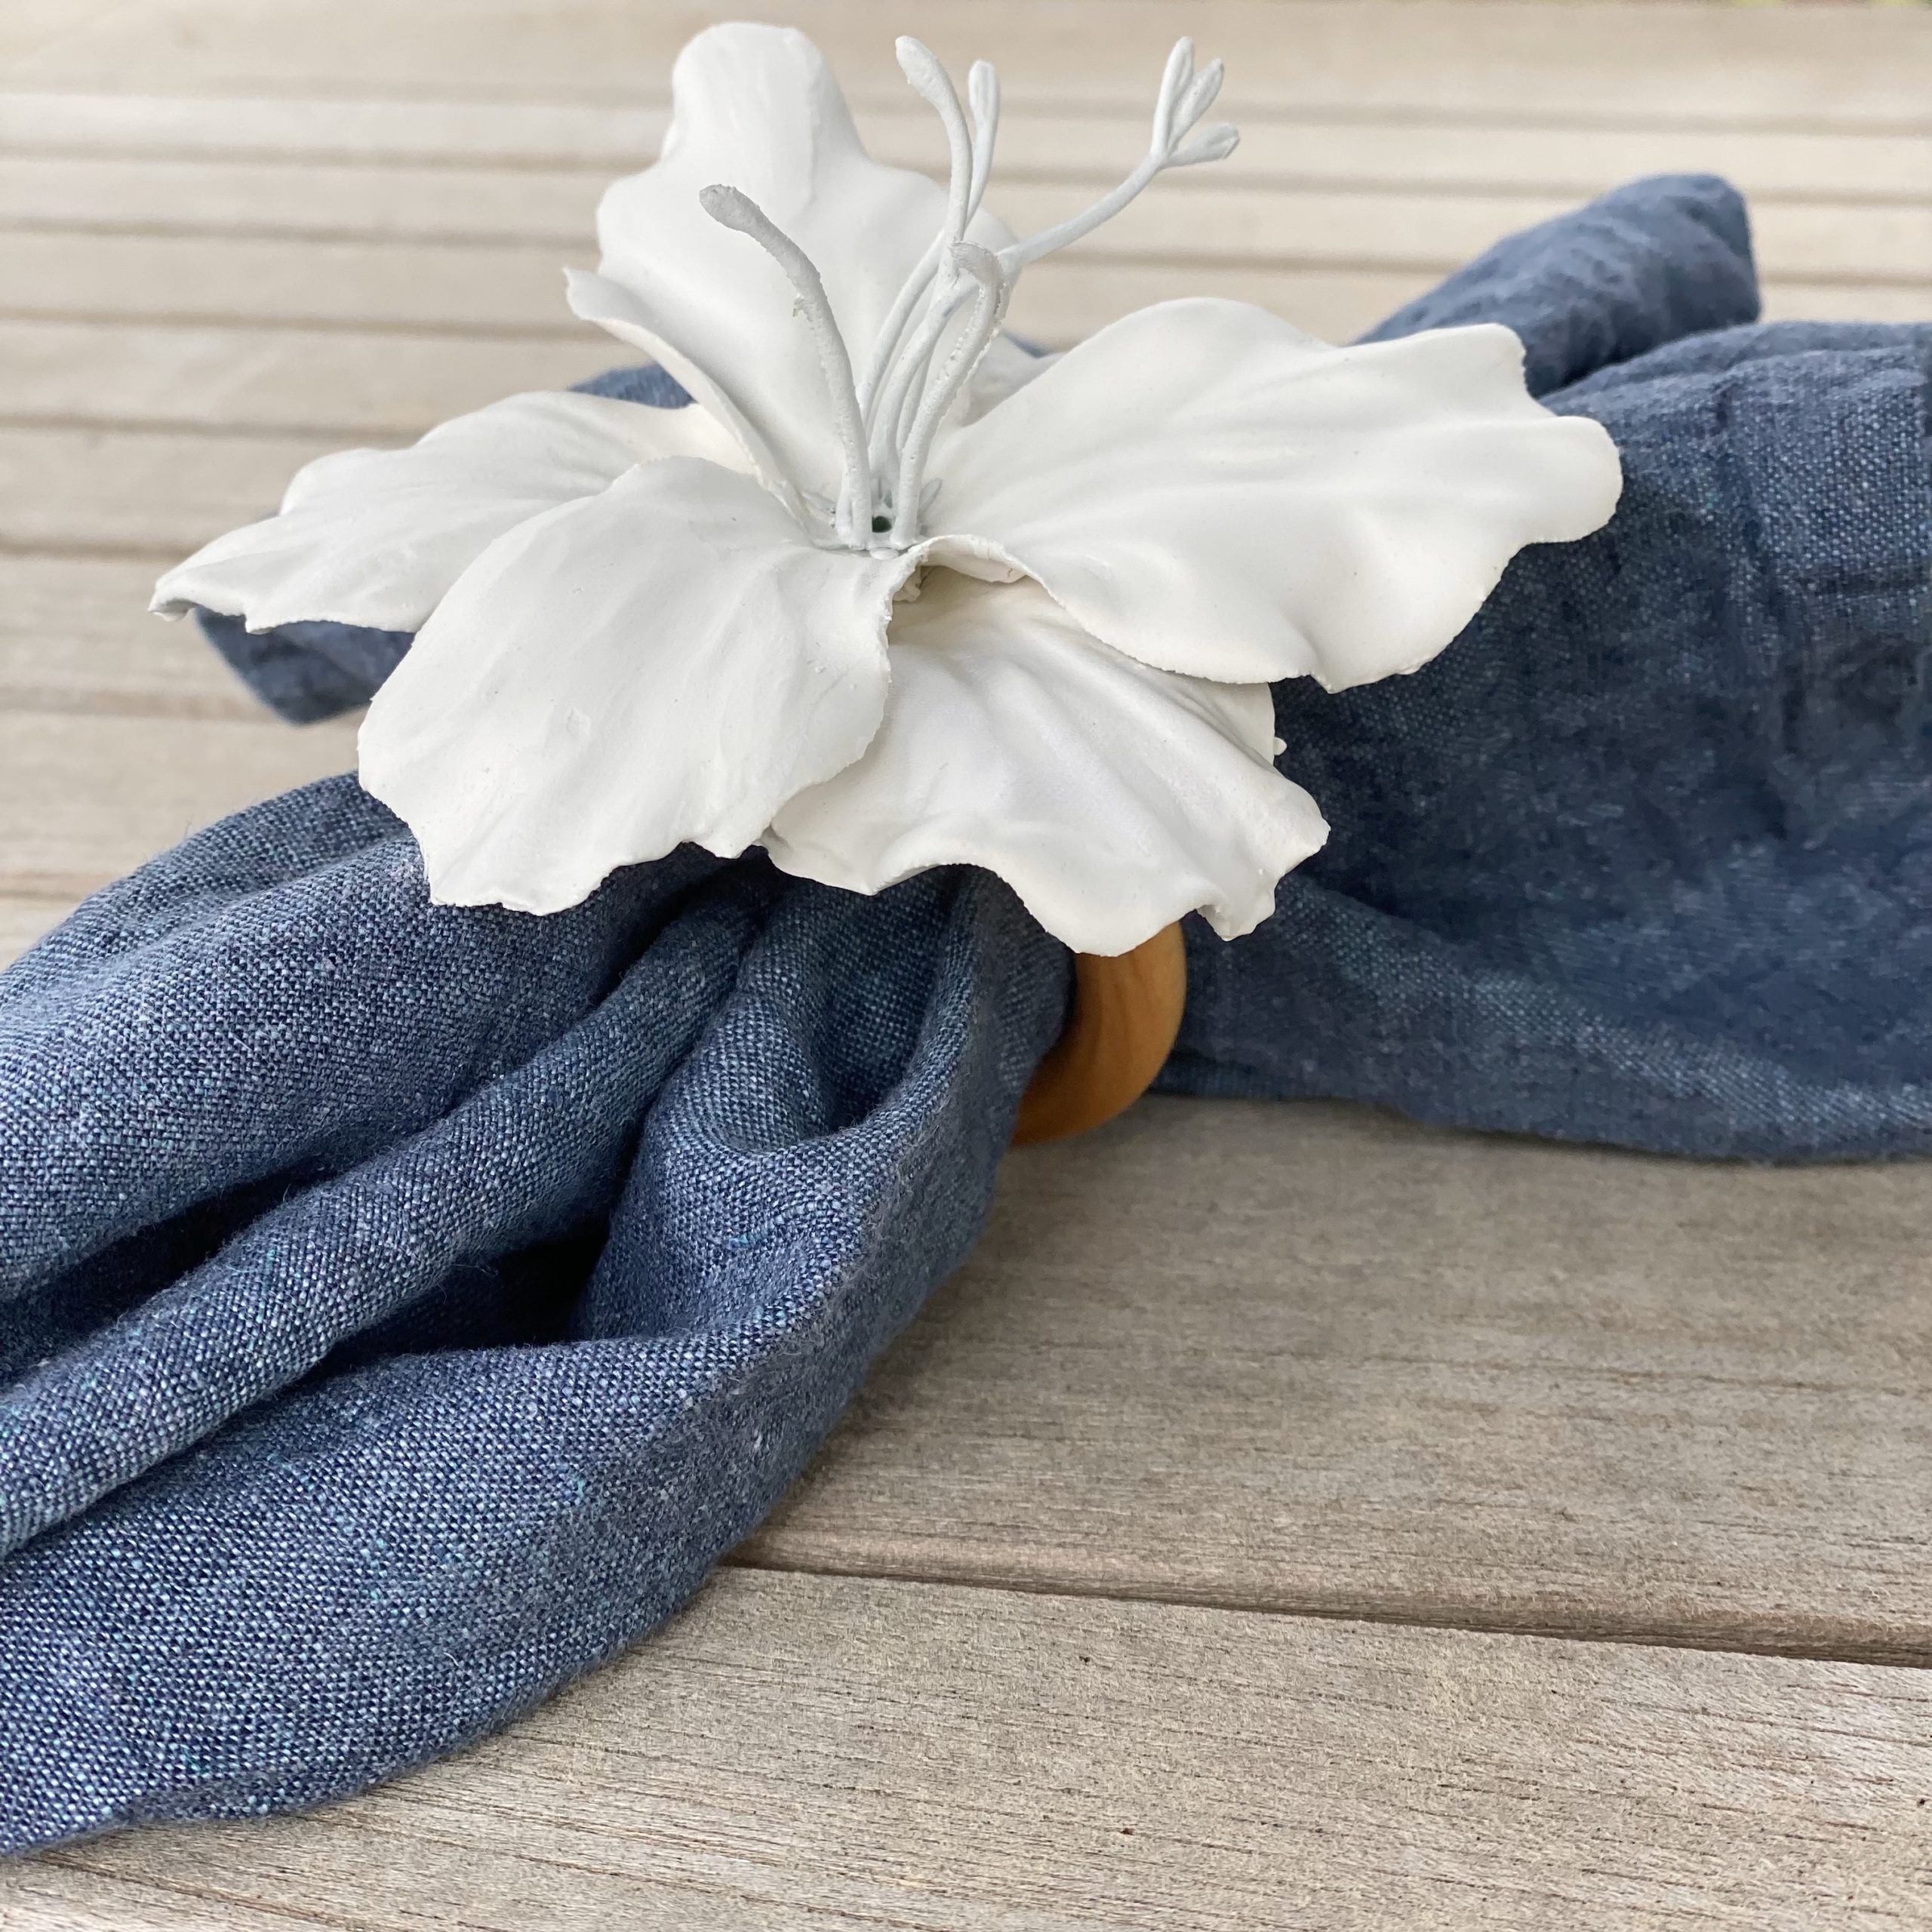
With the plaster of paris floral napkin rings complete, it’s time to set the table. The neutral clay-like finish to these flowers compliments any style and color scheme used in tablescaping. The floral design is perfect for Spring and Summer, but can be used all year round.
This Summer, I celebrated the arrival of my favorite season with a patriotic tablescape for the 4th of July. These handmade plaster of paris floral napkin rings were the perfect touch to my red, white, and blue theme.
I hope you enjoy making these plaster of paris floral napkin rings as much as I did! Happy Summer!!
Plaster of Paris Floral Napkin Rings – Video

This post contains some affiliate links for your convenience. Click here to read my full disclosure policy. Thank you for supporting my blog.


[…] this beautiful blue and white tablescape, I used plaster of paris floral napkin rings that I made. Having handmade pieces on the table is a wonderful way to add a personal touch for […]
[…] Plaster of Paris Floral Napkin Rings […]