
Making a DIY gold leaf vase is the perfect way to turn an ordinary unused, thrifted, or Dollar Store glass vase into an extraordinary one. Add beauty and shine to any glass vase or bottle with this quick and easy project.
This post contains some affiliate links for your convenience. Click here to read my full disclosure policy. As always, thank you for supporting my blog.
Y’all, I’m obsessed! If you’ve been with me for any length of time, you know that when I try an easy DIY and I fall in love with it, nothing is safe in our home. I just keep making pieces until I run out of supplies. This DIY is no different. Not only that, I’m already thinking of more DIYs I want to use gold leaf for this holiday season. Get ready! Consider this practice for what’s to come later in the year. You’ve been warned.
The Spark of Inspiration
This project was inspired after I was seeing a bunch of gold color block vases online that I loved. Although I loved the vases, I didn’t love their prices.

The beauty of metals in home decor is that they can be used year-round. Metals are a wonderful way to enhance seasonal home decor. For instance, I love to use brass in Winter, gold in Spring, silver in Summer, and copper in Fall. However, they are all truly interchangeable throughout the year.
Supplies Needed to Make a DIY Gold Leaf Vase

With just a few affordable supplies, it’s quick and easy to make your own DIY gold leaf vase. Here is what you need:
- Glass vase (unused, thrifted, or from a dollar store or craft store)
- Gold leaf sheets
- Gold leaf adhesive
- Paintbrush
- Clean, soft cloth
- Painter’s tape (optional)
- Gold leaf sealer (optional)
- Gloves (optional)
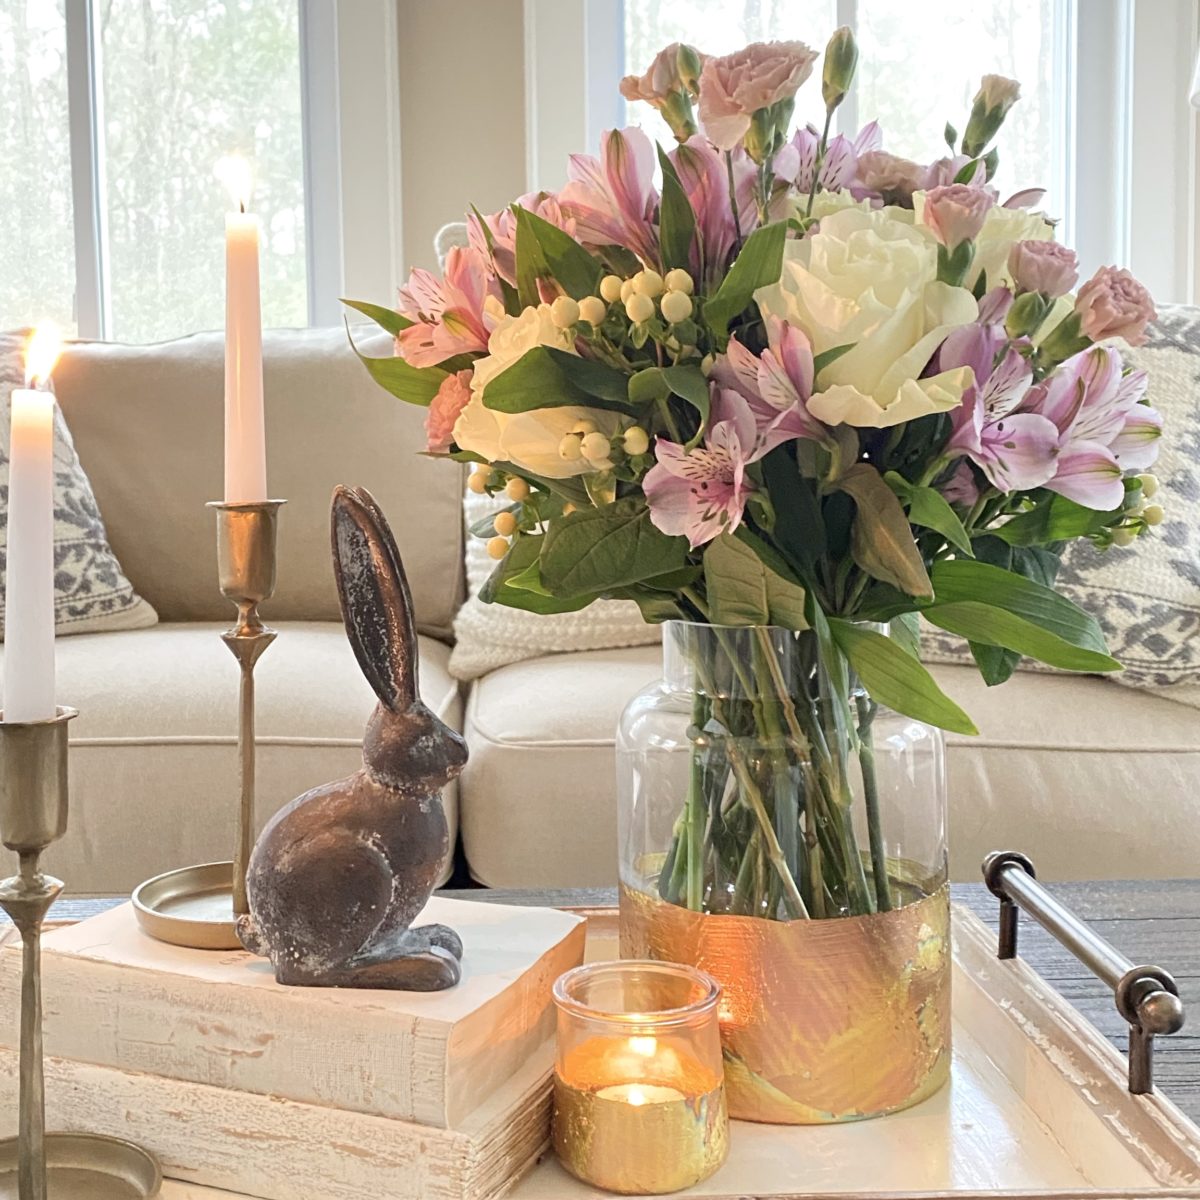
When I found these gorgeous veriegated gold leaf sheets, I fell in love with them. They were perfect for this Spring DIY project. I loved the combination of the yellow gold tones, the rose gold, copper, and the oxidized metal touches in the sheets. They were ideal for Spring!
How to Make a DIY Gold Leaf Vase
Wait until you see how easy (and fun) it is to make this beautiful vase for your home!
Prepare the vase:
First, wash and dry the vase to ensure it’s free from oils and debris. This is also the time to make sure the work surface is protected. The gold leaf sheets are very light and once they are applied to the glass vase, they begin to flake. I like to use a dropcloth or cover the work surface with butcher paper.
Gather the supplies:
Next, gather the supplies and determine how you want your gold leaf vase to look. Do you want to cover the entire vessel? Or, do you want to cover only a block of space on the vase with gold leaf? Do you want the gold leaf to have straight lines or a more freeform organic look? I like the look of the freeform color block vase, therefore, I chose that design initially.
Brush on the adhesive:
Now it’s time to apply the adhesive. With a paintbrush, brush the adhesive on the vase. Apply it evenly and generously in the area where you want the gold leaf to adhere. For this example, I brushed the adhesive onto the bottom half of my vase and also painted the adhesive on the bottom of it.

Note: The small brush strokes will show through the gold leaf a bit. I love it because I think it adds texture to the piece. Allow the adhesive to dry for about 15-20 minutes.

During the drying process, you will notice that the adhesive turns from white to more transparent. Although the adhesive is transparent, it will be tacky. That is good. The tackiness of the adhesive is what the gold leaf will adhere to.

Apply the gold leaf:
Once all the adhesive is transparent, it is time to start applying the gold leaf. You will notice that the gold leaf sheets are lighter than a feather and that flake or tear easily. That is okay. Begin to apply the gold leaf all over the vase where the adhesive has been applied. It doesn’t matter if the gold leaf is applied in larger pieces or smaller flakes, just be sure you cover all the adhesive with it. The beauty of the different sizes of the gold leaf pieces being applied is that it creates character and uniqueness to each vase.

Brush or wipe off access gold leaf flakes:
With a soft paintbrush or cloth, wipe off the access gold leaf flakes from the vase. You may notice that there are small spots of exposed adhesive you missed with gold leaf. That is okay. Use the flakes leftover on your workspace to cover those spots.

Seal the gold leaf (optional):
Finally, although it’s not necessary, you can seal the gold leaf on the vase. To do this, brush a generous amount of sealer on top of gold leaf. The sealer dries clear, so feel free to be generous with it.

Straight Lines or Free Form
The organic look of the free-form gold leaf design is my favorite. I have also seen vases and candleholders made with gold leaf using straight lines.
The straight lines are made with painter’s tape. The adhesive is applied in between the tape. Although I have not tried this method of design, my understanding is that it is difficult to ensure crisp-looking lines. Many who have tried it say that it is important to remove the painter’s tape gently so that the tape doesn’t rip off the gold leaf with it. They also recommend removing the tape right after the gold leaf is applied.
The Sky’s The Limit
After making a couple of DIY gold leaf vases, I decided to make a candle holder too. Together they make a beautiful set. I am so excited to use these pieces this Spring and Summer in the farmhouse. They are perfect for a shelf, table, kitchen island, bathroom counter, or anywhere! Now that I’ve tried my hand at gold leaf application, I’ve got my eye on some other glass pieces in the farmhouse I want to add it to… The sky’s the limit!

I loved creating this easy and beautiful DIY! My hope is that you try it and love it as much as I do.
Be sure to check out my incredibly talented friends and the great DIY ideas they are sharing today too. Tammy and Emily are incredibly talented and their blogs are filled with outstanding inspiration. Enjoy!

Tammy – Lavender Brook Home: Realistic DIY Faux Trees

Emily – Handmade Farmhouse: Faux Spring Flower Bulb Planter
If you are looking for more easy and beautiful home decor DIYs, you might enjoy these projects too:
Don’t forget to follow me on Instagram and Pinterest for more easy and beautiful DIYs, farmhouse home decor and styling tips, recipes, and more. I look forward to seeing you there!


Well, you’ve done it again! I love how simple and beautiful your DIY projects are. Thank you for the inspiration!
Thank you so much, Tammy! I’m so happy you like it. It’s always my pleasure to share!
[…] at Cali Girl In a Southern World shared these gorgeous DIY Gold Leaf Vases inspired by a much more expensive Anthropology version. I can’t wait to make […]
Thank you very much for that simple but beautiful application using gold leaf. I was wondering whether you have tried getting gold leaf lettering by printing it either on tissue or vellum to transfer to my glass candle holder. I would love to hear your comments.
Much appreciated
patricia
You’re welcome, Patricia. It was my pleasure to share. I have not tried to get gold leaf lettering by printing it on tissue or vellum. It’s a beautiful idea though! I’m sorry I don’t have any experience to pass on to you. If you try it, I’d love to know how it worked out. Best wishes.