
Today I am making homemade baking soda dough Christmas ornaments. I can’t wait to show you how easy and fun they are to make. Baking soda dough is a beautiful, white, smooth (unless you want to make it patterned), non-edible dough that is perfect for making ornaments and garlands to celebrate the holidays in your home.
Find the full recipe for baking soda dough and the directions on how to make it at the end of this post.
This post contains some affiliate links for your convenience. Click here to read my full disclosure policy. As always, thank you for supporting my blog.
Homemade Christmas Tree Ornaments
We have so many different collections of Christmas ornaments in the farmhouse including new ones, old ones, heirlooms, and handmade ornaments. Even with the abundance of ornaments that we have, each year I find myself wanting to create some new additions to our extensive and cherished ornament collection. There is nothing like homemade Christmas ornaments.
This year (so far), I’ve made snowball ornaments. I love how they look on the Christmas tree! Without the lights on, the snowball ornaments look like sweet little snowballs on the tree. However, when the tree is lit, the light catches the snowy balls perfectly and they glow up beautifully on the tree.

‘Tis the Season to Make Baking Soda Dough Christmas Ornaments
Although the snowy ornaments I made are beautiful, they are on the larger side. I wanted to make some smaller ornaments for our smaller Christmas trees in the farmhouse this year too.
Cue the baking soda dough! Earlier this year I made homemade baking soda dough for the first time when I made an easy Valentine’s Day garland. After having so much fun and realizing how easy and inexpensive it is to make this dough, I made a mental note that this holiday season I would make some ornaments for our Christmas trees also.
Baking Soda Dough vs. Salt Dough
I remember making salt dough ornaments when I was younger in Girl Scouts. Although they were fun and inexpensive to make, they had a tendency to crumble and the color looked more like sugar cookies than like porcelain. I wanted the ornaments this year to be bright white.
Homemade baking soda dough is so much better than traditional salt dough. Why you ask? Thank you for asking. Baking soda dough has a much smoother texture and a much brighter white color, compared to the slightly grainy, off-white color, that salt dough creates.
The beauty of homemade baking soda dough is that it can air dry. In about 24-hours you will have beautiful, white, ornaments that look like porcelain to decorate your Christmas tree with. Or, you can string them together and make a garland that can hang in your home.
What You Need to Make Baking Soda Dough Christmas Ornaments
Three things are all you need to make these beautiful ornaments. That’s right, only three things!
- Baking soda
- Corn Starch
- Water
You will also need a saucepan, measuring cups, a spoon, a medium glass bowl, a kitchen towel, a rolling pin, your favorite holiday cookie cutters, a toothpick/bamboo skewer (or something similar) to make a hole to string the ornaments, and string or ribbon to hang them from.
How to Make Baking Soda Dough Christmas Ornaments
Making baking soda dough is so easy! First, combine the baking soda, cornstarch, and water in a medium saucepan. Over medium heat and stir the ingredients constantly. After about 5-7 minutes, the mixture will begin to bubble. Continue to stir the mixture for another 2-3 minutes as the dough thickens and comes together.
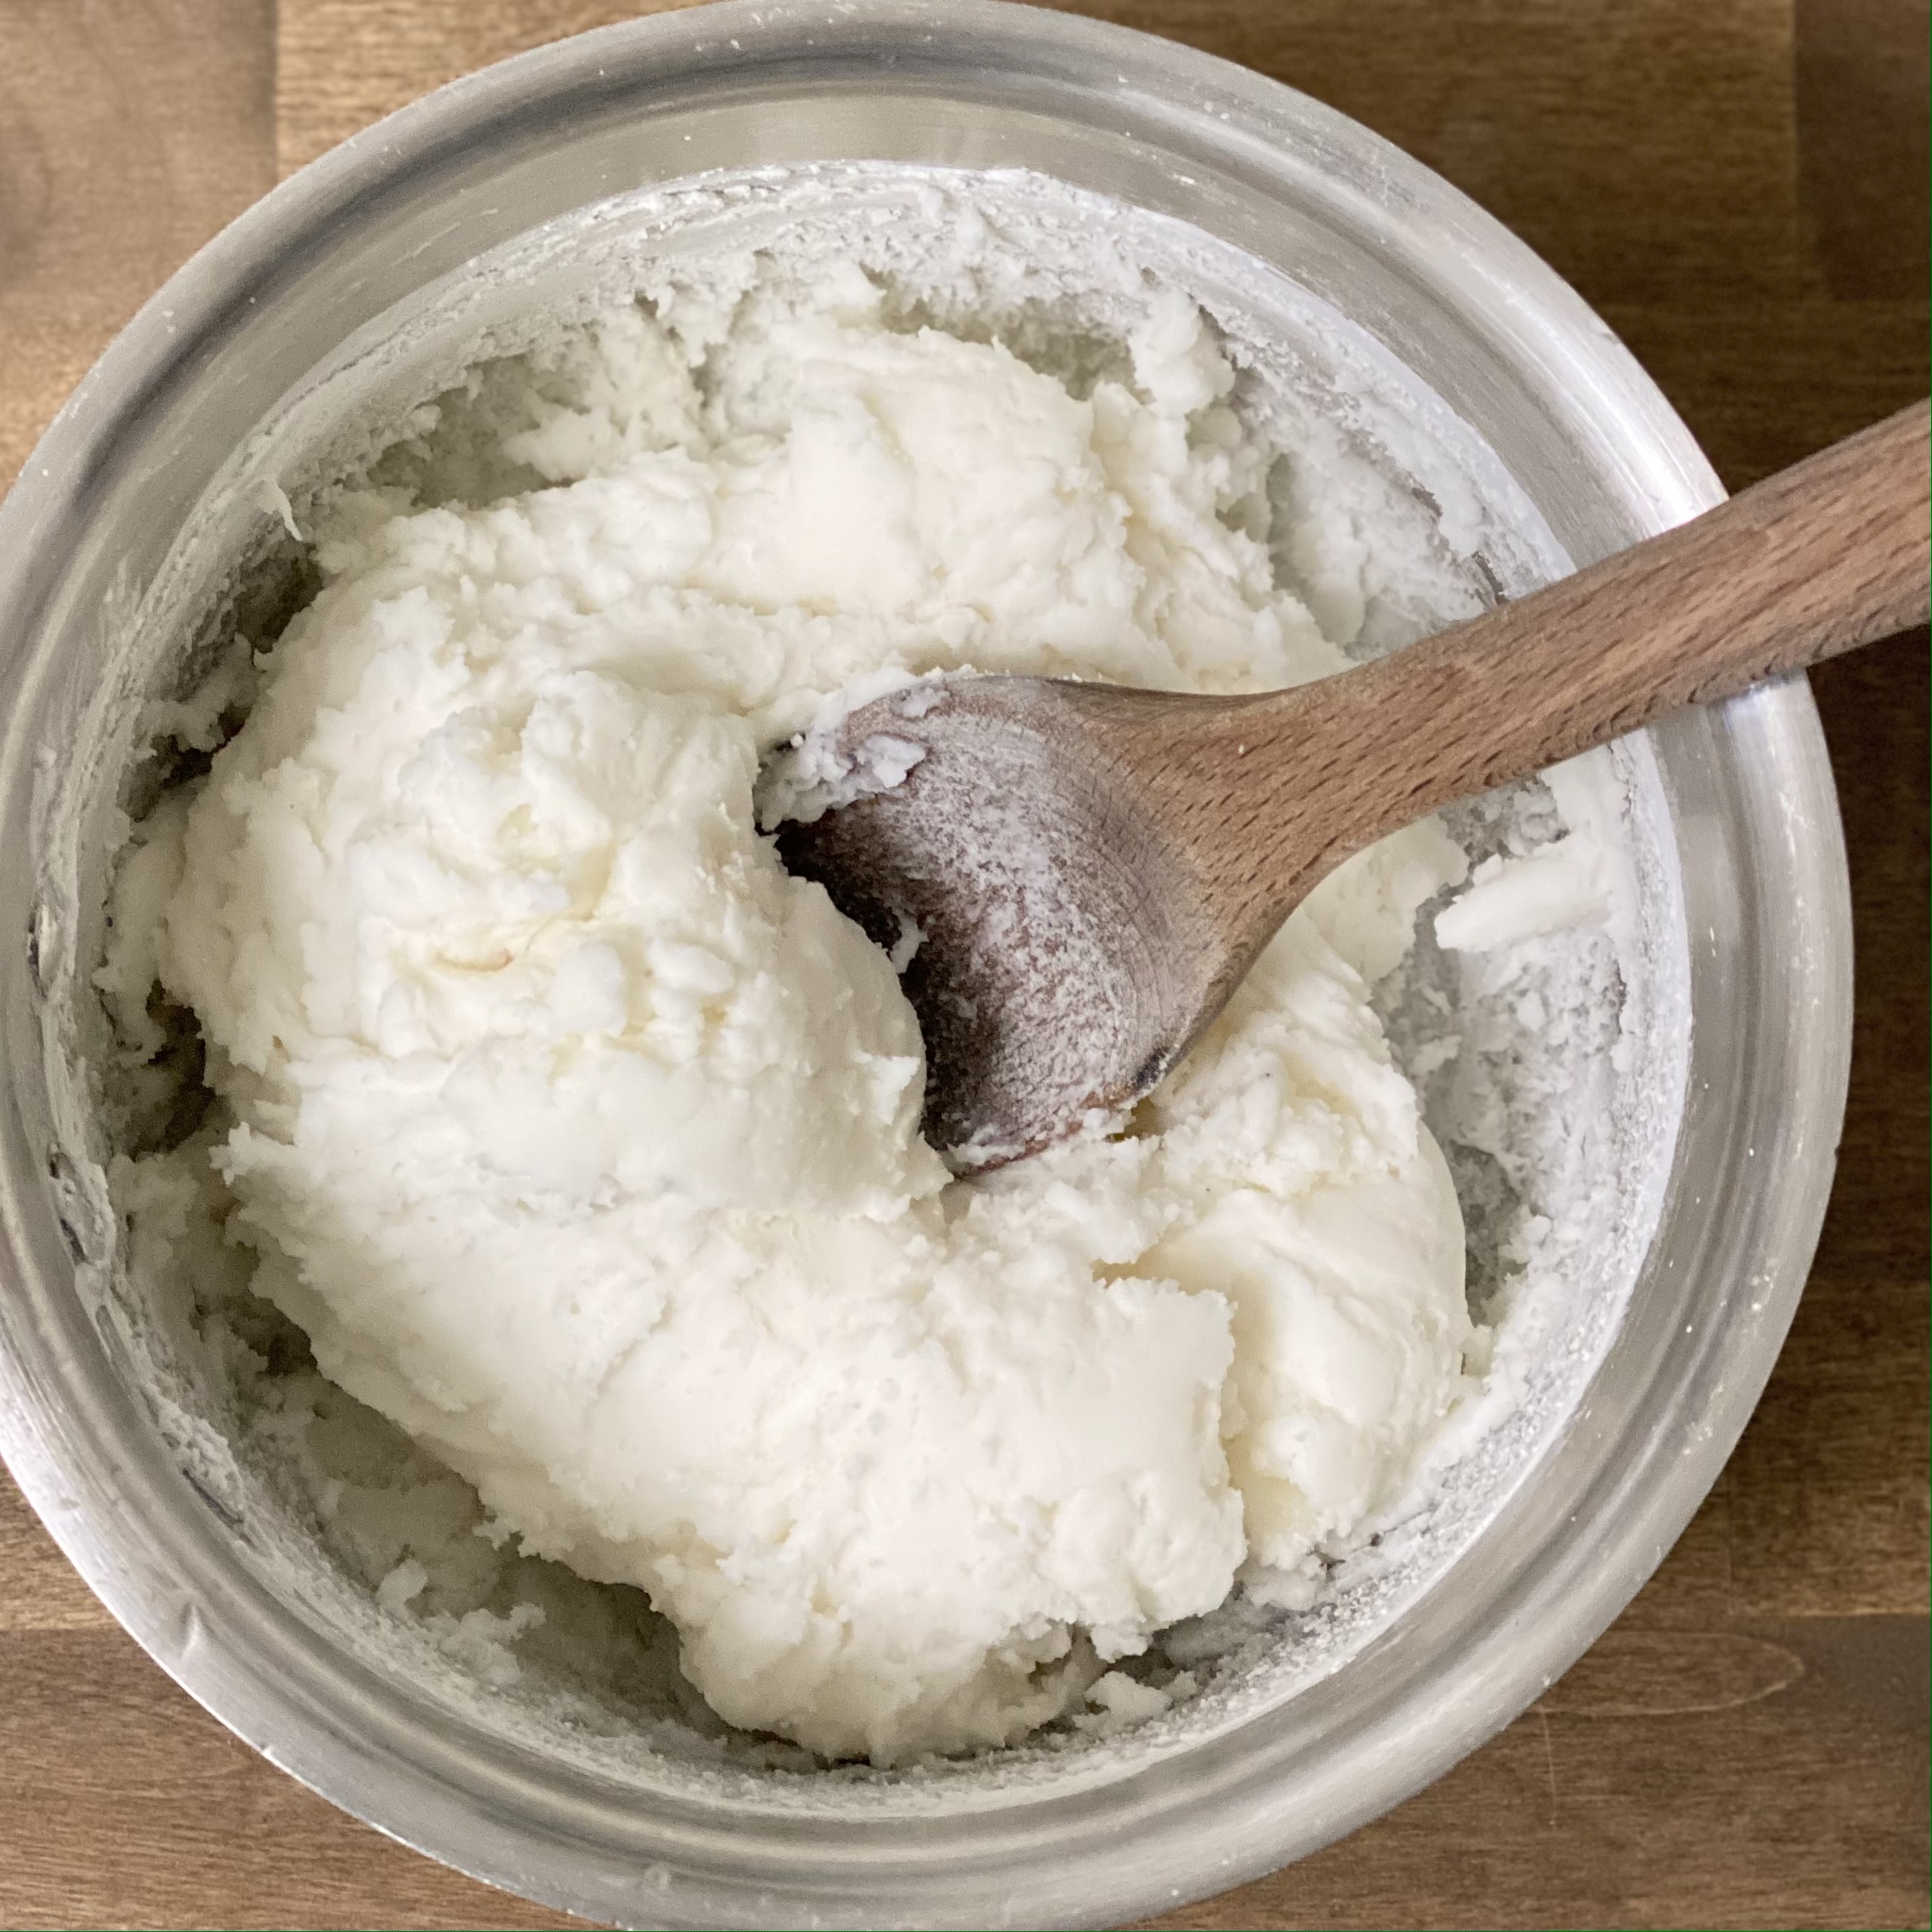
Next, transfer the dough to a glass bowl. Then, cover it with a damp cloth and let the dough cool for 30 minutes and up to one hour.
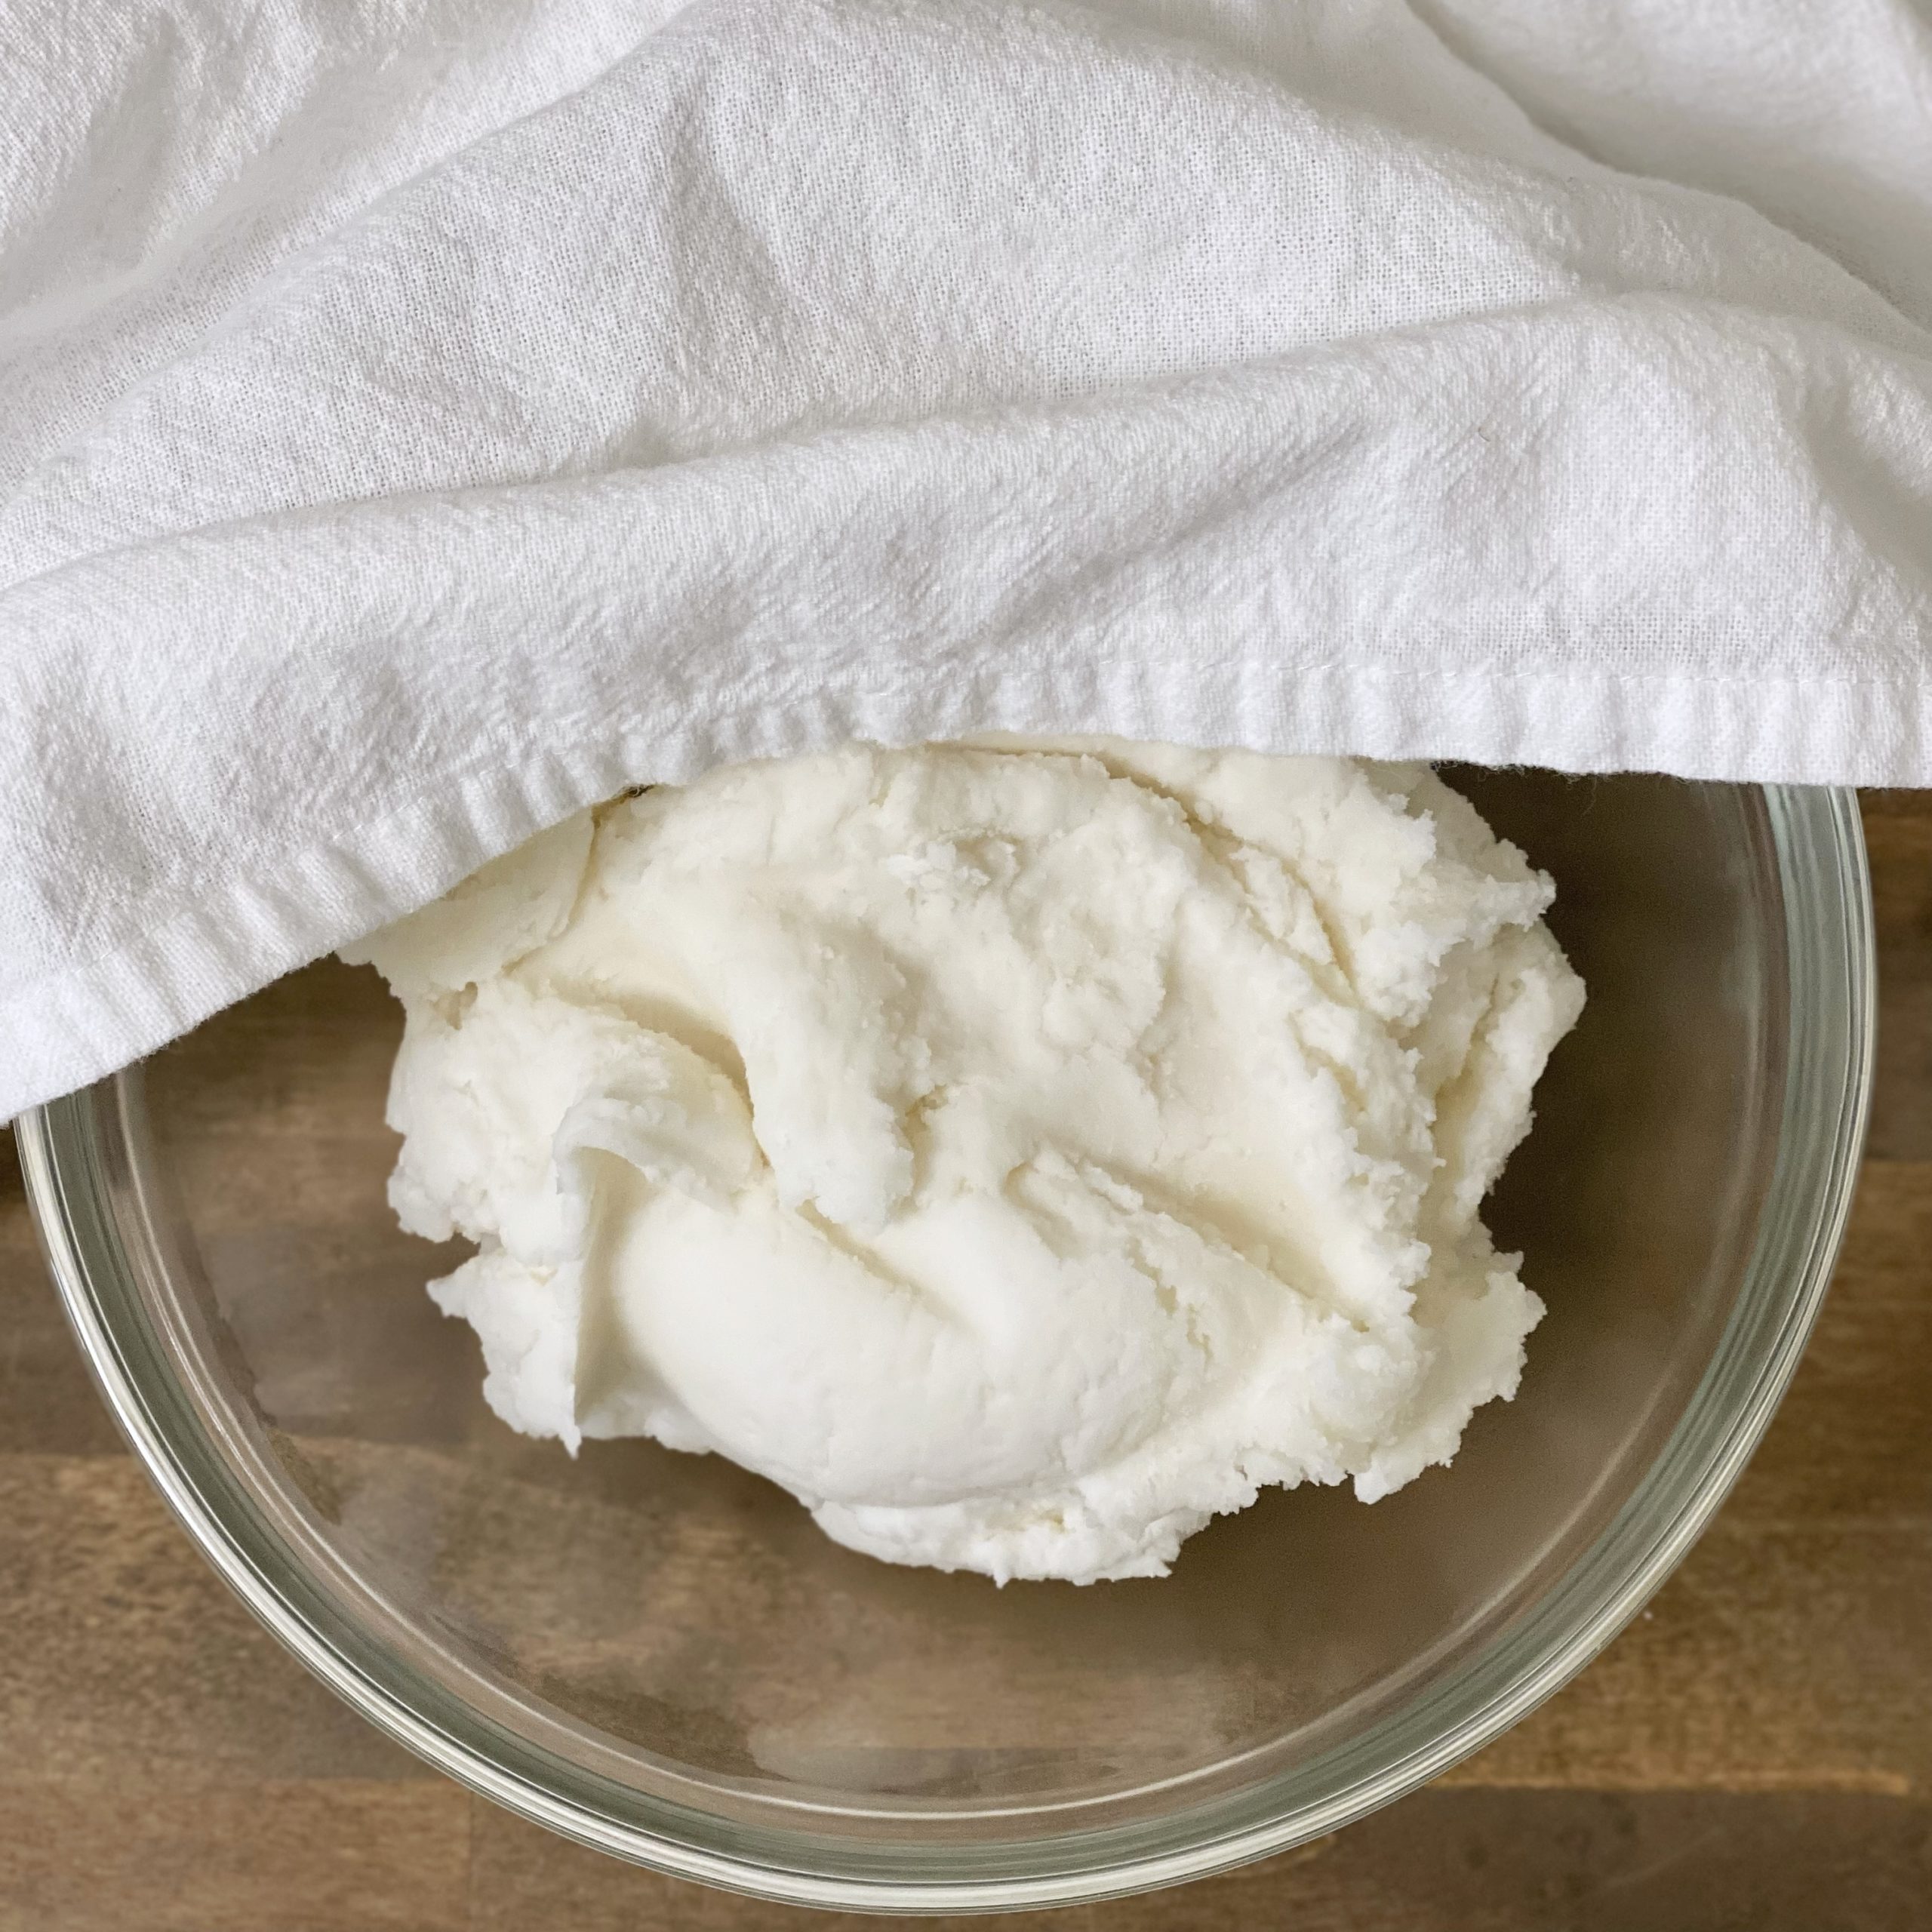
Knead the cooled baking soda dough until it’s smooth. Roll it out to the desired thickness. (I prefer the dough to be thinner, but it’s completely personal preference). Use more cornstarch if you need to to keep the dough from sticking.
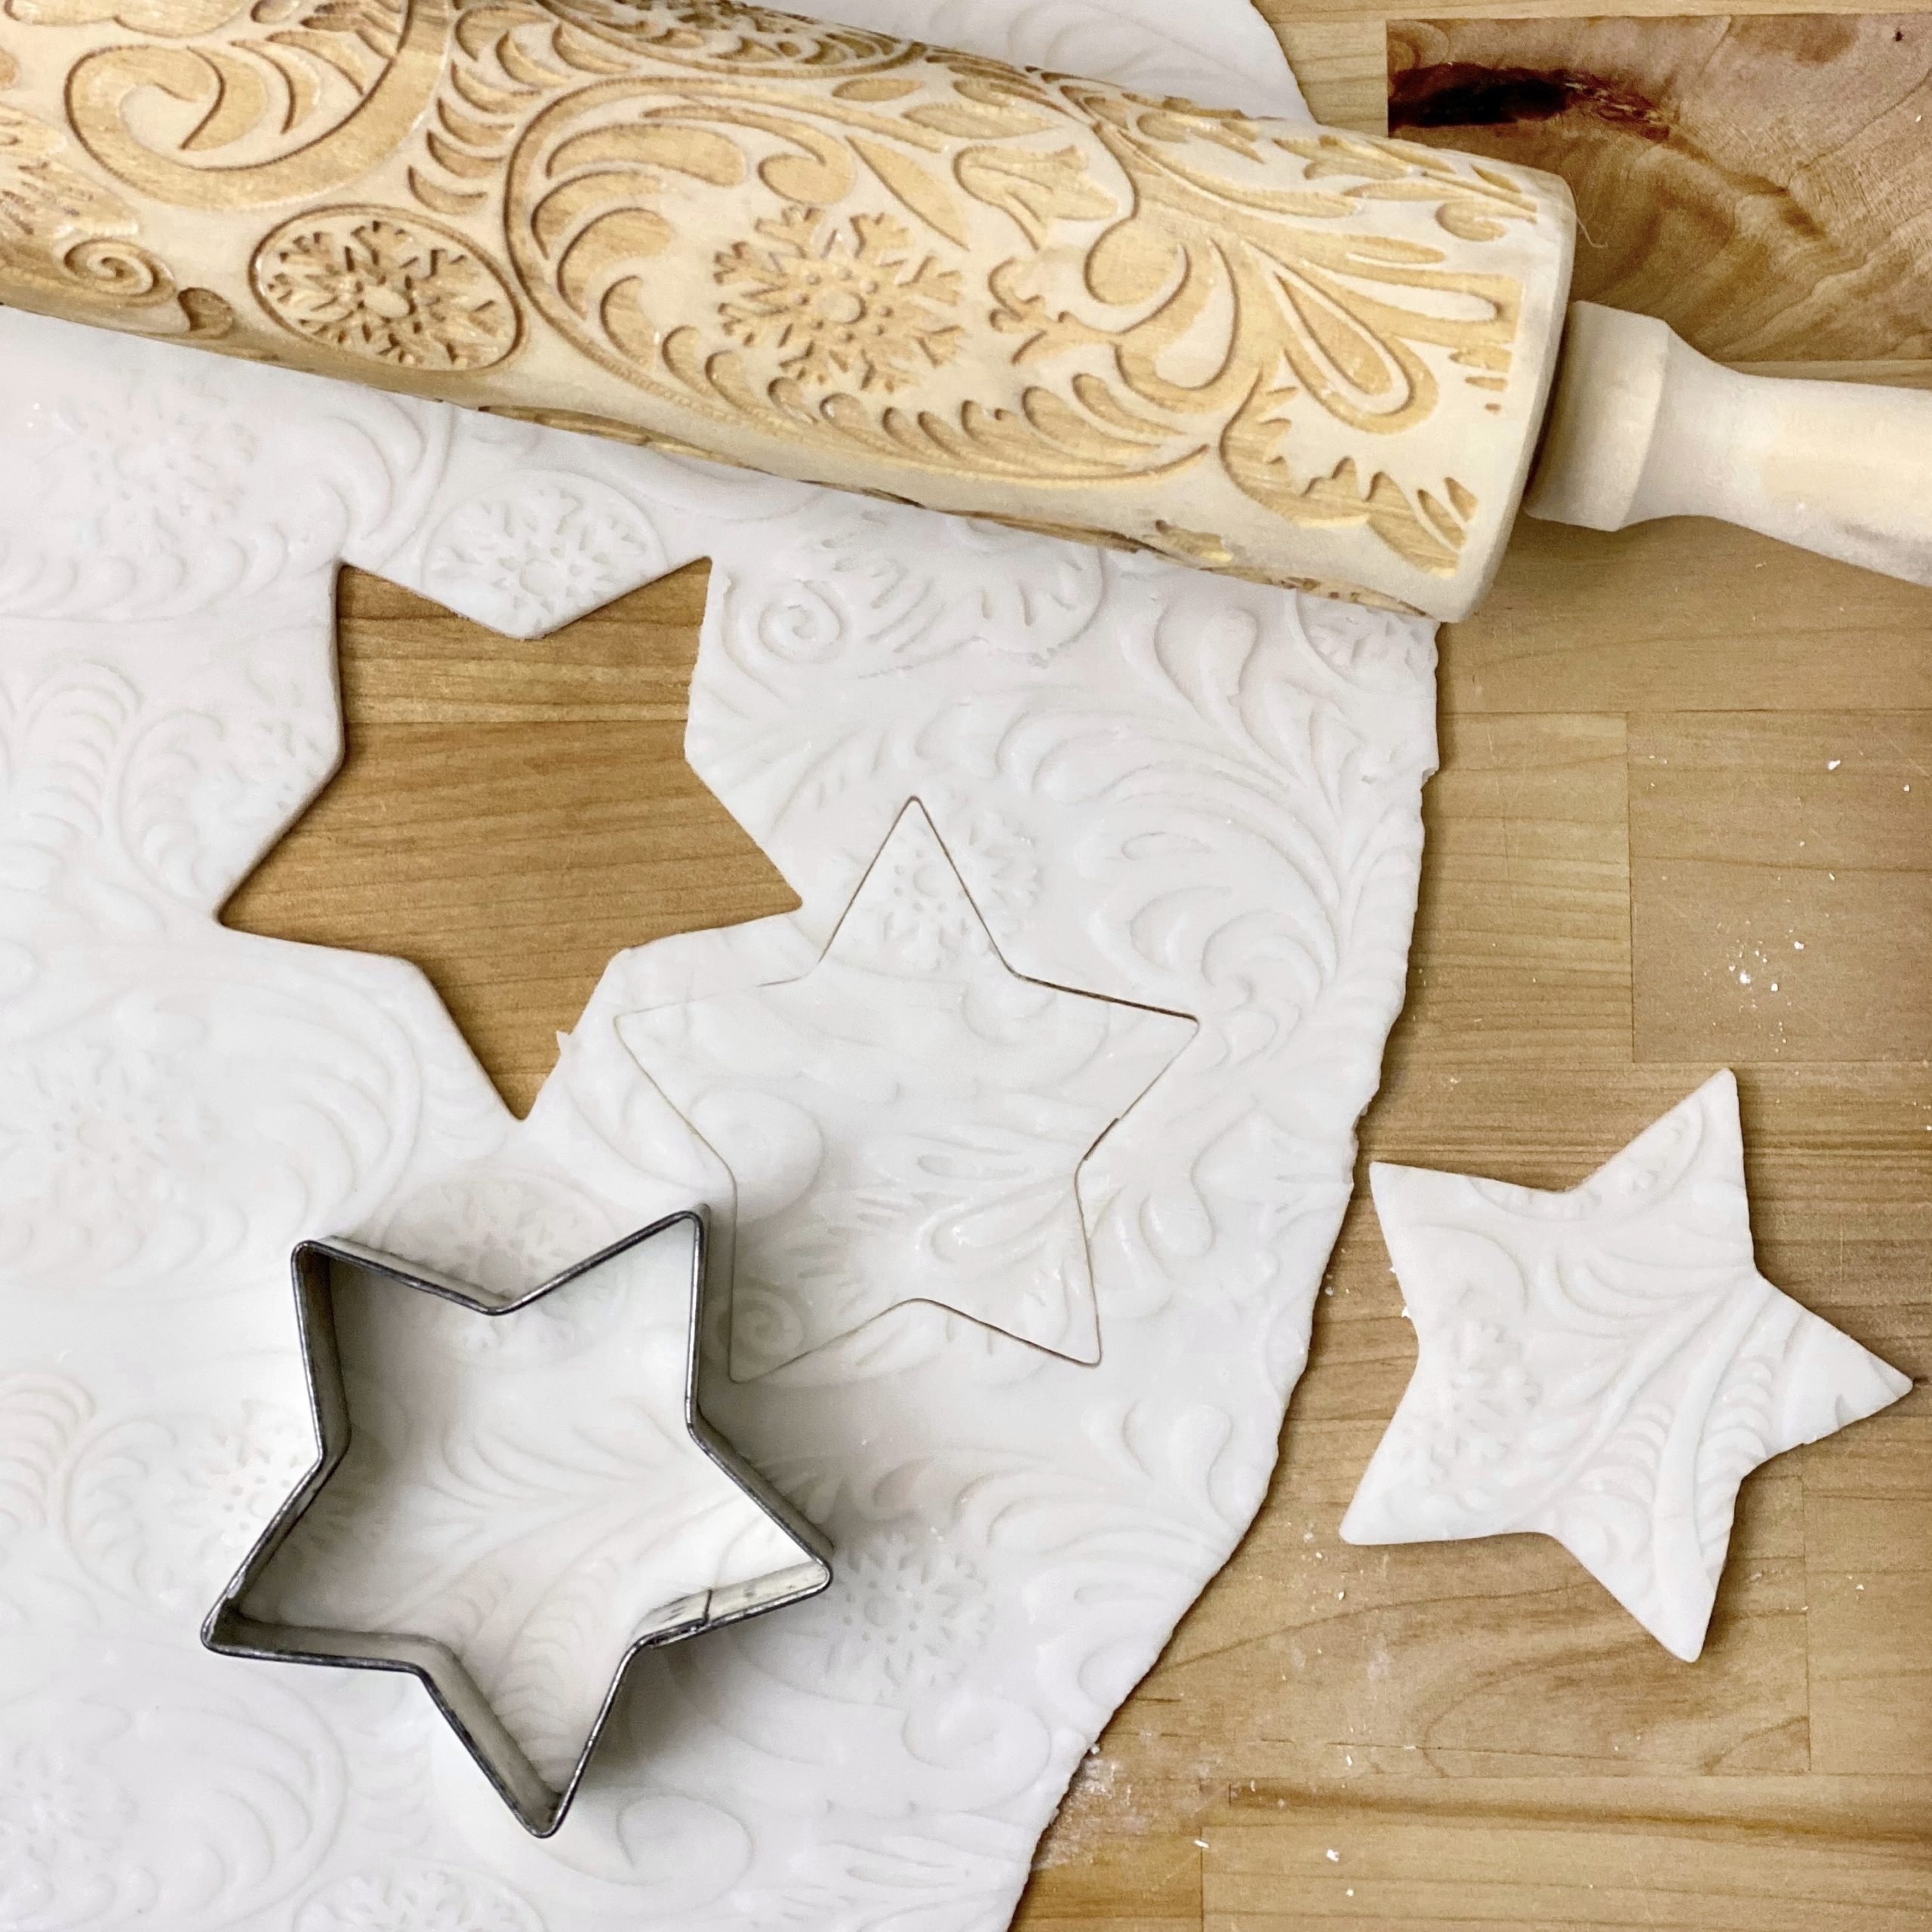
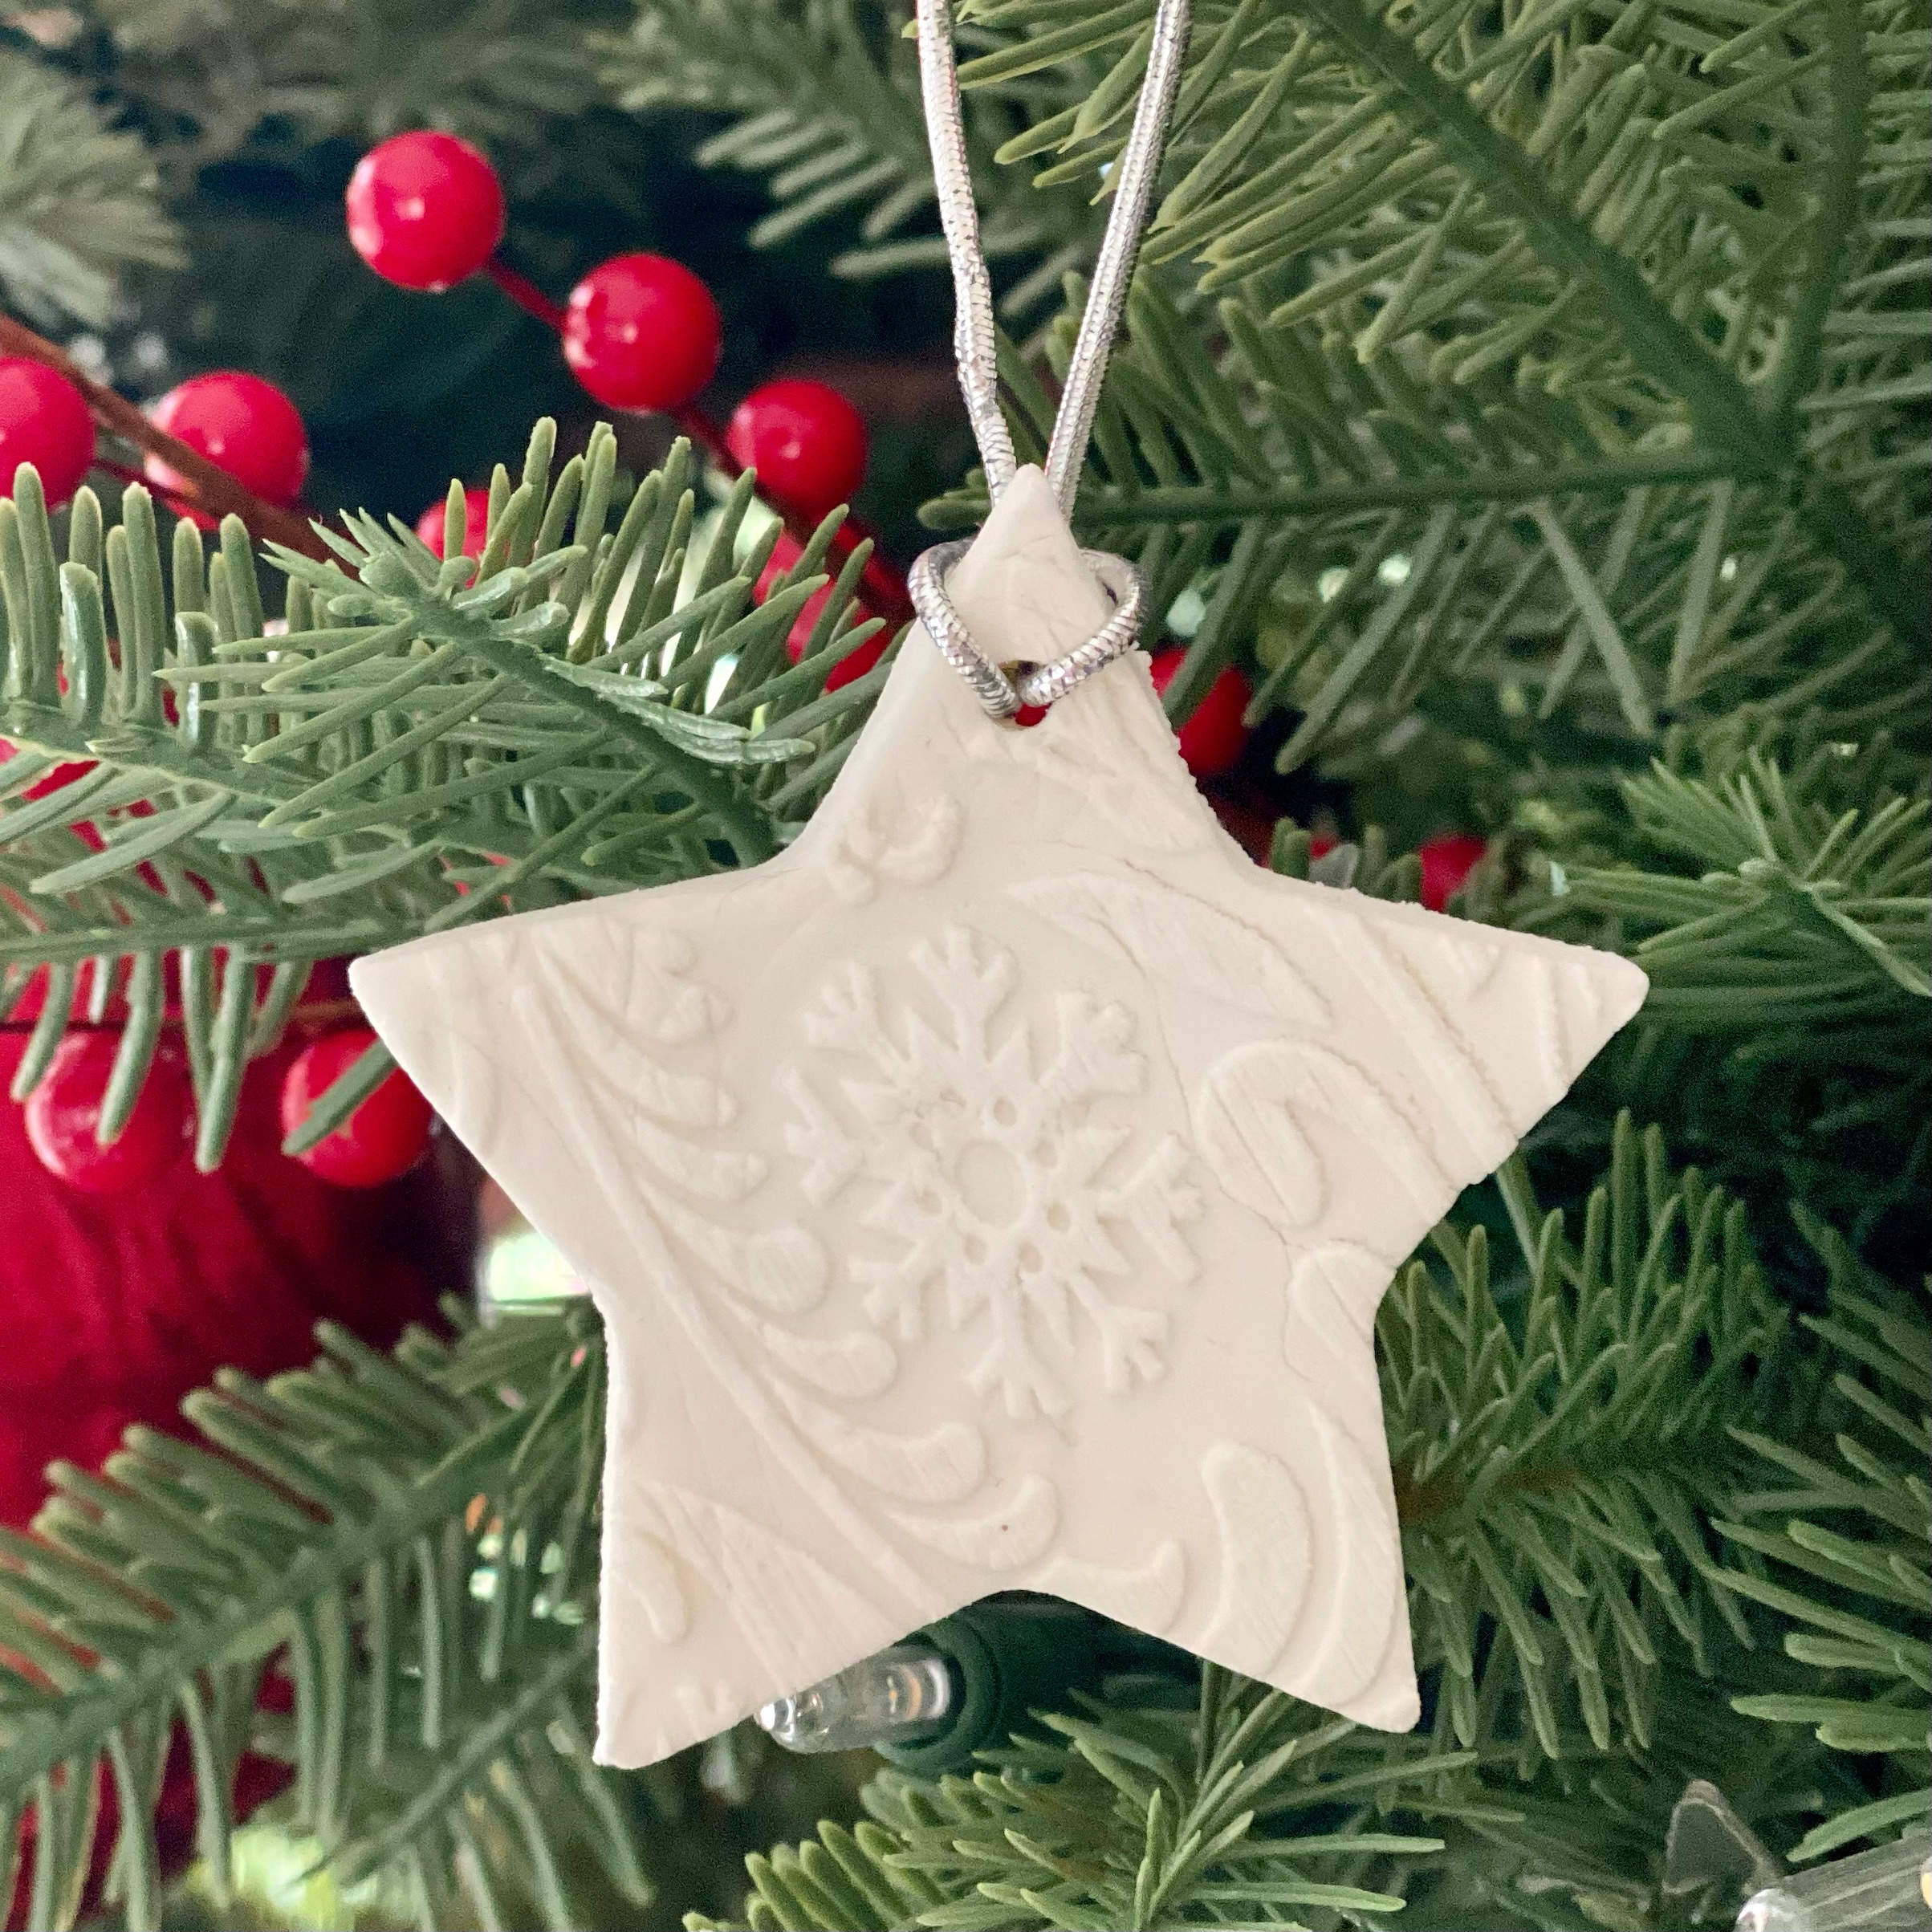
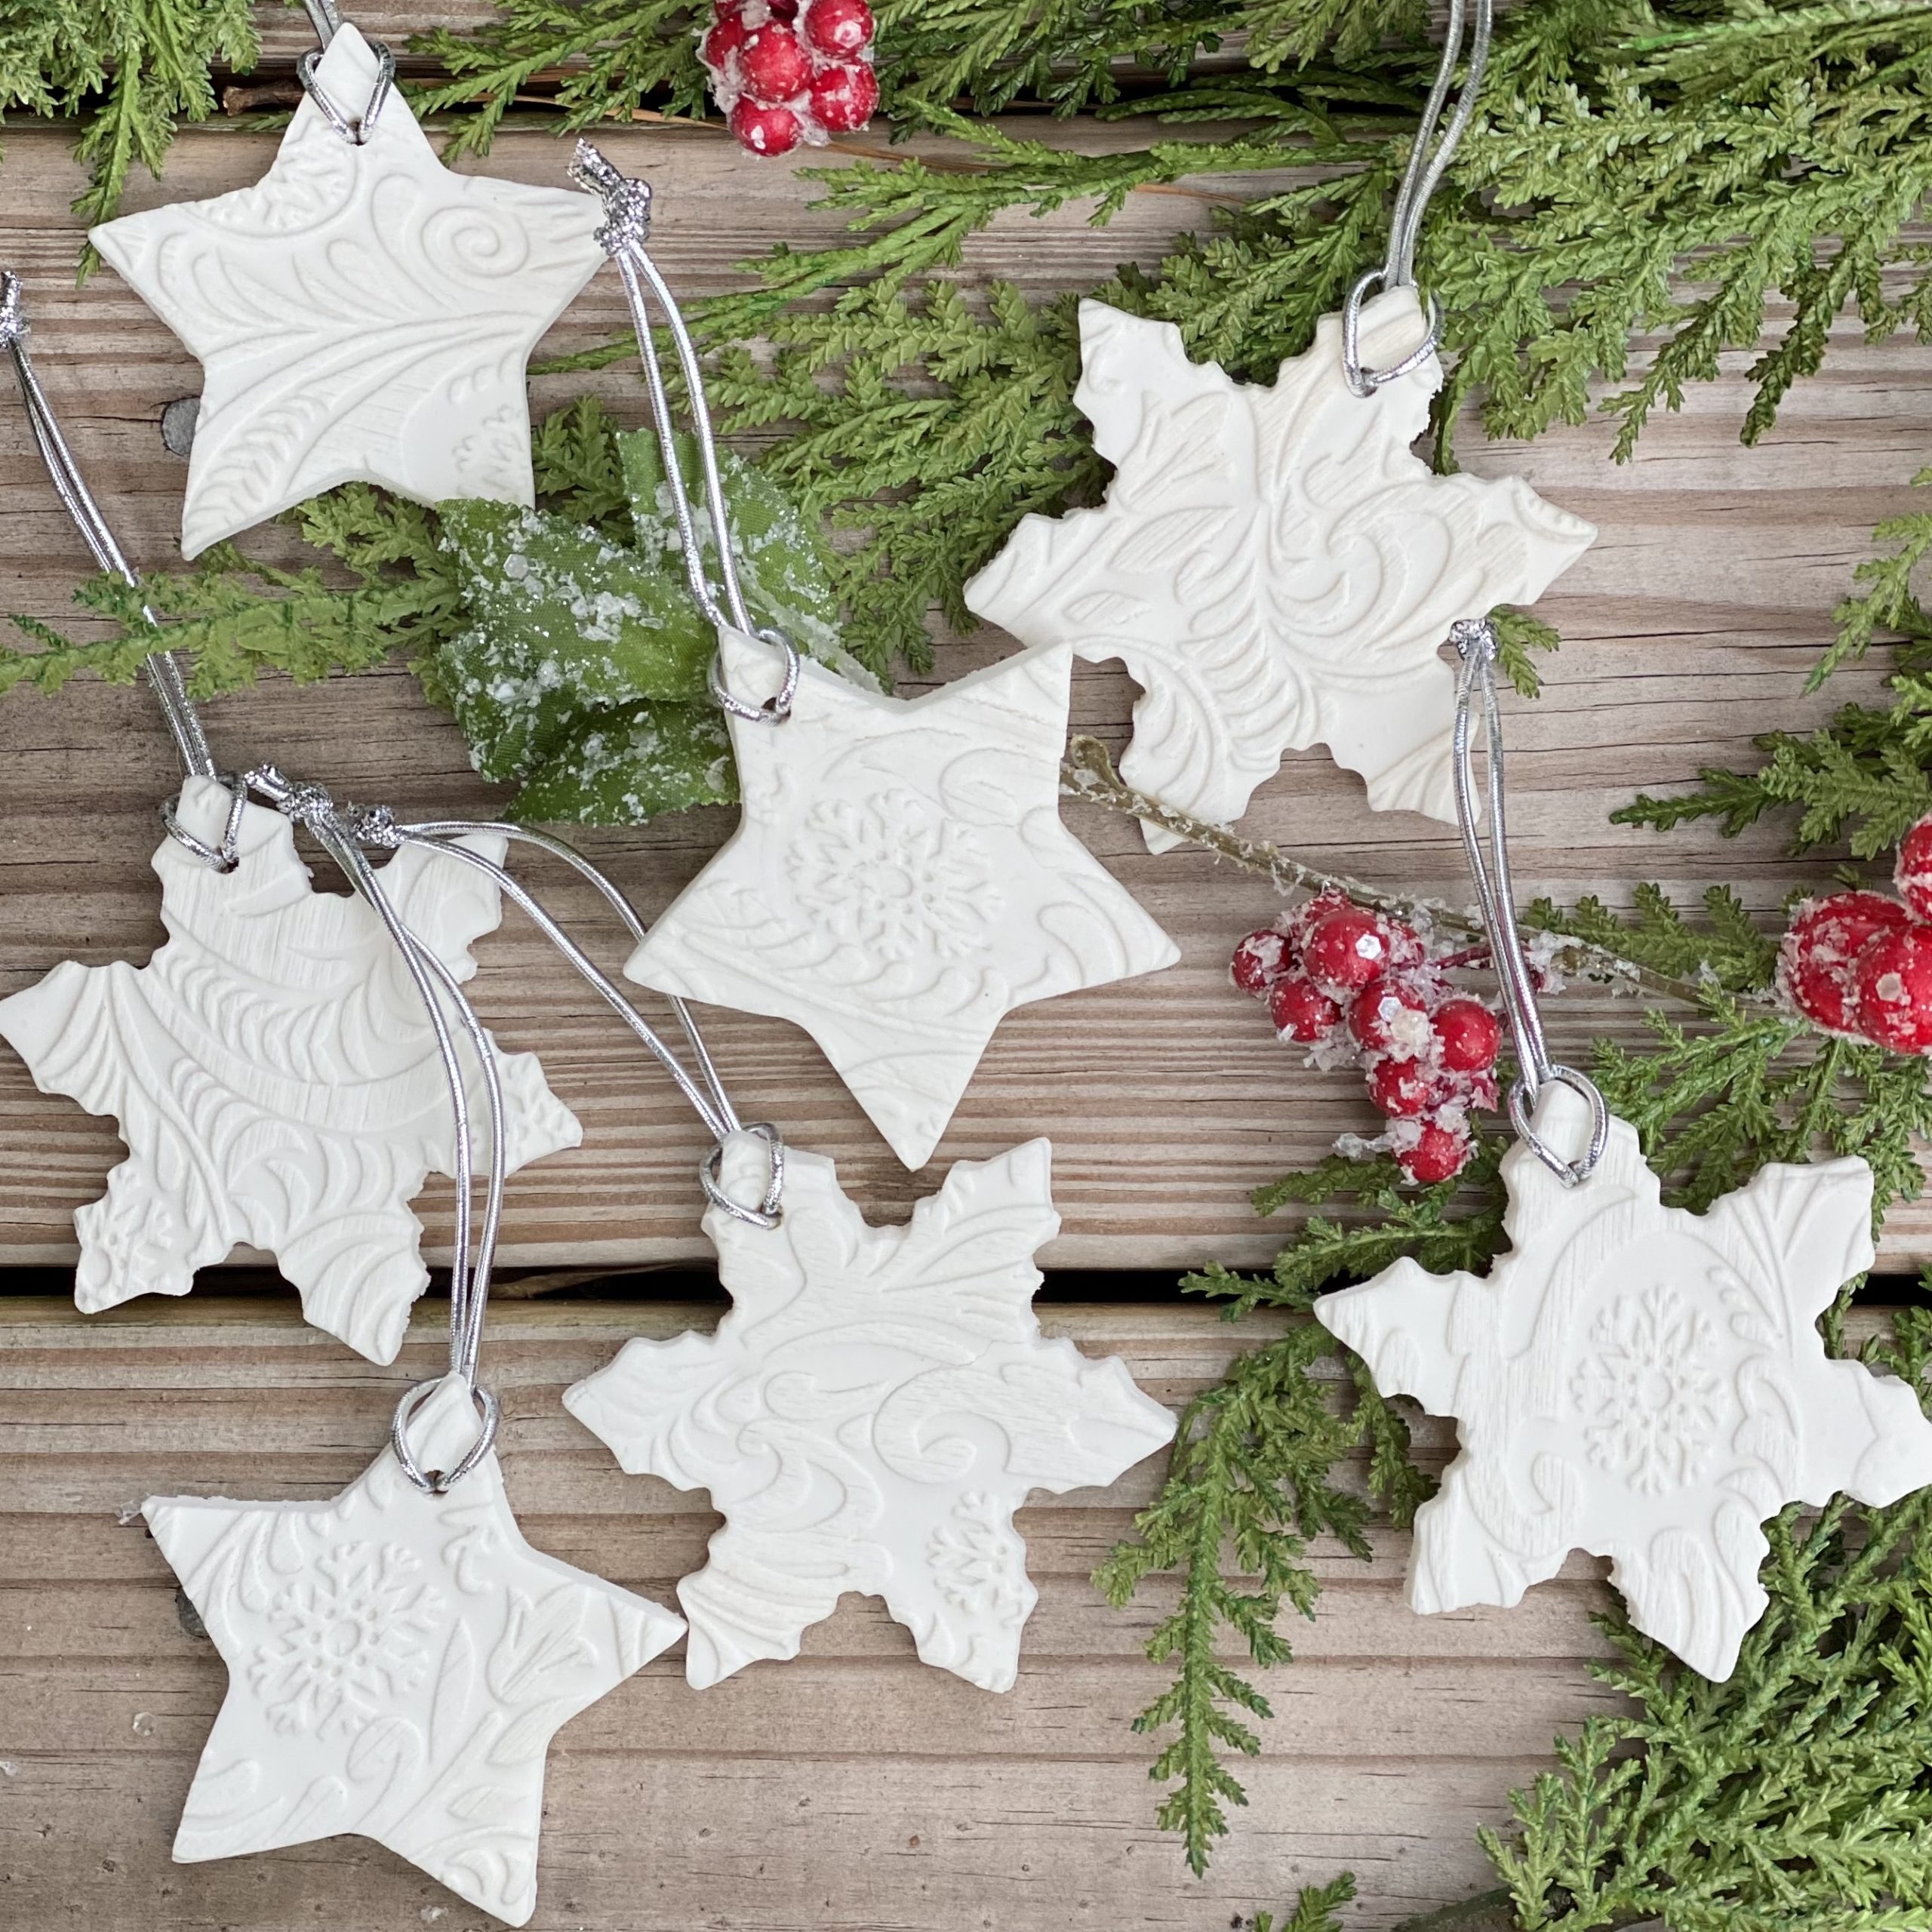
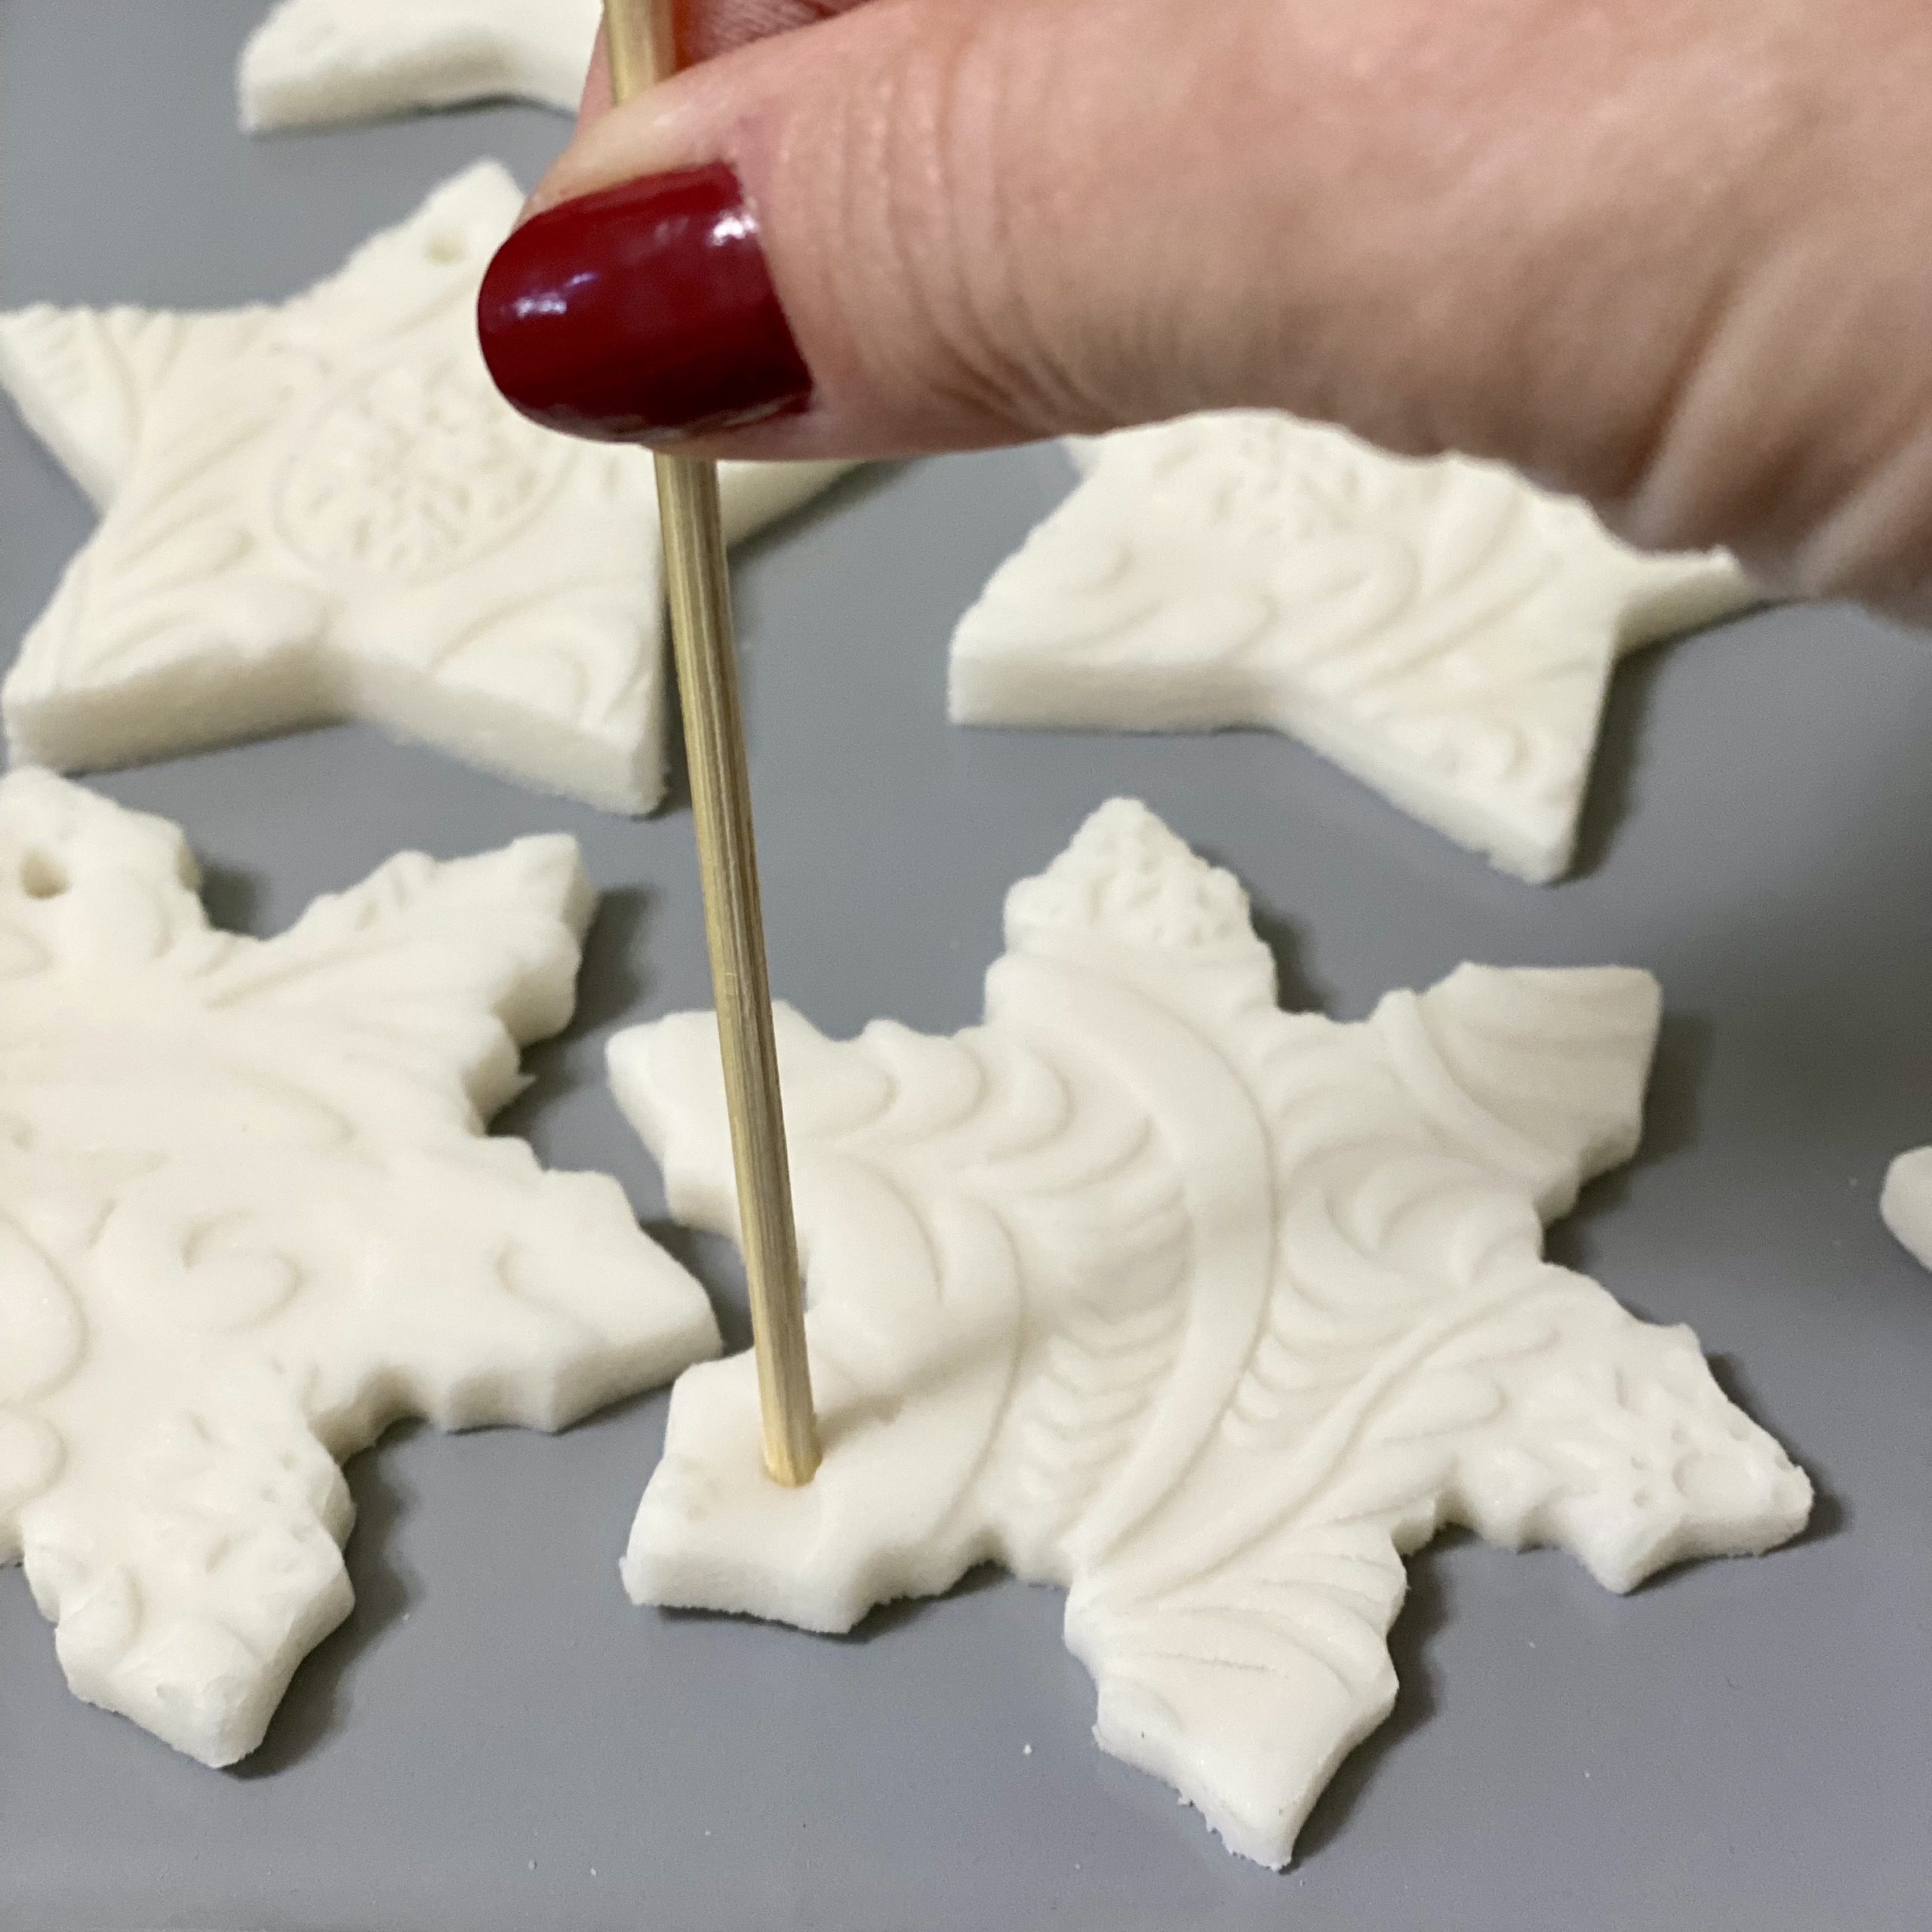
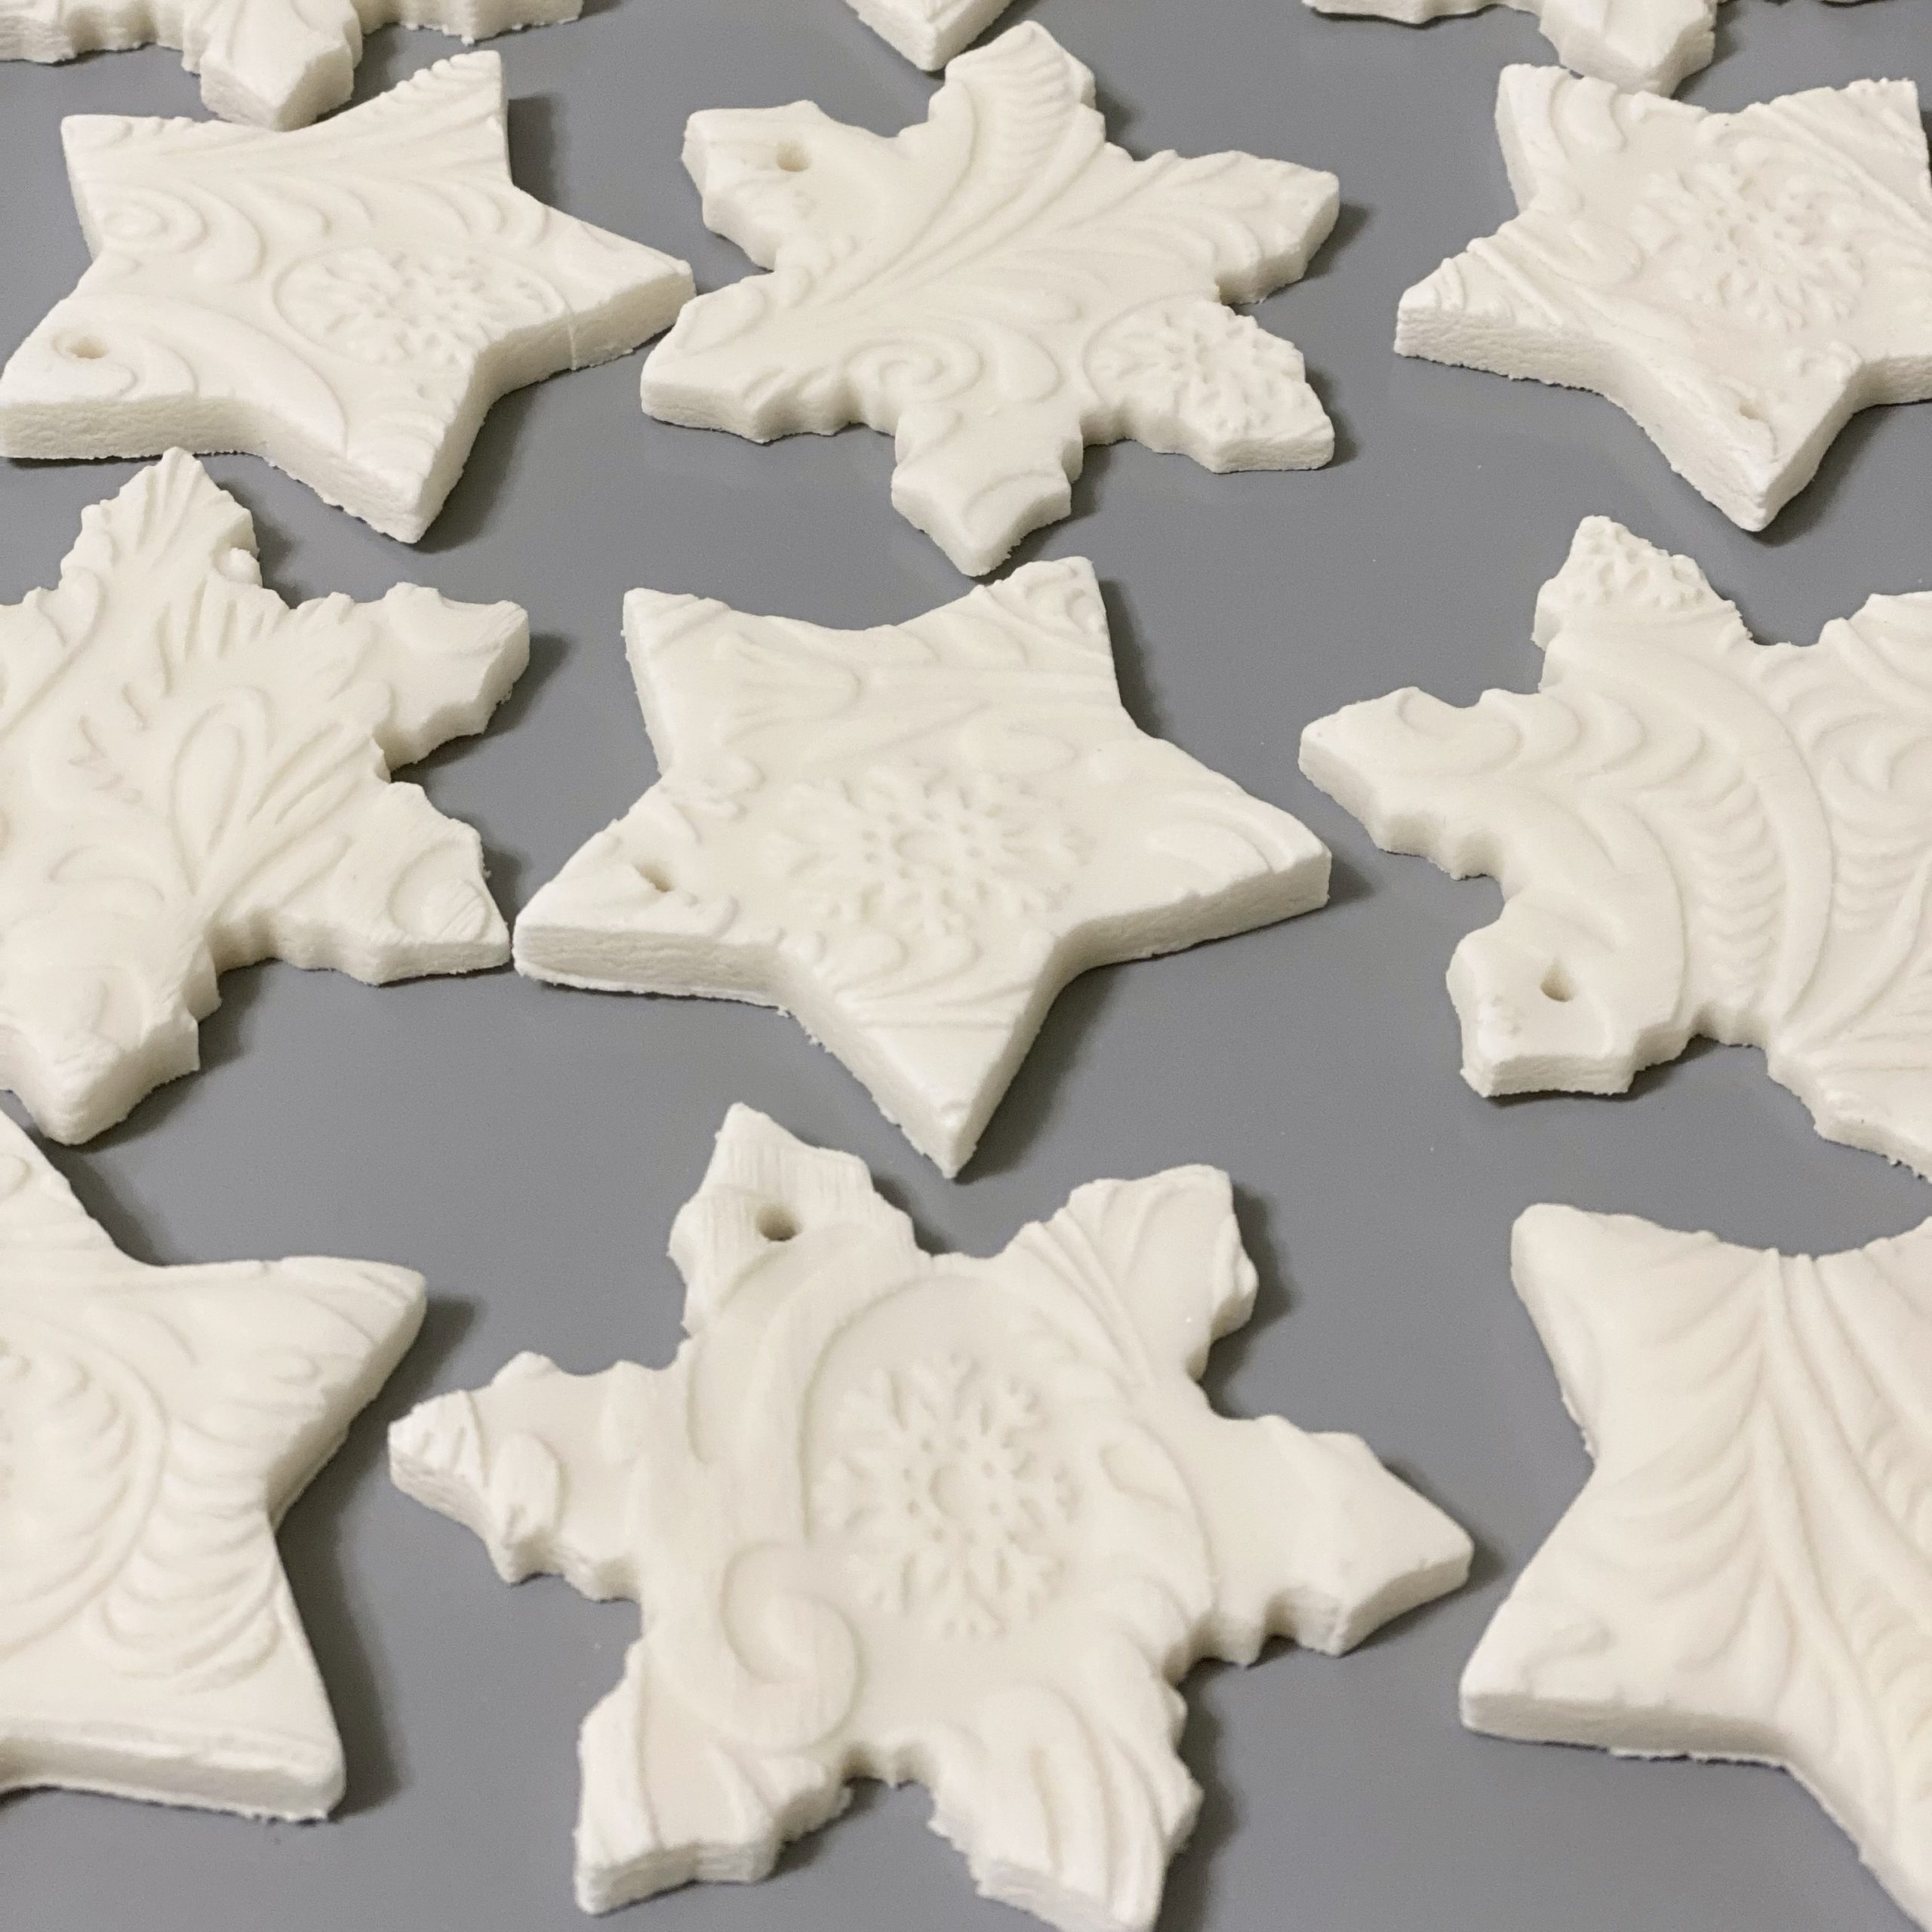
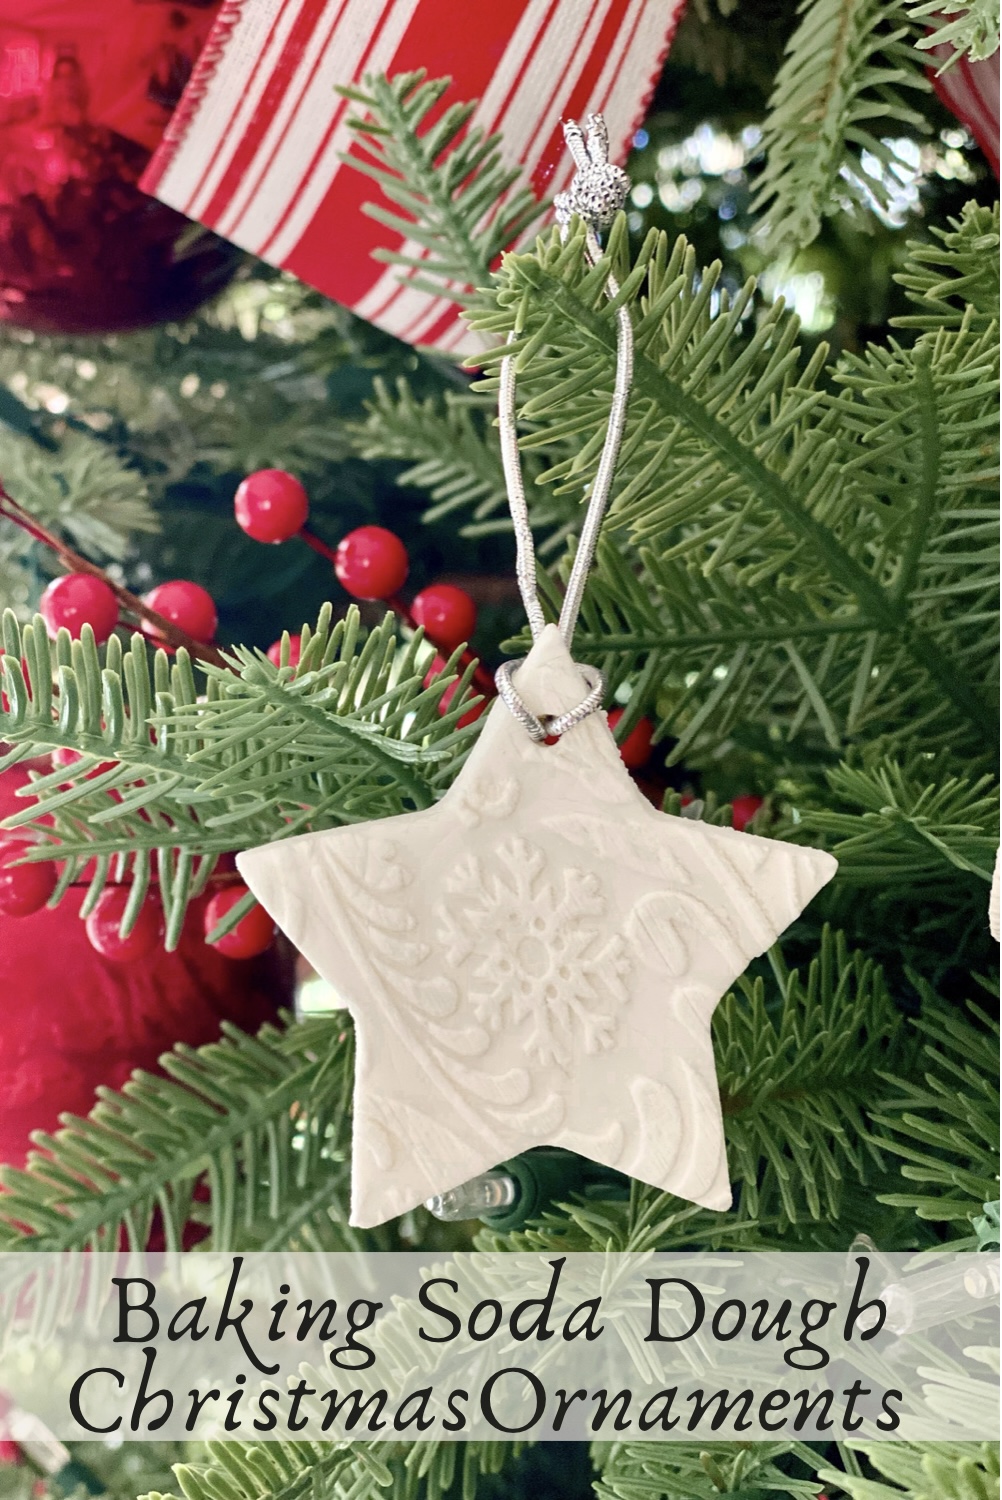
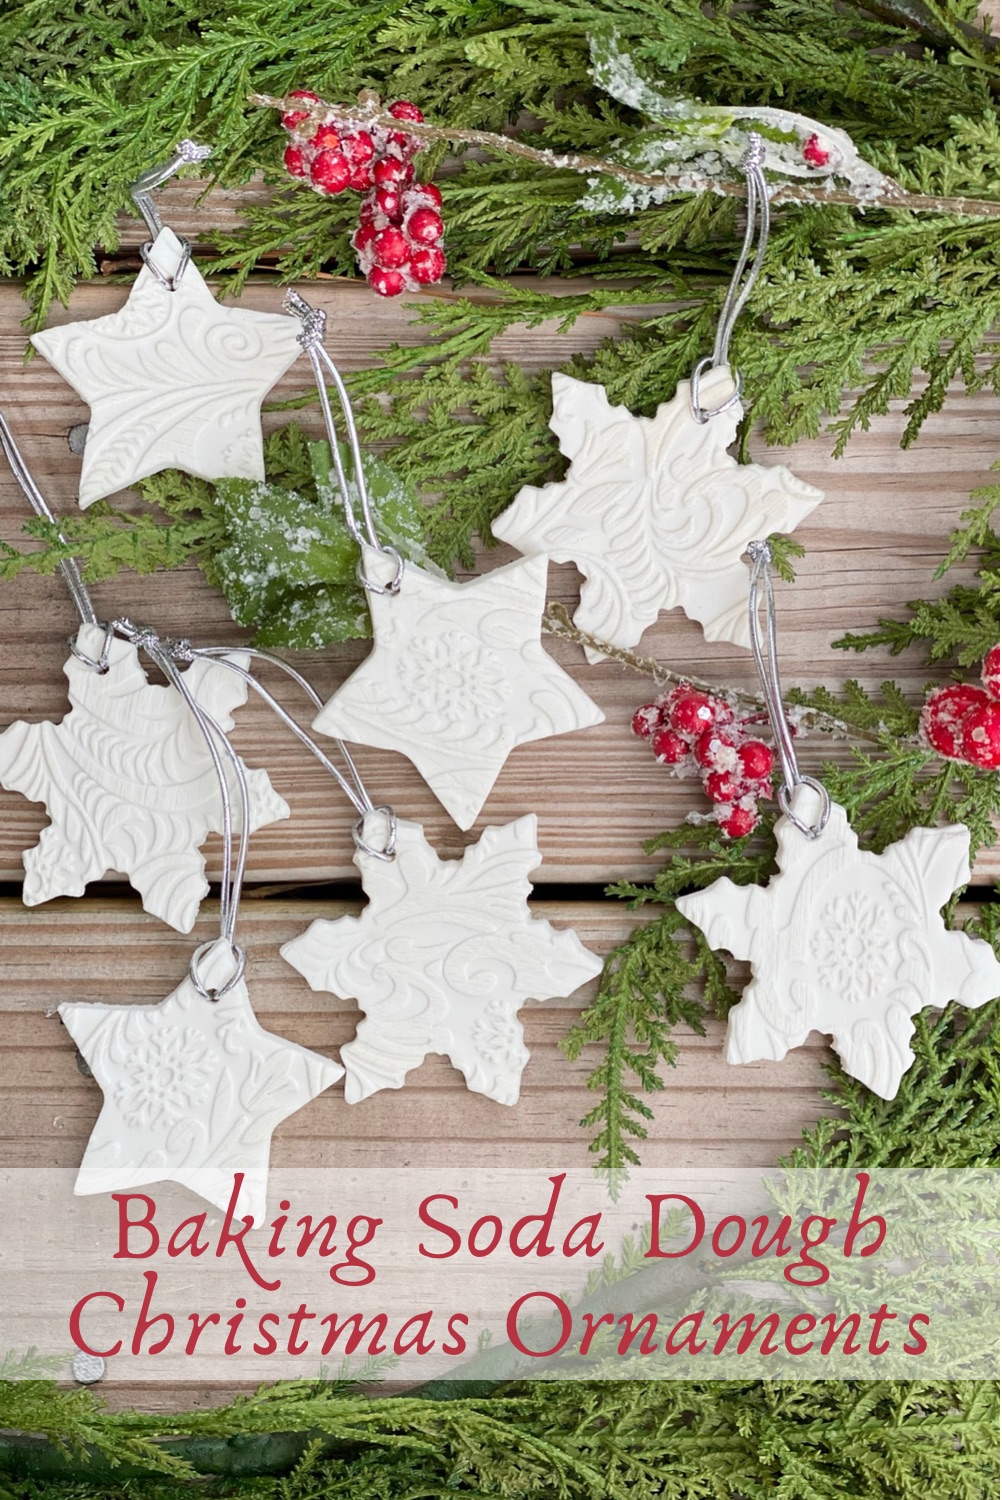
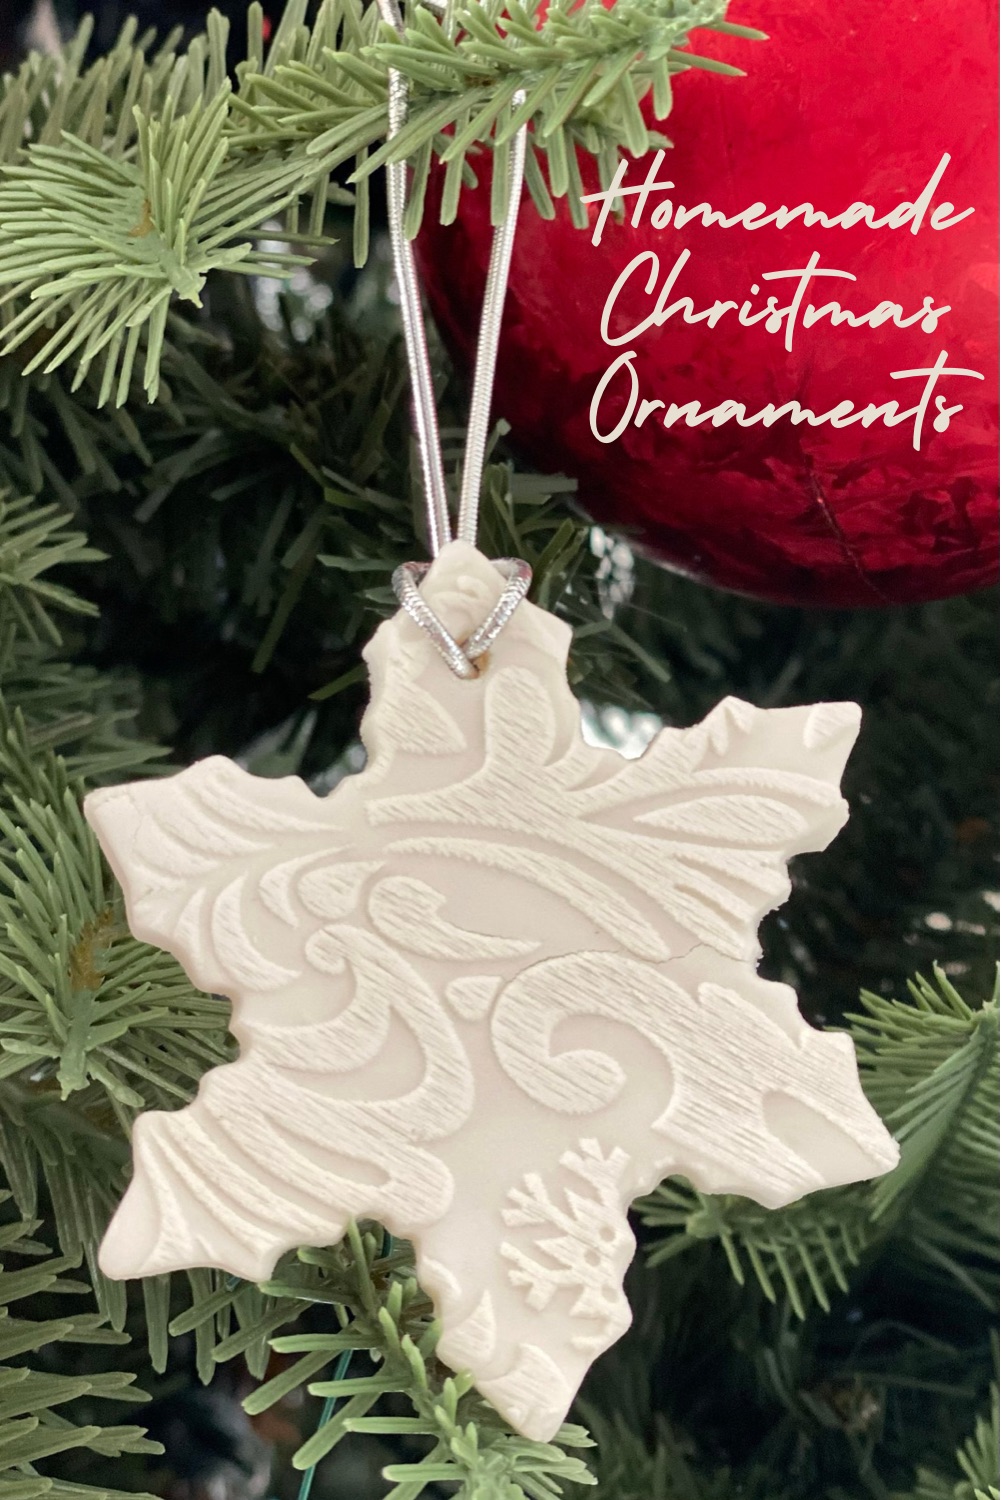
Stamp or press the rolled-out dough if desired (using stamps, cookie stamps, embossed rolling pins, or found items). Cut the dough with cookie cutters. Be sure to make a hole for hanging the ornaments or stringing them for garland. (I used a bamboo skewer to make the holes.)
Allow ornaments to air dry for about 24 hours. The thinner you make your ornaments the fast they will air dry. If you want to dry the ornaments quicker, you can bake them in the oven at 175 degrees for about an hour or two flipping them over halfway through the baking time.
Enhancements to Baking Soda Dough Christmas Ornaments
There are many variations of baking soda dough you can make. You can also add enhancements to your ornaments. Here are some ideas:
Add Fragrance:
If you want to add fragrance to your baking soda dough, you can add a few drops of essential oils to the dough while it’s on the stove. During the holidays, frankincense, pine, lavender, peppermint, and cinnamon are always great fragrance choices.
Add Color:
You can also add color to the dough. To add color, squeeze a few drops of food coloring into the dough while it’s on the stove. The number of food coloring drops will depend on the color shade you are trying to achieve. Red, yellow, and blue ornaments look beautiful on the Christmas tree.
Add Texture or a Design:
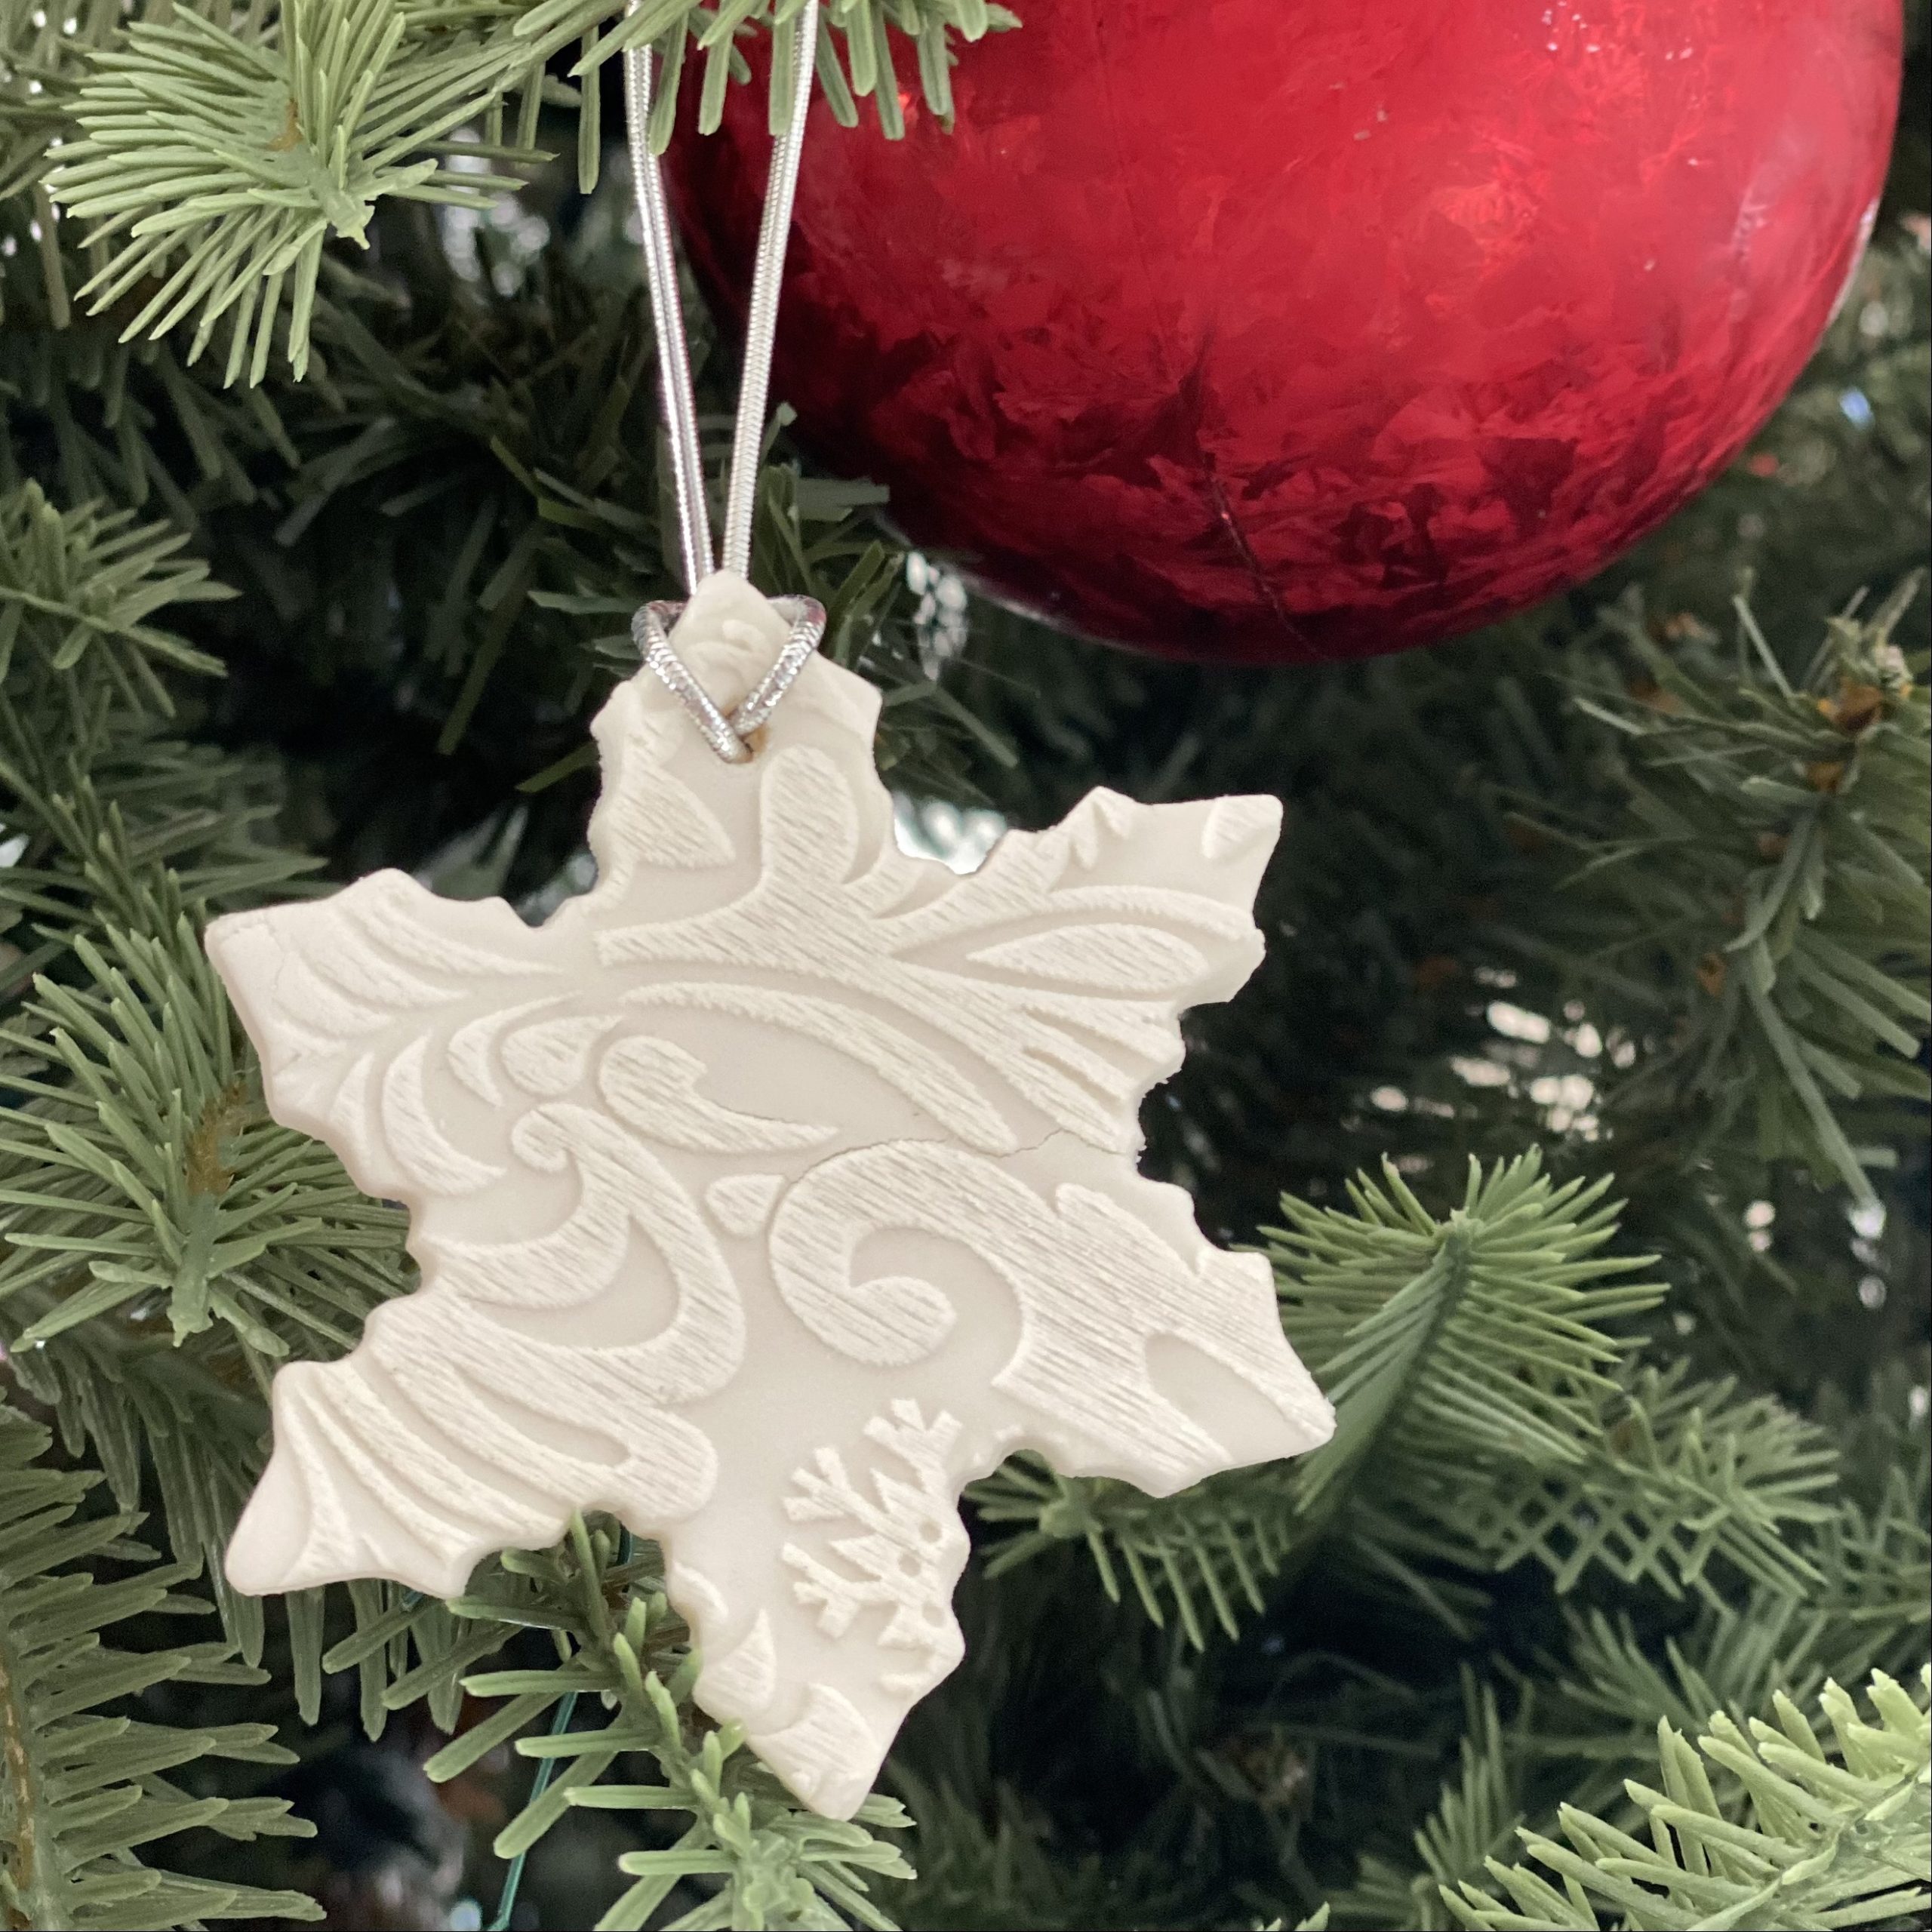
I love to add texture and patterns to my baking soda dough Christmas ornaments. You can do this by using natural elements from nature like pine bows, leaves, and seeds. Press them into the dough once it’s rolled out and before you begin to cut out the shapes using the cookie cutters.
There are also embossed or engraved rolling pins that you can use to stamp the dough. I used this one. Here are some more of my favorites:

Decorating with Baking Soda Dough Christmas Ornaments
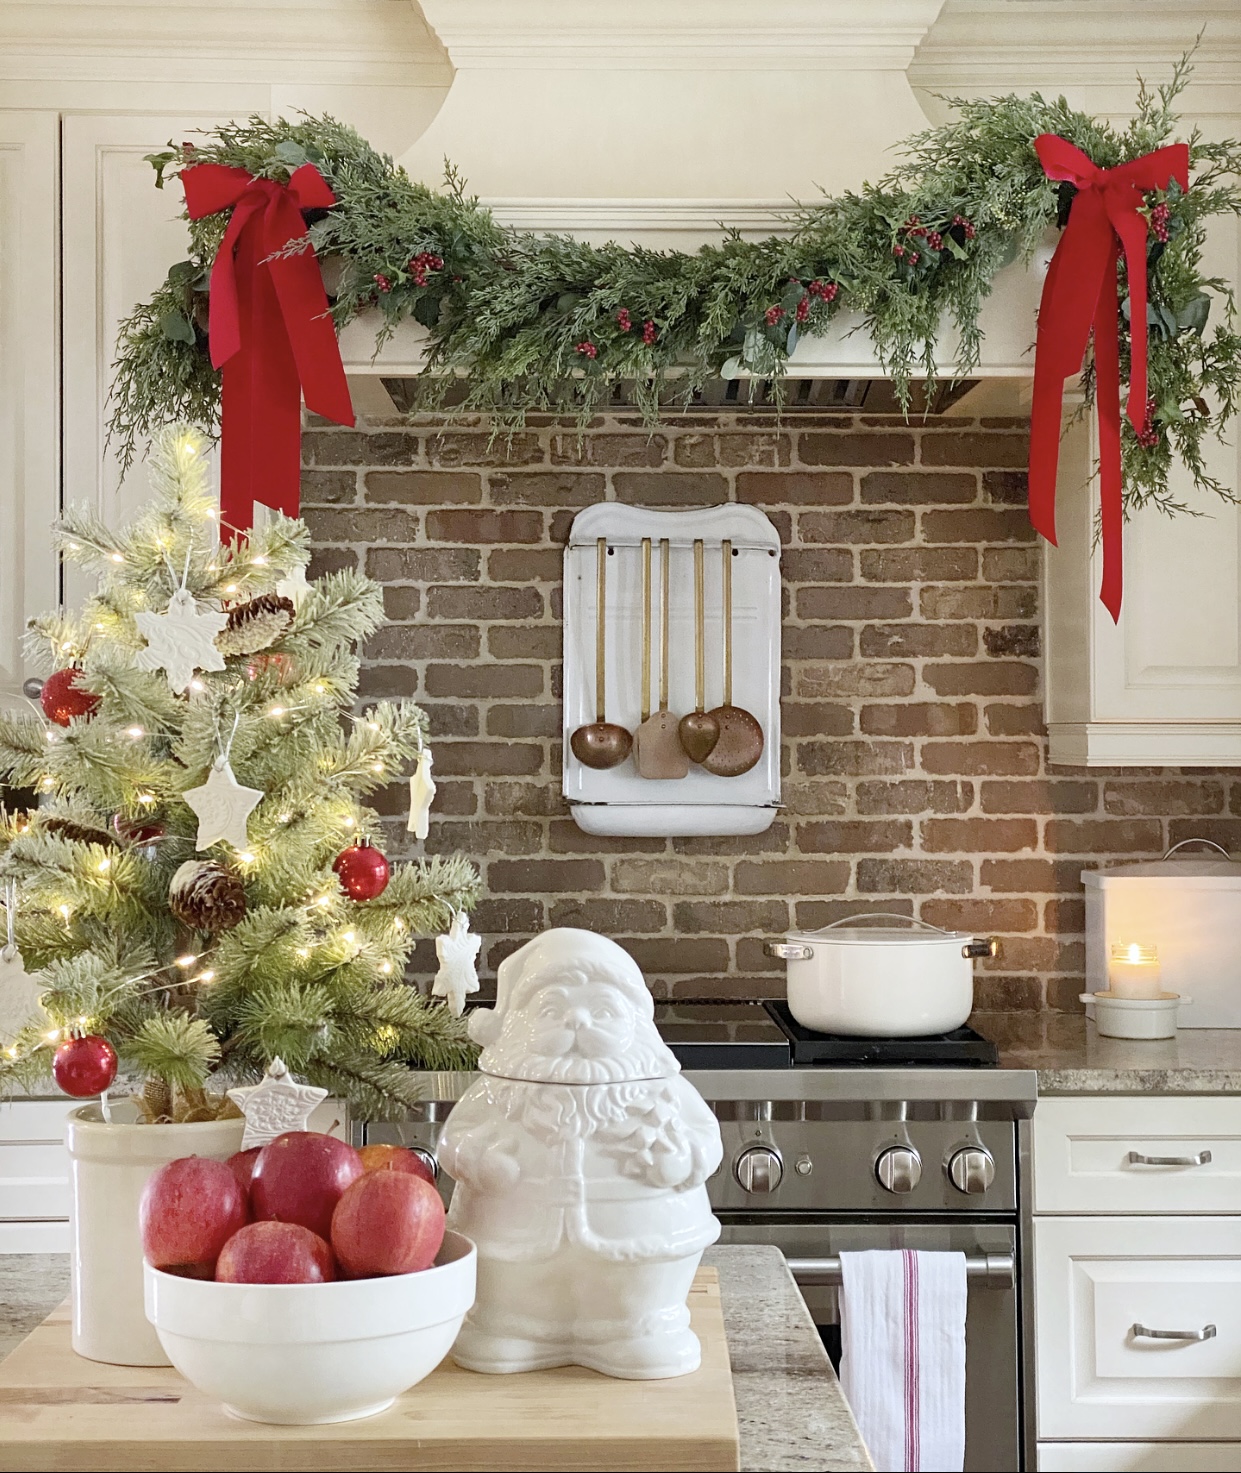
Whether you use your baking soda dough ornaments to decorate your Christmas tree or string them for garlands to hang on a mantel or shelf, you’re going to love this holiday DIY. It’s fun for the whole family. Have fun and enjoy getting creative!
Looking for a beautiful, white, smooth, non-edible dough for making ornaments and garland to celebrate the holidays? This homemade baking soda dough is so much better than traditional salt dough. You're going to have so much fun making ornaments and garlands to decorate your home. Have fun and get creative! Combine baking soda, cornstarch, and water in a medium saucepan. Set pan over medium heat and stir constantly. After about 5-7 minutes, the mixture will begin to bubble. Continue to stir for another 2-3 minutes as the dough thickens and comes together. Transfer the dough to a glass bowl. Cover it with a damp cloth and let the dough cool for at least one hour. Knead the cooled dough until smooth. Roll out to desired thickness. (I prefer the dough to be thinner, but it's completely personal preference). Use more cornstarch if needed to keep it from sticking. Stamp or press the rolled dough if desired (using stamps, cookie stamps, embossed rolling pins, or found items). Cut the dough with cutters. Be sure to cut out a hole for hanging. (I used a bamboo skewer.) Allow ornaments to air dry for at least 24 hours.*
Homemade Baking Soda Dough
Ingredients
Instructions


[…] Baking Soda Dough Christmas Ornaments […]
[…] I made a baking soda dough medallion, stamped the year on it, and tied it onto the ribbon around the jar. Each new year I can make a […]
Do the ornaments shrink at all as they dry?
Hi Jenn! No, the ornaments don’t shrink very much at all as they dry. Great question!
[…] making a few new Christmas ornaments to add to our tree. Last year, I shared how I make my Baking Soda Dough Christmas Ornaments with […]
Love them! Can they be painted? and how large of an area does the dough roll out to, just to figure out roughly how many ornaments a batch makes, if food coloring is the only way to color the ornaments. – Thanks and Merry Christmas!
I’m so happy you love them, Carol! Yes, they can be painted. The number of ornaments you get from a batch depends on the size and shapes of the cookie cutters you use. Typically, I get about 18-24 ornaments depending on the variety that I use. I hope you enjoy making ornaments for your tree. Merry Christmas to you and yours!
How much of each ingredient do i need!?
The recipe is listed at the end of the post with the full ingredient list and directions.
Hi, making these with my nephew—how long will the dough last if we have to wait to roll it? Can it be refrigerated for a while? Thank you, Kelly
Hi Kelly! I suggest trying to make the dough shortly before you have time to make the ornaments. If you let sit for too long it can dry out making the dough lumpy. I’ve never refrigerated it before, so I’m not sure how that would effect it. It may make it hard to work with.
Can you make the dough ahead of time? As in, how long can it sit under the damp cloth?
I don’t recommend making the dough too far ahead of time, Beth. It shouldn’t sit much longer than about 30 minutes. If you let it sit out too long, even under the damp cloth, the outside will start to dry out which create small clumps in your dough.
I think used too much water rather than less when I was trying to half the recipe. I let it sit under damp towel, but it’s still too mushy. Is there a way to fix it or do you just have to start all over?
I can’t believe I messed this east process up. Lol
Thank you!
Hi Stephanie! Lol although the process sounds easy, getting the proper water ratio can be tricky sometimes. If the dough is too wet or too dry, making the ornaments can be difficult and they will likely crack while drying. Here are my thoughts… Generally speaking, a drier dough is better than dough that is too wet. However, it is possible to achieve a perfectly balanced dough. (Side note: The damp towel helps to prevent the dough from drying out while it cools so that you can handle it. It doesn’t add much in the way of processing the dough.) Most likely, your dough was too wet because you didn’t simmer out enough of the water on the stovetop before taking it off the heat to cool. If after cooling the dough it still seems to have too much water in it, add some cornstarch and knead it through the dough. Add a little cornstarch at a time because you don’t want to over-correct it and make it too dry. The dough should be the texture of Play-Doh. That being said, if too much water was simmered out of the dough and it seems too dry, before throwing in the towel on the dough, try adding a little more water into it and knead it until it reaches the consistency of Play-Doh. I hope these tips help!
Would these ornaments hold up outside? If we add Peppermint oil, could these be used as deer repellent?
I honestly, don’t know, Roe. Good question! I have never tried to hang these ornaments outside. I suppose it’s worth trying though. It never occurred to me to use them deer repellent with the peppermint oil. We don’t have much of a deer problem. If you try it, you’ll have to let me know how it works out.
Love these ornaments. Where can I find the rolling pin.
Thank you! The rolling pin can be found on Amazon. I’ve linked it in the post.
How many ornaments does one batch make?
It depends on the size of the shapes you cut out. I can usually get 10-15 ornaments per batch.
We want to make these for an ornament making party – can the dough be painted on? Or drawn on with markers?
Also, if you did that and wanted them to have a glossy surface, what would you spray on them to achieve that?
Thanks so much! Excited to do this at our party! (We’re going to make the plain ones in advance)
Hi, Suzanne- What a fun idea! The dough can be painted on. Acrylic paint works best. I’m not sure about drawing on the ornaments with markers, as I’ve never tried it. If you try using markers, let me know how it goes. To get a glossy finish, I would paint on some glossy Mod Podge (once the paint has fully dried). Have a wonderful party! Happy holidays!!
I am looking for a dough that can be piped with an icing nozzle. Would this recipe work?
Hi Janet! I have never piped this dough with an icing nozzle, but I think it would work. If you try it, I’d love to know if it was successful. Good luck! Happy holidays!!
Will these last for years or do they disintegrate over time? Do they need to be sealed (with Mod Podge or similar)? Can you make prints (paw prints, baby handprints and footprints) out of the dough? I’m having a disastrous time with my attempts at salt dough so want to give this a try!
Hi Kari! My ornaments are over two years old now and they still look like the day I made them. They haven’t yellowed or disintegrated. I did not seal them, because I prefer a matte finish. If you prefer a glossy finish, I suggest trying glossy Mod Podge. I also haven’t tried making print with the dough, but I don’t see why it wouldn’t work. Let me know if you try it! I think you’ll love baking soda dough more than salt dough. I know I do. 🙂 Happy holidays!
Question: Is there some kind of acrylic clear gloss spray you could use on these to seal them and make them shiny? I’m making these for a decorating party and wanted to know if that was an option. We’re also going to make flat ones (with no pattern on top) for kids to decorate with markers, glitter, etc. and wondering if such a spray would work. I got some clear acrylic “paint” spray, but it doesn’t seal or make shiny. Thanks!
Hi Suzanne! Although I haven’t tried it (because I prefer the matte finish), I would suggest glossy Mod Podge. It can be applied with a paint brush. Have fun at your party and happy decorating!
I have used Ace brand clear spray gloss enamel on various projects successfully to seal and add mild shine. That being said, I have NOT tried it on this type of dough yet, but it might be worth a try if having a spray is important to you. You’ll definitely want to spray outdoors. Otherwise, as mentioned, Mod Podge is great!
Thank you for the suggestion, Heather!
During the drying process, most of my ornaments cracked 🙁 any idea why this happened? So bummed
Oh shoot, Dianne! I’m sorry to hear about the cracking. Usually, that’s a sign that the dough was too dry. Next time I would add a little more water when mixing it together.
These are gorgeous! Could you tell me how you tied the ribbon to the ornament? I always just thread the ribbon through and the ornaments then hang a little sideways, whereas yours look like there’s a neat little tie method that’s keeping them facing forward.
Hi Katie! I used a Lark’s Head Knot to attach the ribbon to the ornament. It’s my favorite way to hang ornaments, especially ones that are handmade. The Lark’s Head Knot definitely helps to keep the ornament facing forward when it’s hanging from a tree branch. Here is a great post explaining how to to tie this type of knot https://www.thesprucecrafts.com/how-to-tie-larks-head-knot-340197. There are also great YouTube video tutorials online. Good luck and happy holidays!
Even though it’s after Christmas I am giving them a try! Can you tell me if you think they will work with a silicone mold? I have a great one that looks like houses. Do you think I need to dust it with cornstarch?
Hi, Sue! I cannot tell you for certain that they will work with a silicone mold, as I have not tried it. However, I don’t see why they wouldn’t work. I think a dusting of cornstarch would help the process. I’d love to hear how it works out. Happy New Year!
I love your snowflake ornaments, do you have a purchase link for them? All the ones I find look too much like a flower haha
Hi Christy, If you are referring to the snowflake cookie cutter, unfortunately I don’t have a link for it. It is a cutter that was passed down to me from my mom. I’m glad you like it too!
Really good.
Thank you, Erin!
My ornaments are cracking as they dry! What’s wrong?
Hi Janice! I’m sorry to hear about your ornaments cracking… Sounds like the dough was too dry.
Do you think they would benefit from a coating varnish?
They may, Laura. My only concern with varnish would be them turning yellow or discoloring down the road. If you try it, let me know how it goes.