
 I know what you’re thinking, “Did I just read that right, DIY Lampshade Christmas Tree!?” Yes, yes you did. Today I am going to show you how to make a Christmas tree using lampshades. This is such a fun, creative, easy, and unique seasonal DIY. Perfect for Christmas! It’s also versatile in its use and involves up-cycling which is always something I love to do. There is nothing like giving new life to old things!
A “bright” idea: DIY lampshade Christmas tree.
You may be wondering, “Meeghan, how in the world does one find herself suddenly making a Christmas tree out of old lampshades during the holiday season?” Thank you for asking!
Just before Thanksgiving, I had fallen down the infamous rabbit hole of Pinterest DIYs. You know the one… Where something catches your eye for a second, you click on it to get more information, and then three hours later you realize you’ve now figured out how to do it and you’ve found about a million other DIYs you want to try. That’s how it happened and that is why we are here today.
Don’t throw shade.
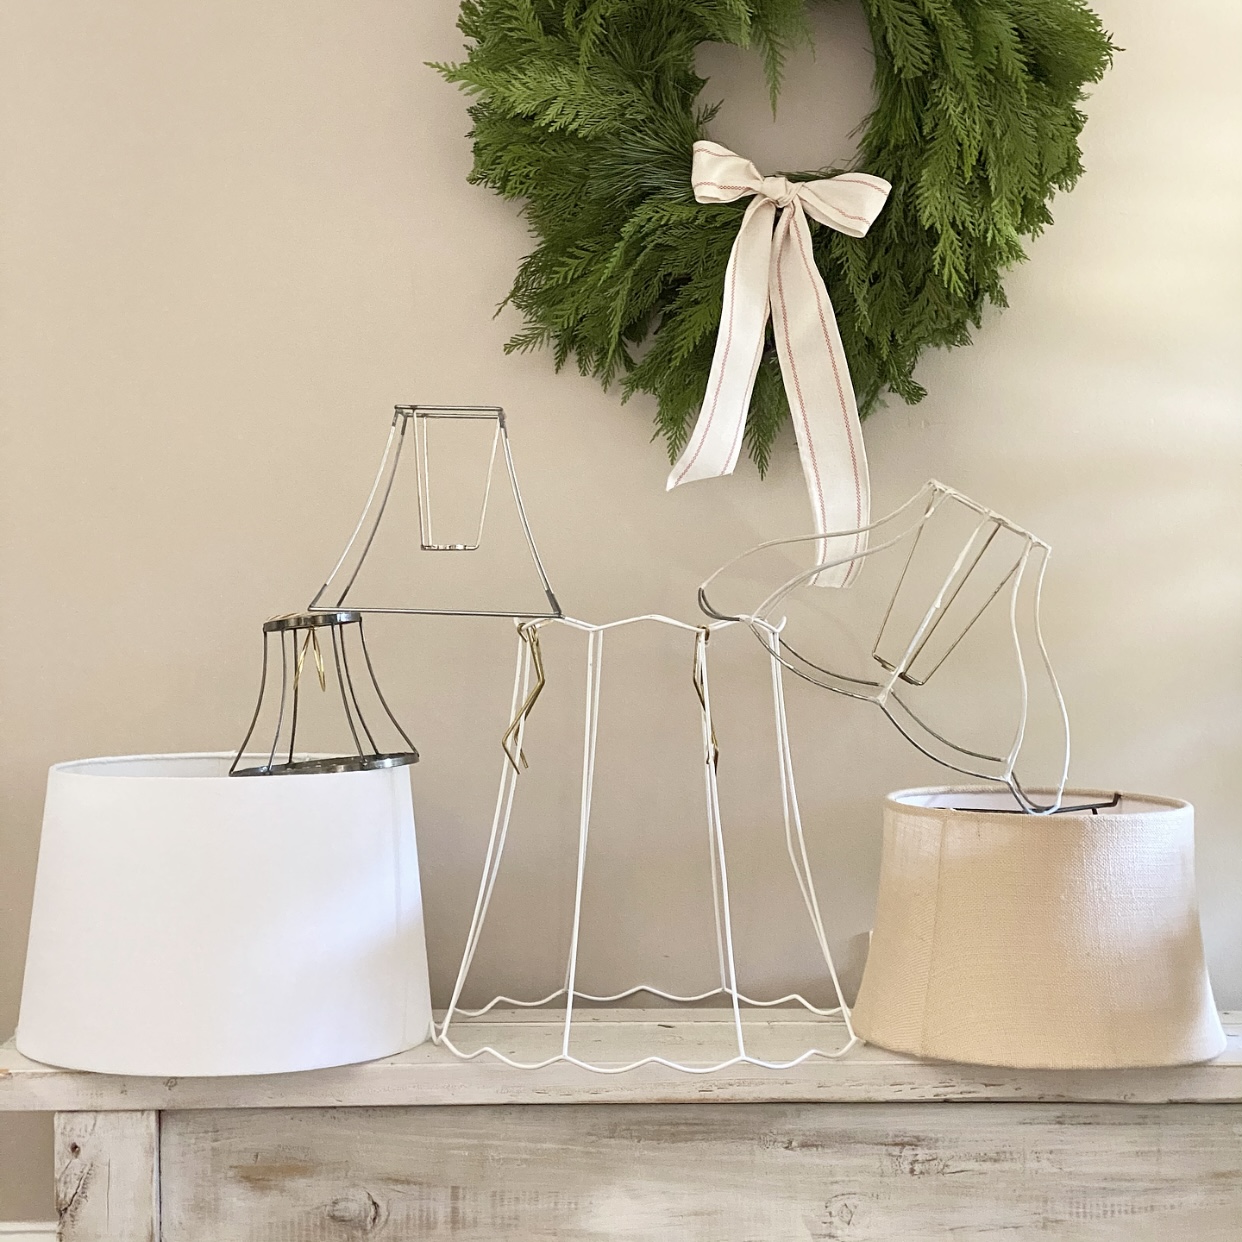
Not to point out the obvious, but the first things you need for this DIY are lampshades. How many times have you gone to buy a new lamp, loved the base, but thought that the shade wasn’t right for the room? For me, it’s happened more times than I can count. Most of us find a different lampshade we like better and toss the “free” shade in a closet or up in the attic. Some of us even donate said shade to Goodwill.
Next time you wonder whether or not you should keep that unwanted lampshade, remember this DIY. Now, you have something to do with those unused shades!
I had three lampshades in the farmhouse to use for my Christmas tree. I needed two or three more (depending on their sizes) to complete my tree. I was off to Goodwill! Thanks to y’all who donate, I was able to find two more perfect lampshades for $2.00 each. Such a deal!
To make a DIY lampshade Christmas tree, here is what you need:
- 5-6 lampshades of varying sizes and shapes
- Scissors
- 1 (six-foot-tall, one inch in diameter) wood dowel
- An old bucket (or you can use the bucket the quick-set concrete comes in)
- Quick-set concrete
- Water
- Level
- Finishing nails
- Drill
- Wire clothes hangers
- Wire cutters
- Pliers
- Tree topper
- Fairy lights
- Mini clothespins
Build your base.
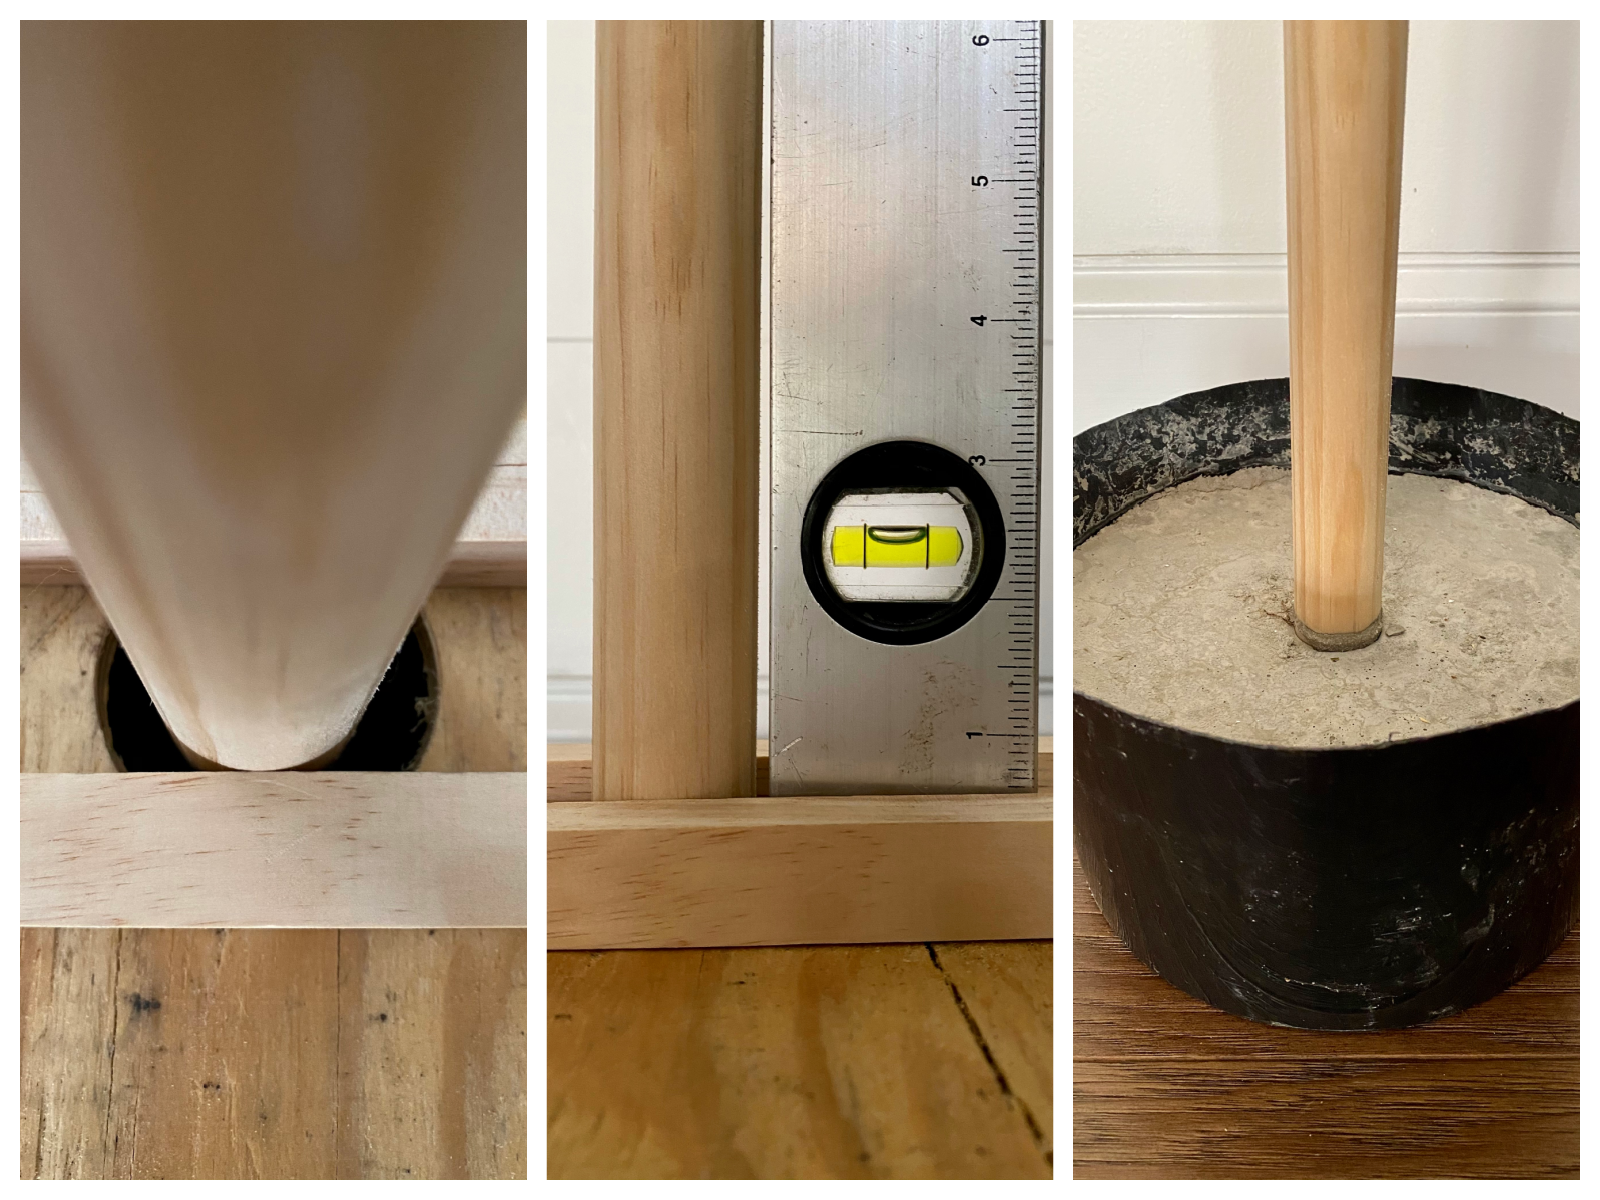
It’s important to have a strong and straight base for the lampshade Christmas tree. To achieve this, set the wood dowel (which will serve as the tree trunk) in a bucket with quick-setting concrete.
I used the concrete that I had leftover from my last seasonal DIY project, Concrete Pumpkins, and an old bucket from the barn. However, some quick-set concrete comes in a bucket and this can conveniently be used for the base. In this case, just place the dowel in the bucket of concrete and add water.
To ensure that the dowel is straight use a level. Once the dowel is in perfect position, create a form around it to keep it upright while the concrete dries. The form I made was made from random wood pieces I had leftover from past projects. Allow the concrete to set for about twenty-four hours before starting to build the DIY lampshade Christmas tree.
Lampshade demo.
While the concrete base is setting, begin the demo on the lampshades. To do this, start by removing the fabric, interior plastic, and any other fringe or piping from the lampshades using scissors and pliers. Once the demo is complete, all that should be left of the lampshades is the metal frame.
While we’re talking shades, now is a good time to mention that any style lampshade can be used for this project. However, there is an ideal style of lampshade that works best. A “slip UNO fitter” is the best type of lampshade to make a DIY Christmas tree. Here is a photo of one for your reference.
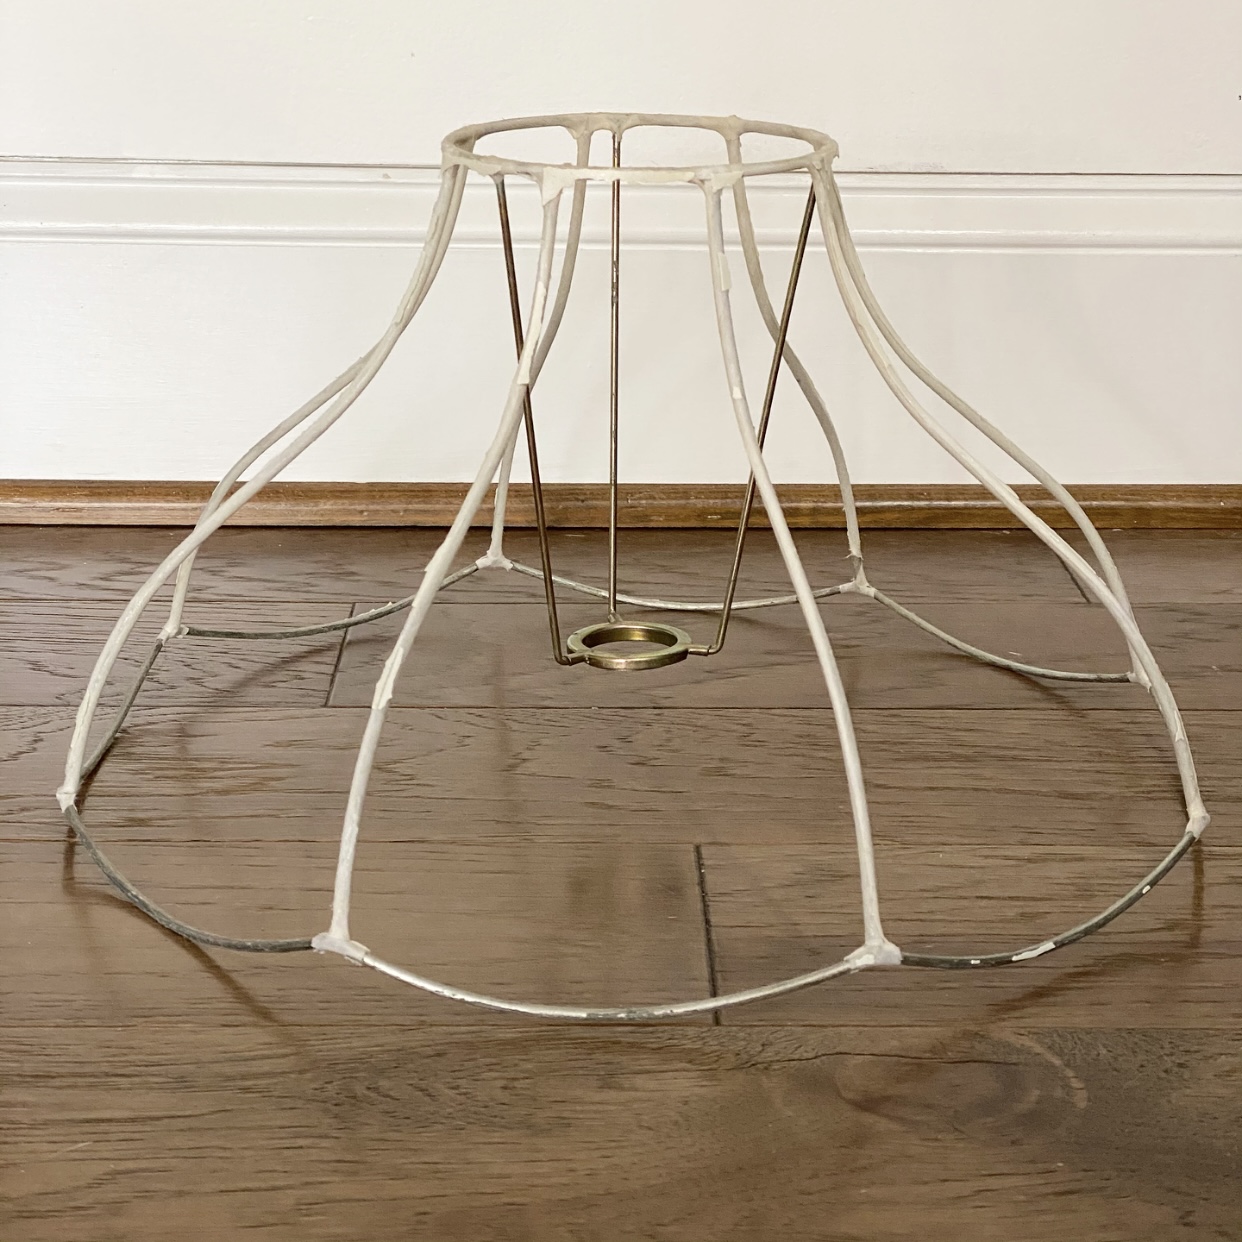
This style of lampshade is perfect for this project because the “slip UNO fitter” slips right onto the one-inch wood dowel. Using other types of lampshades will still work, but figuring out a way to attach them to the dowel requires some creativity and ingenuity. This is where your wire clothes hangers, wire cutters, and pliers may come in handy.
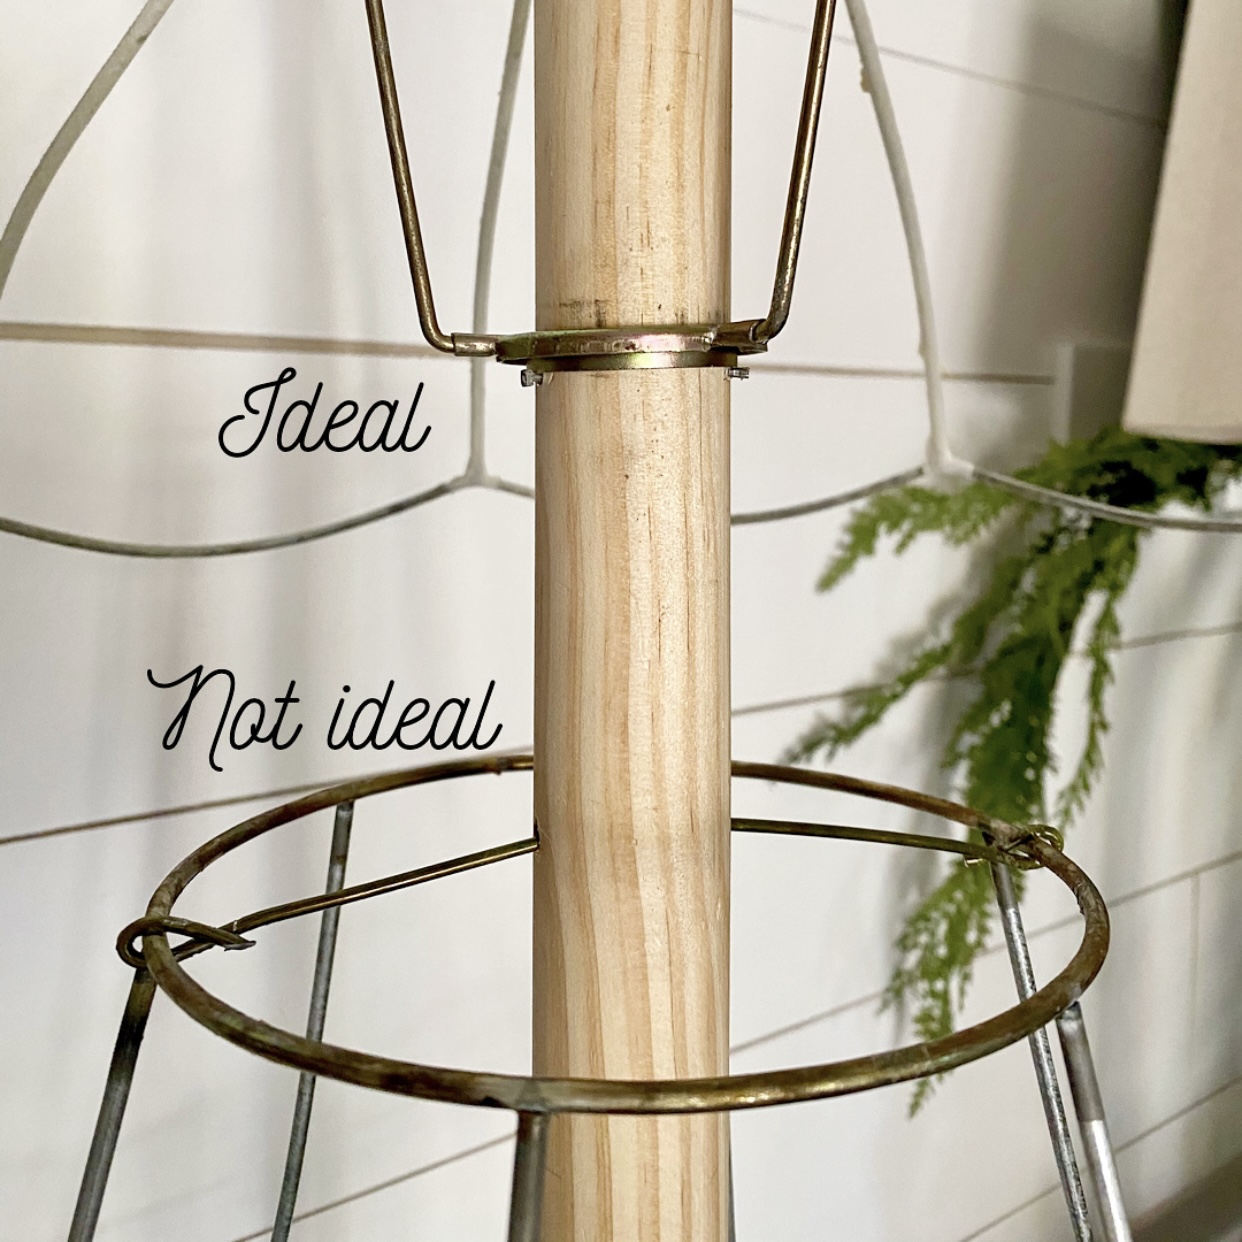
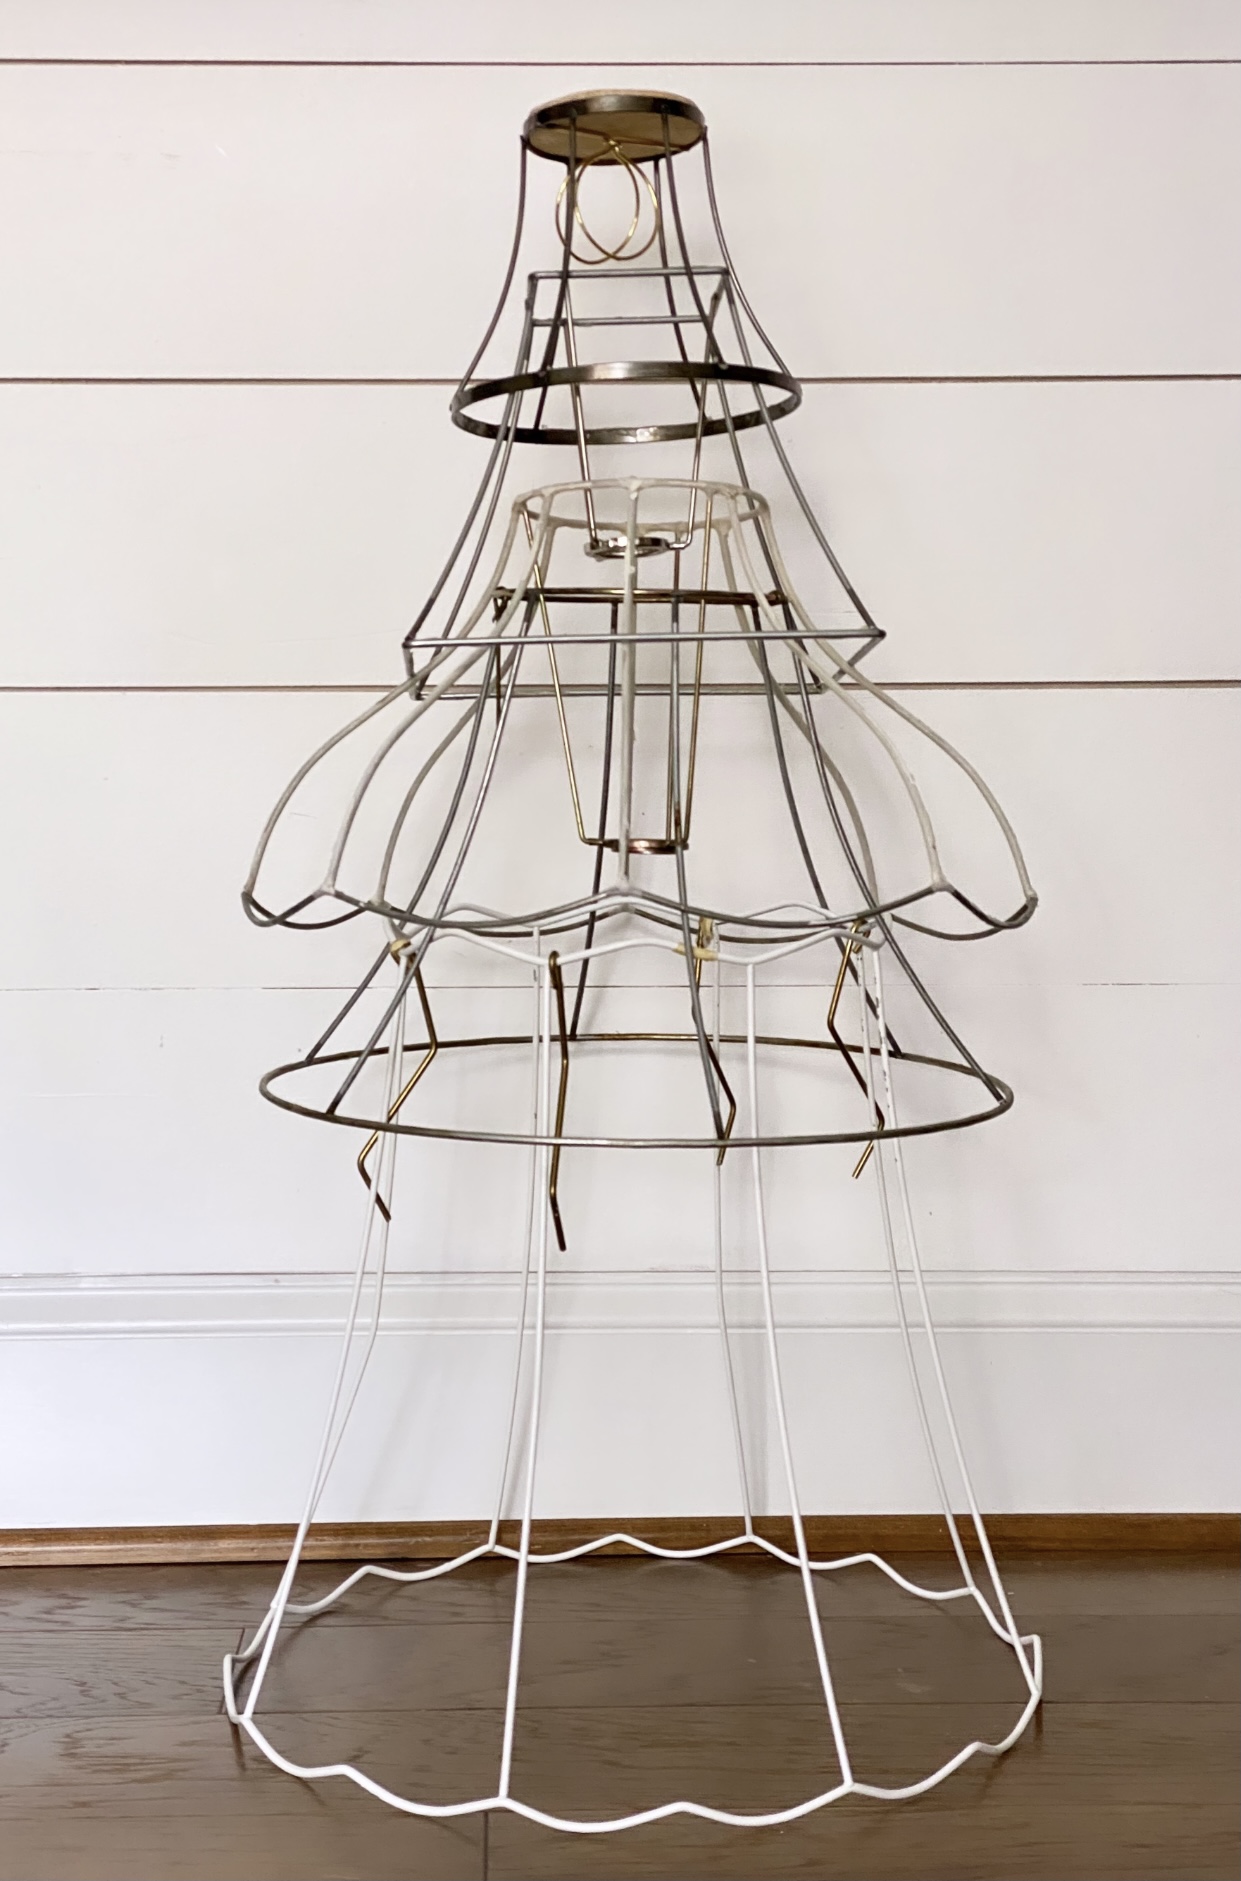
As seen in the photo above, the “slip UNO fitter” lampshade frame (on top) fits perfectly on the one-inch wood dowel. Once you determine the spacing of your lampshades on the dowel for your tree, with the widest shade on the bottom and working your way up to the narrowest shade on the top, drill three small holes in the dowel where you want the lampshade to attach. Stick finishing nails in the holes and lower your lampshade until the nails stop it at the desired spot.
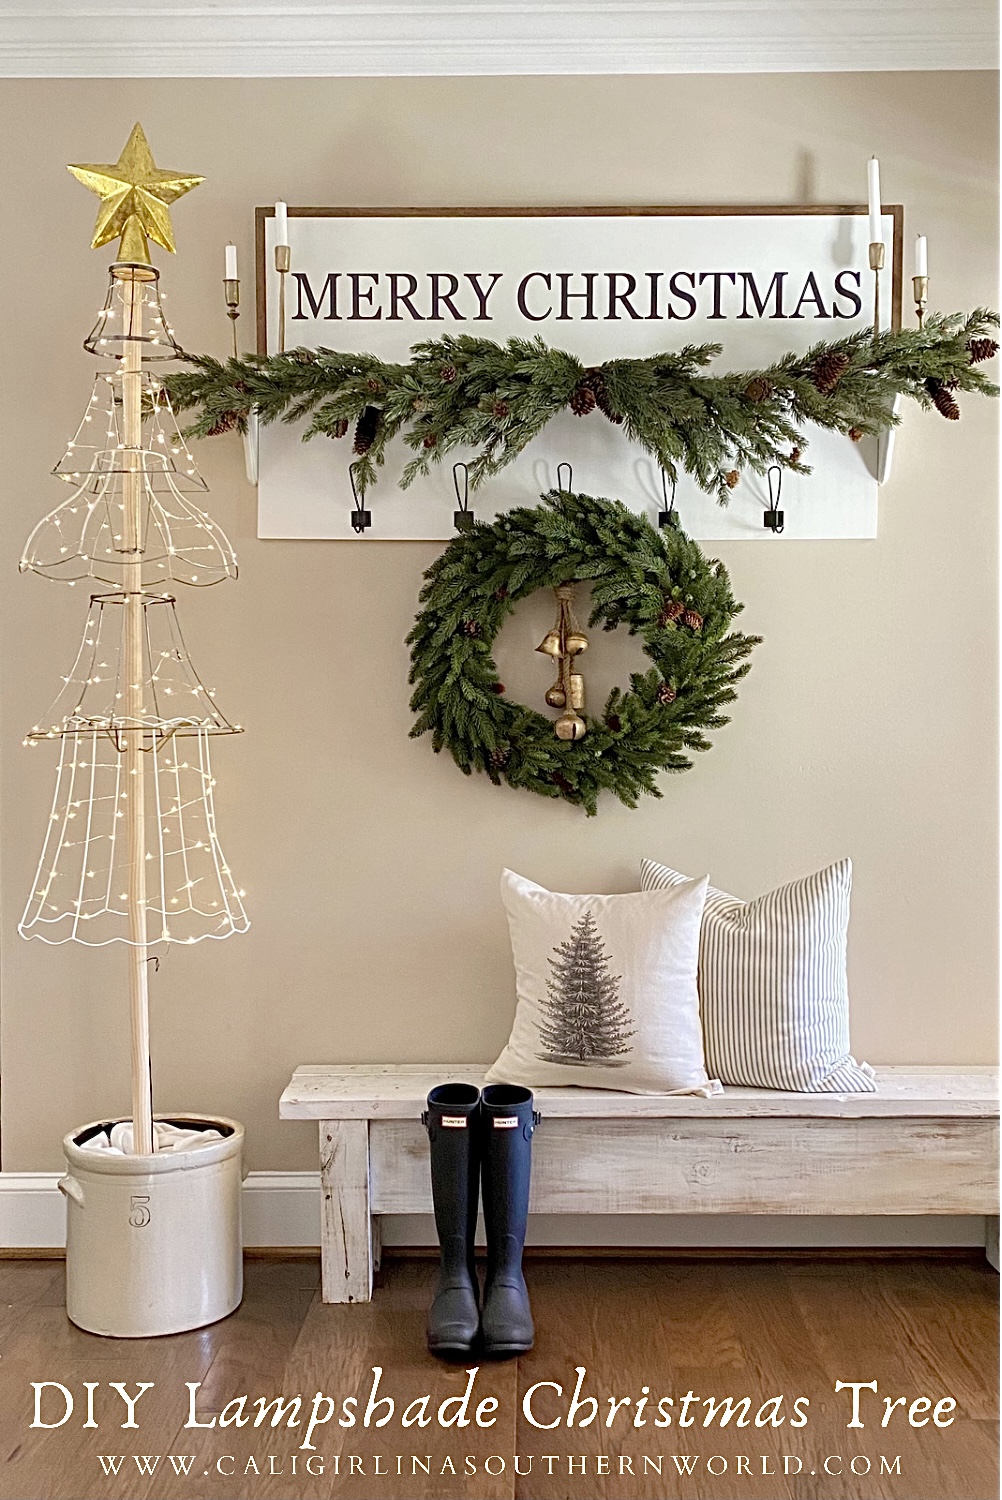
Time to decorate the lampshade Christmas tree.
Once the lampshades are attached to the wooden dowel (or Christmas tree trunk) for your lampshade Christmas tree, it’s time for the fun part, decorating it. Get creative! Add ornaments, garland, lights, and have fun with the process.
If lighting the tree, I found that fairy lights work best. The lightweight wire is easy to work with and allows you to mold it to the lampshade frames which helps keep the lights in place.
Tip: Initially when hanging the lights, I had trouble with the lampshade frames spinning as I was circling the tree with the lights. To prevent this, I added a dab of hot glue to where the finishing nails and the lampshade met. It was just enough glue to keep the shade in place, but the glue is not strong enough that disassembly after the holidays is difficult.

Oh, Christmas tree!
Not only can the lampshade Christmas tree be a beautiful piece of seasonal decor, but it can also be a wonderful way to display Christmas cards. I think this is my favorite use of our lampshade Christmas tree this year. I love seeing the family circle around the tree looking at the most recent cards I add each day.
I hope you enjoy this fun, unique, beautiful, and easy upcycled Christmas DIY. If you make your own tree, be sure to share it with me on Instagram or Pinterest. I’d love to see it and share it!


[…] projects are some of my favorite types of DIYs. Last holiday season I created a lampshade Christmas tree. It was such a fun way to use old and/or broken lampshades that had lost their purpose and were […]