
“The great gift of Easter is hope.” Basil C. Hume
 Happy Spring, y’all! The season of renewal and hope is here. As are the carpenter bees, the pollen, and the mosquitoes- yaaassss!
Ahhh, sweet southern life! Honestly though, I wouldn’t trade it for the world. Part of the reason we wanted to move to North Carolina was to experience seasonal changes. Although we had them in California, they were slight. Here in the south, they are the mild, yet very visible and I love it!
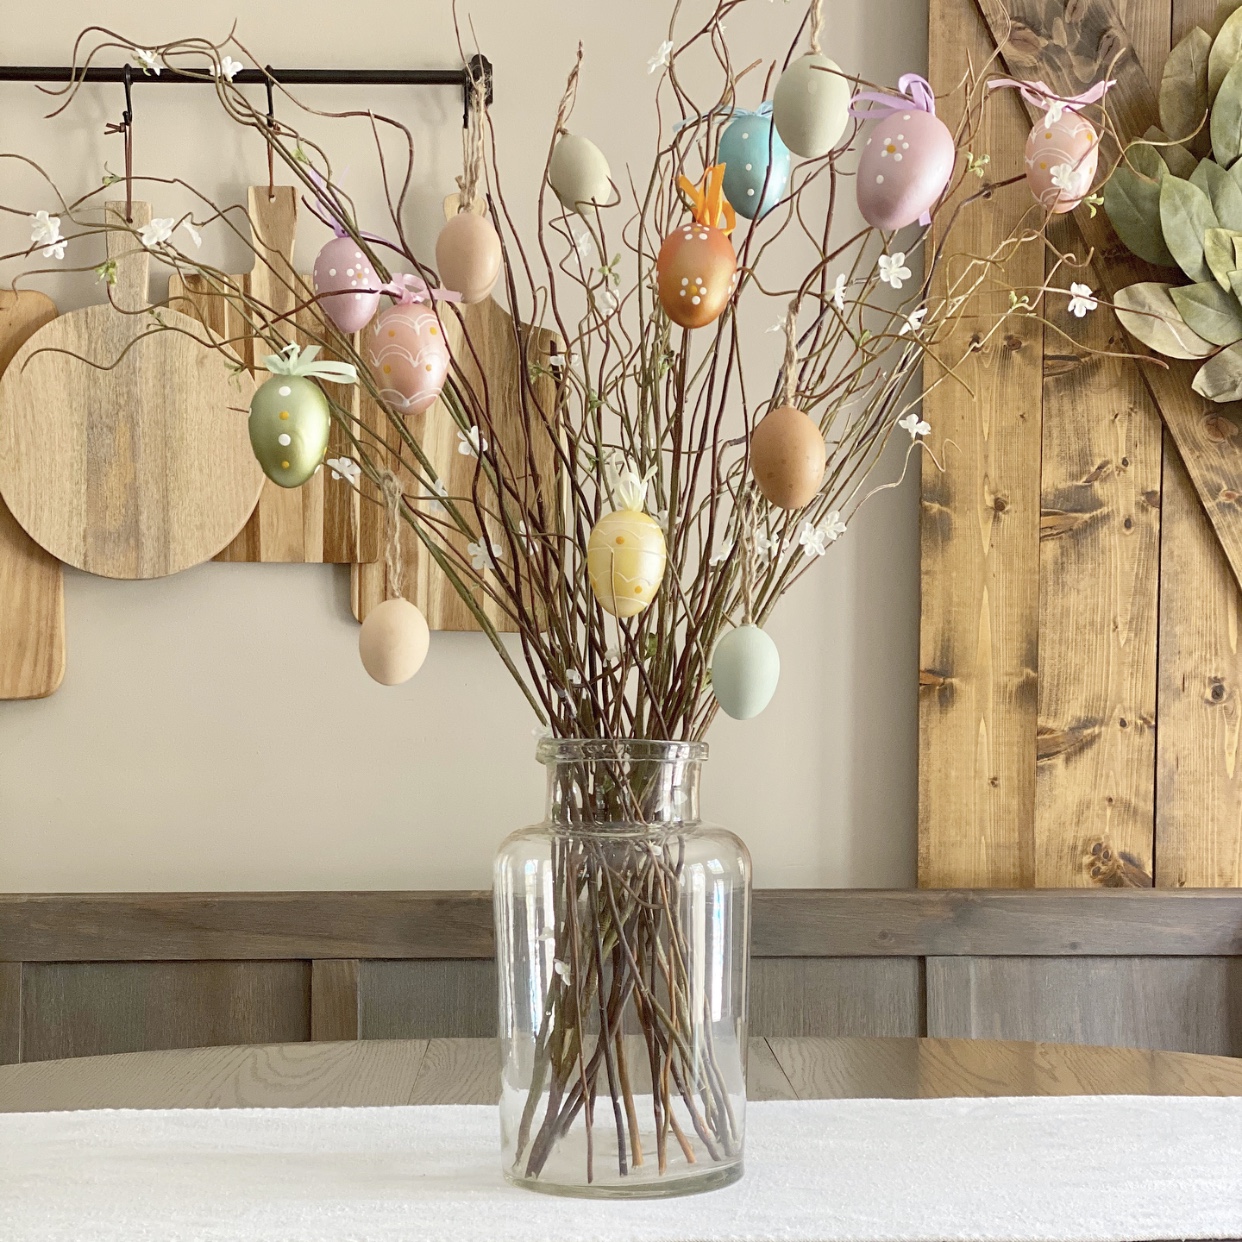
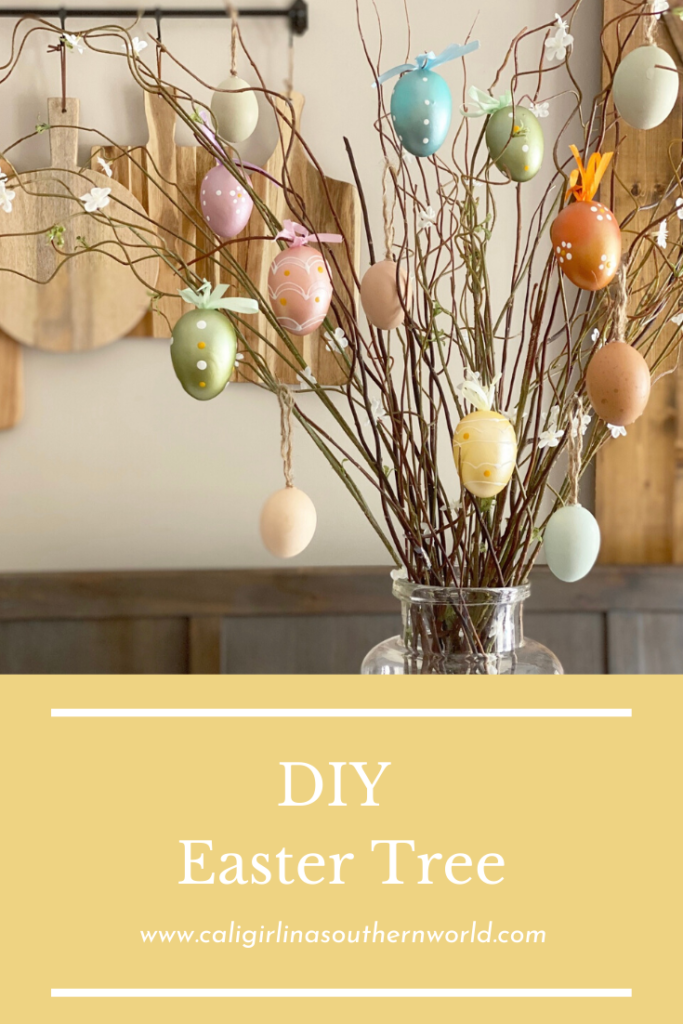
With Spring upon us, it means that Easter is also near. I created my first Easter tree this year and I’m not going to lie, I’m smitten! Do you know the history of the Easter tree? No? Don’t worry, neither did I. The Easter tree is actually a German holiday tradition known as Ostereierbaum. It’s become quite a prominent tradition here in the south as well. The Easter tree celebrates the renewal of life that comes with Spring.
I created my own Easter tree with curly willow branches from our yard, faux spring branches, faux decorated eggs, and real hand-blown eggs from our chickens. (The best kind of Easter eggs!) I used a vintage pickle jar to hold them all and voila-My Easter Tree!  Now of course, you don’t need to have chickens to hand-blow real eggs. You also don’t need to buy faux decorated eggs. You can use store bought eggs and add even more fun for the family by dying them at home. I recommend hand blowing the eggs before dying them though so that the littles aren’t touching their mouths on the dyed eggs.
Our chickens are Easter egg layers, which means they lay eggs of all different colors (shades of brown, green, blue and of course white). We no longer dye eggs now that our children are grown, so I love the natural colors our ladies provide at Easter. To hand blow eggs, use a paring knife and gently tap the top and bottom of the egg until a tiny hole is made. Once there is a tiny hole, use a toothpick or a bamboo skewer to make the hole slightly bigger. Take a large paperclip and bend it so it straightens. Insert the paperclip into the egg through the tiny hole you made and gently move it around. Careful to not crack the egg shell. This helps break the yolk up and makes it easier to blow it out the other side of the egg.
Here is where your patience comes in… Gently, blow into one side of the egg until the egg white and yolk leave the other side of the egg. (Note: You can blow the inside of the eggs into a bowl, cover, refrigerate, and use them the following morning for breakfast.) Once your blown eggs are empty, rinse them with water, pat them dry, and set them aside. 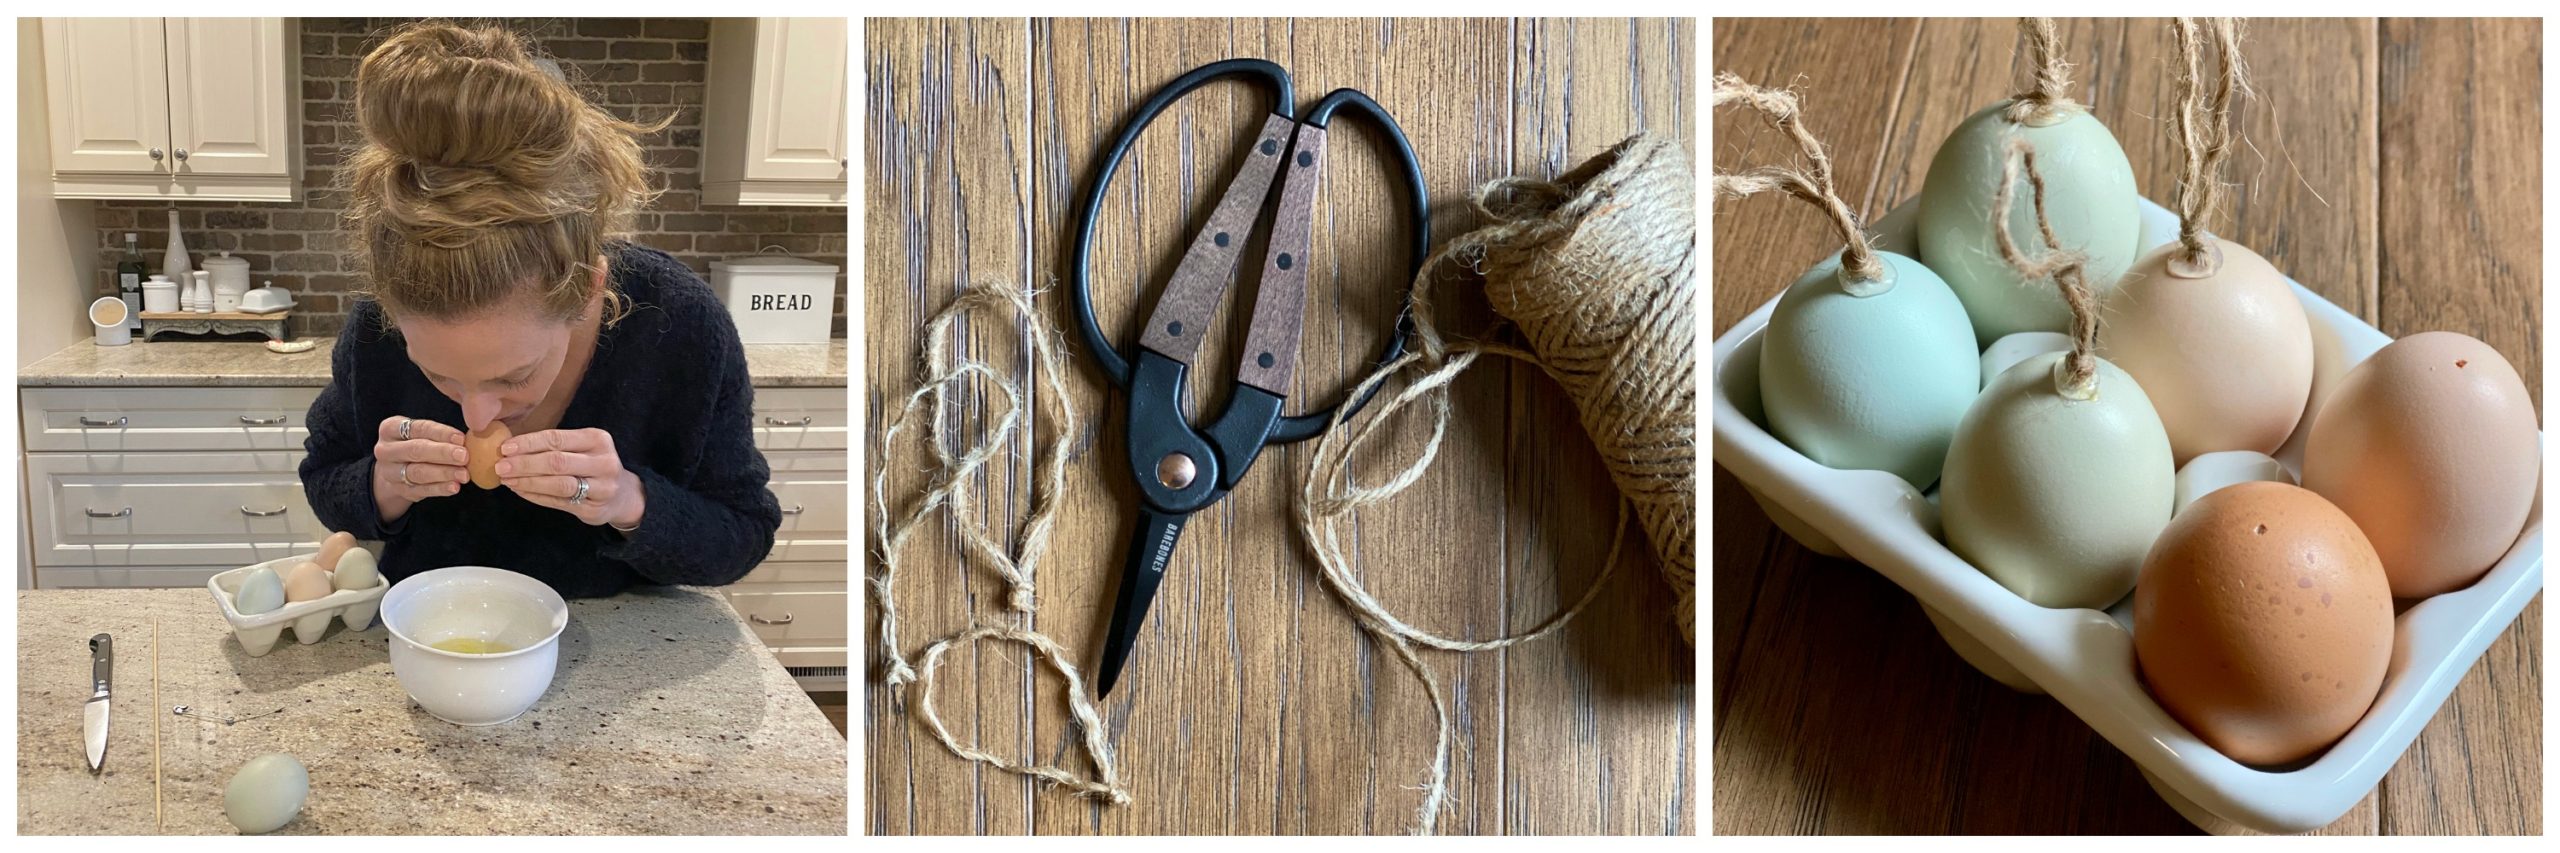 Now it’s time to make the loops for the eggs to hang them from on the tree. I hung my eggs with twine, because I always have it handy. I cut the twine in 5-6 inch lengths, looped them, and then tied a tight knot. I cut the access twine off the opposite side of the knot from the loop so there was only a knot (no fringe). Using hot glue, I attached the twine loops to the eggs. You only need a pea size dot of hot glue on one side of the egg (over a hole). I placed the knot of the loop on top of the glue and pressed it gently holding it until the glue cooled and the loop was securely attached to the egg.
 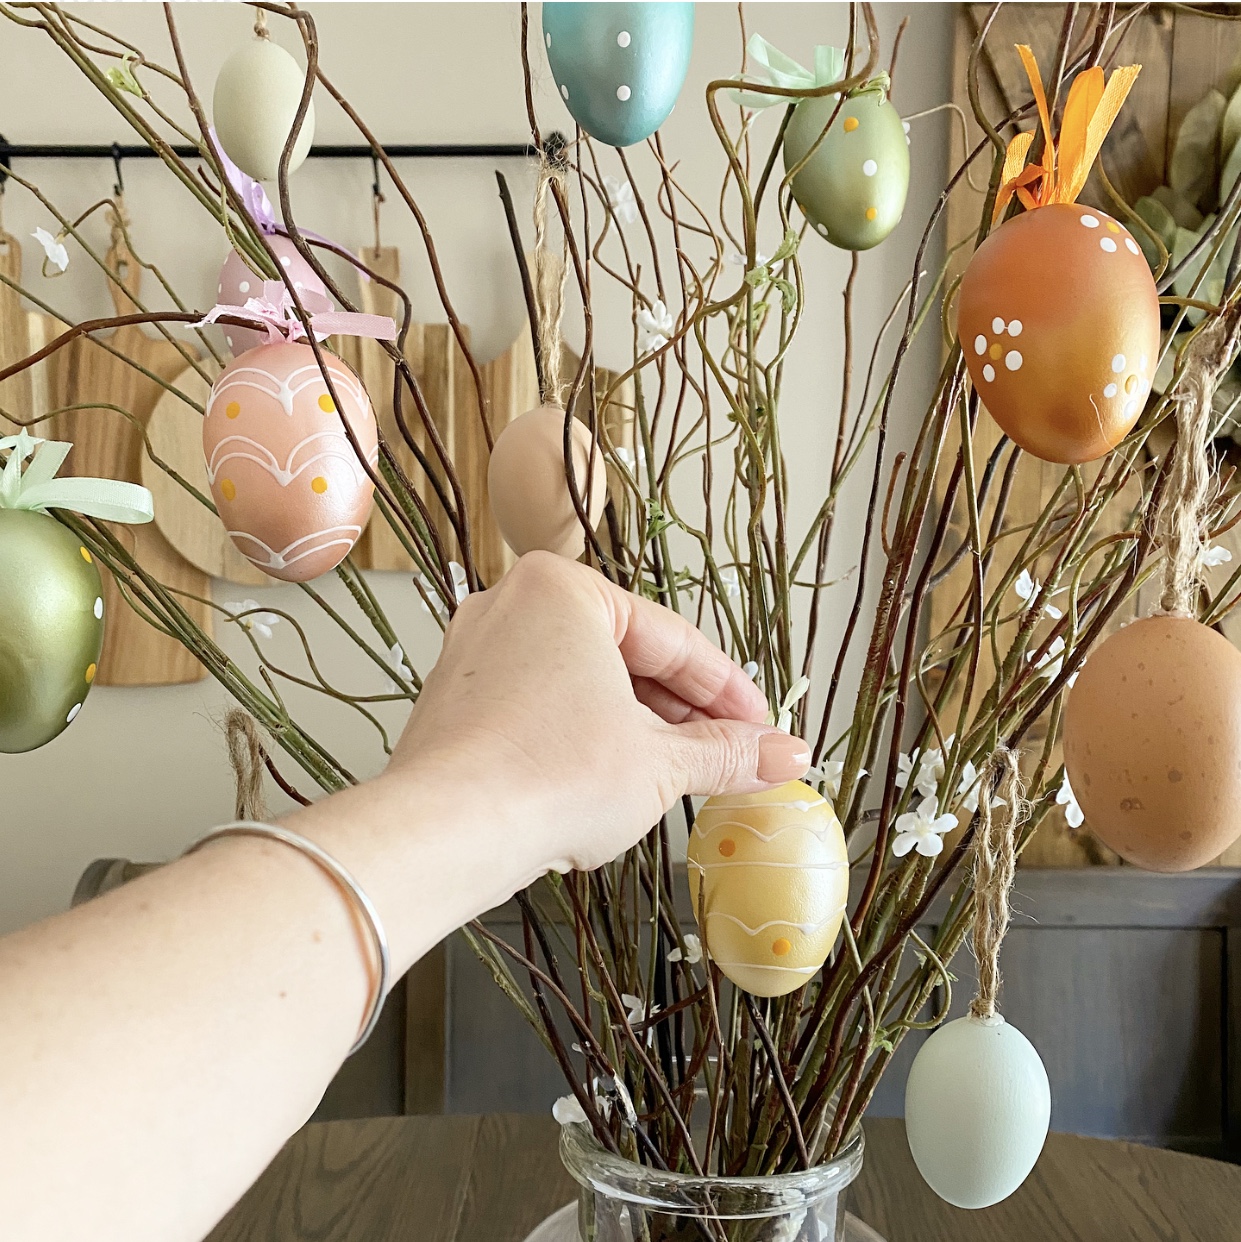 Time to decorate! This is my favorite part. An Easter tree is the perfect way to display Easter eggs and celebrate the holiday. You can add ribbon, paper butterflies, more flowers, anything you want that represents the beauty of Easter and spring to you and yours.
Your Easter tree can be part of a display on a buffet or entry table, it can also be a centerpiece on a dining table or kitchen island. No matter where you put your Easter tree in your home, it’s sure to be loved by everyone.
Have fun, get creative, and enjoy bringing the Easter and the spring season into your home! I hope you enjoy this project as much as I did. P.S. If you make your own Easter tree, be sure to email me a photo! I’d love to share them in my Instagram stories. Danke! (That’s German for, “Thank you!”)


Meeghan. You are so creative. I just love this Easter tree and it puts such a smile on my face. Thank you so much for sharing all your talents !
Carol
Thank you for your kind words, Carol! I’m happy you enjoyed this post. I had so much fun putting the Easter tree together o share with you. It was a fun way to keep myself busy and bring spring into the farmhouse. I need all the distractions I can get at the moment. I hope you and yours are hanging in there and staying well. I appreciate you stopping by!